
Skillet-Roasted Chicken with a Sherry Pan Sauce
This is an exceptional chicken if you’re ready to push the boundaries of your home cooking. It’s not difficult to execute, but it does require precision. The ingredients are few and familiar, but it’s the technique that elevates them. With care, timing, and attention, even the simplest elements can become extraordinary. The flavor this recipe delivers is unlike anything you’ve likely had — people will be beating down the door asking you to make it again.
While this recipe takes about two hours to execute, a fair amount of that time is hands-off — leaving you space to relax, set the table, or prepare a couple of simple side dishes. It’s a rhythm that invites you into the process, without chaining you to the stove.
To create this, I combined elements of the Sherry Chicken (we cooked Poussin) I learned to cook on sauté at the (then) Michelin-starred Spotted Pig, with Jacques Pépin’s iconic whole roast chicken. It’s the best of both worlds: high-quality technique from some of the greatest chefs in the world, tested relentlessly in my own kitchen. I can’t tell you how many Sherry Chickens (Poussin) I cooked on the line — hundreds at least, possibly thousands. And I’ve spent years translating that experience into a version that works for home cooks, with a whole chicken and a standard oven.
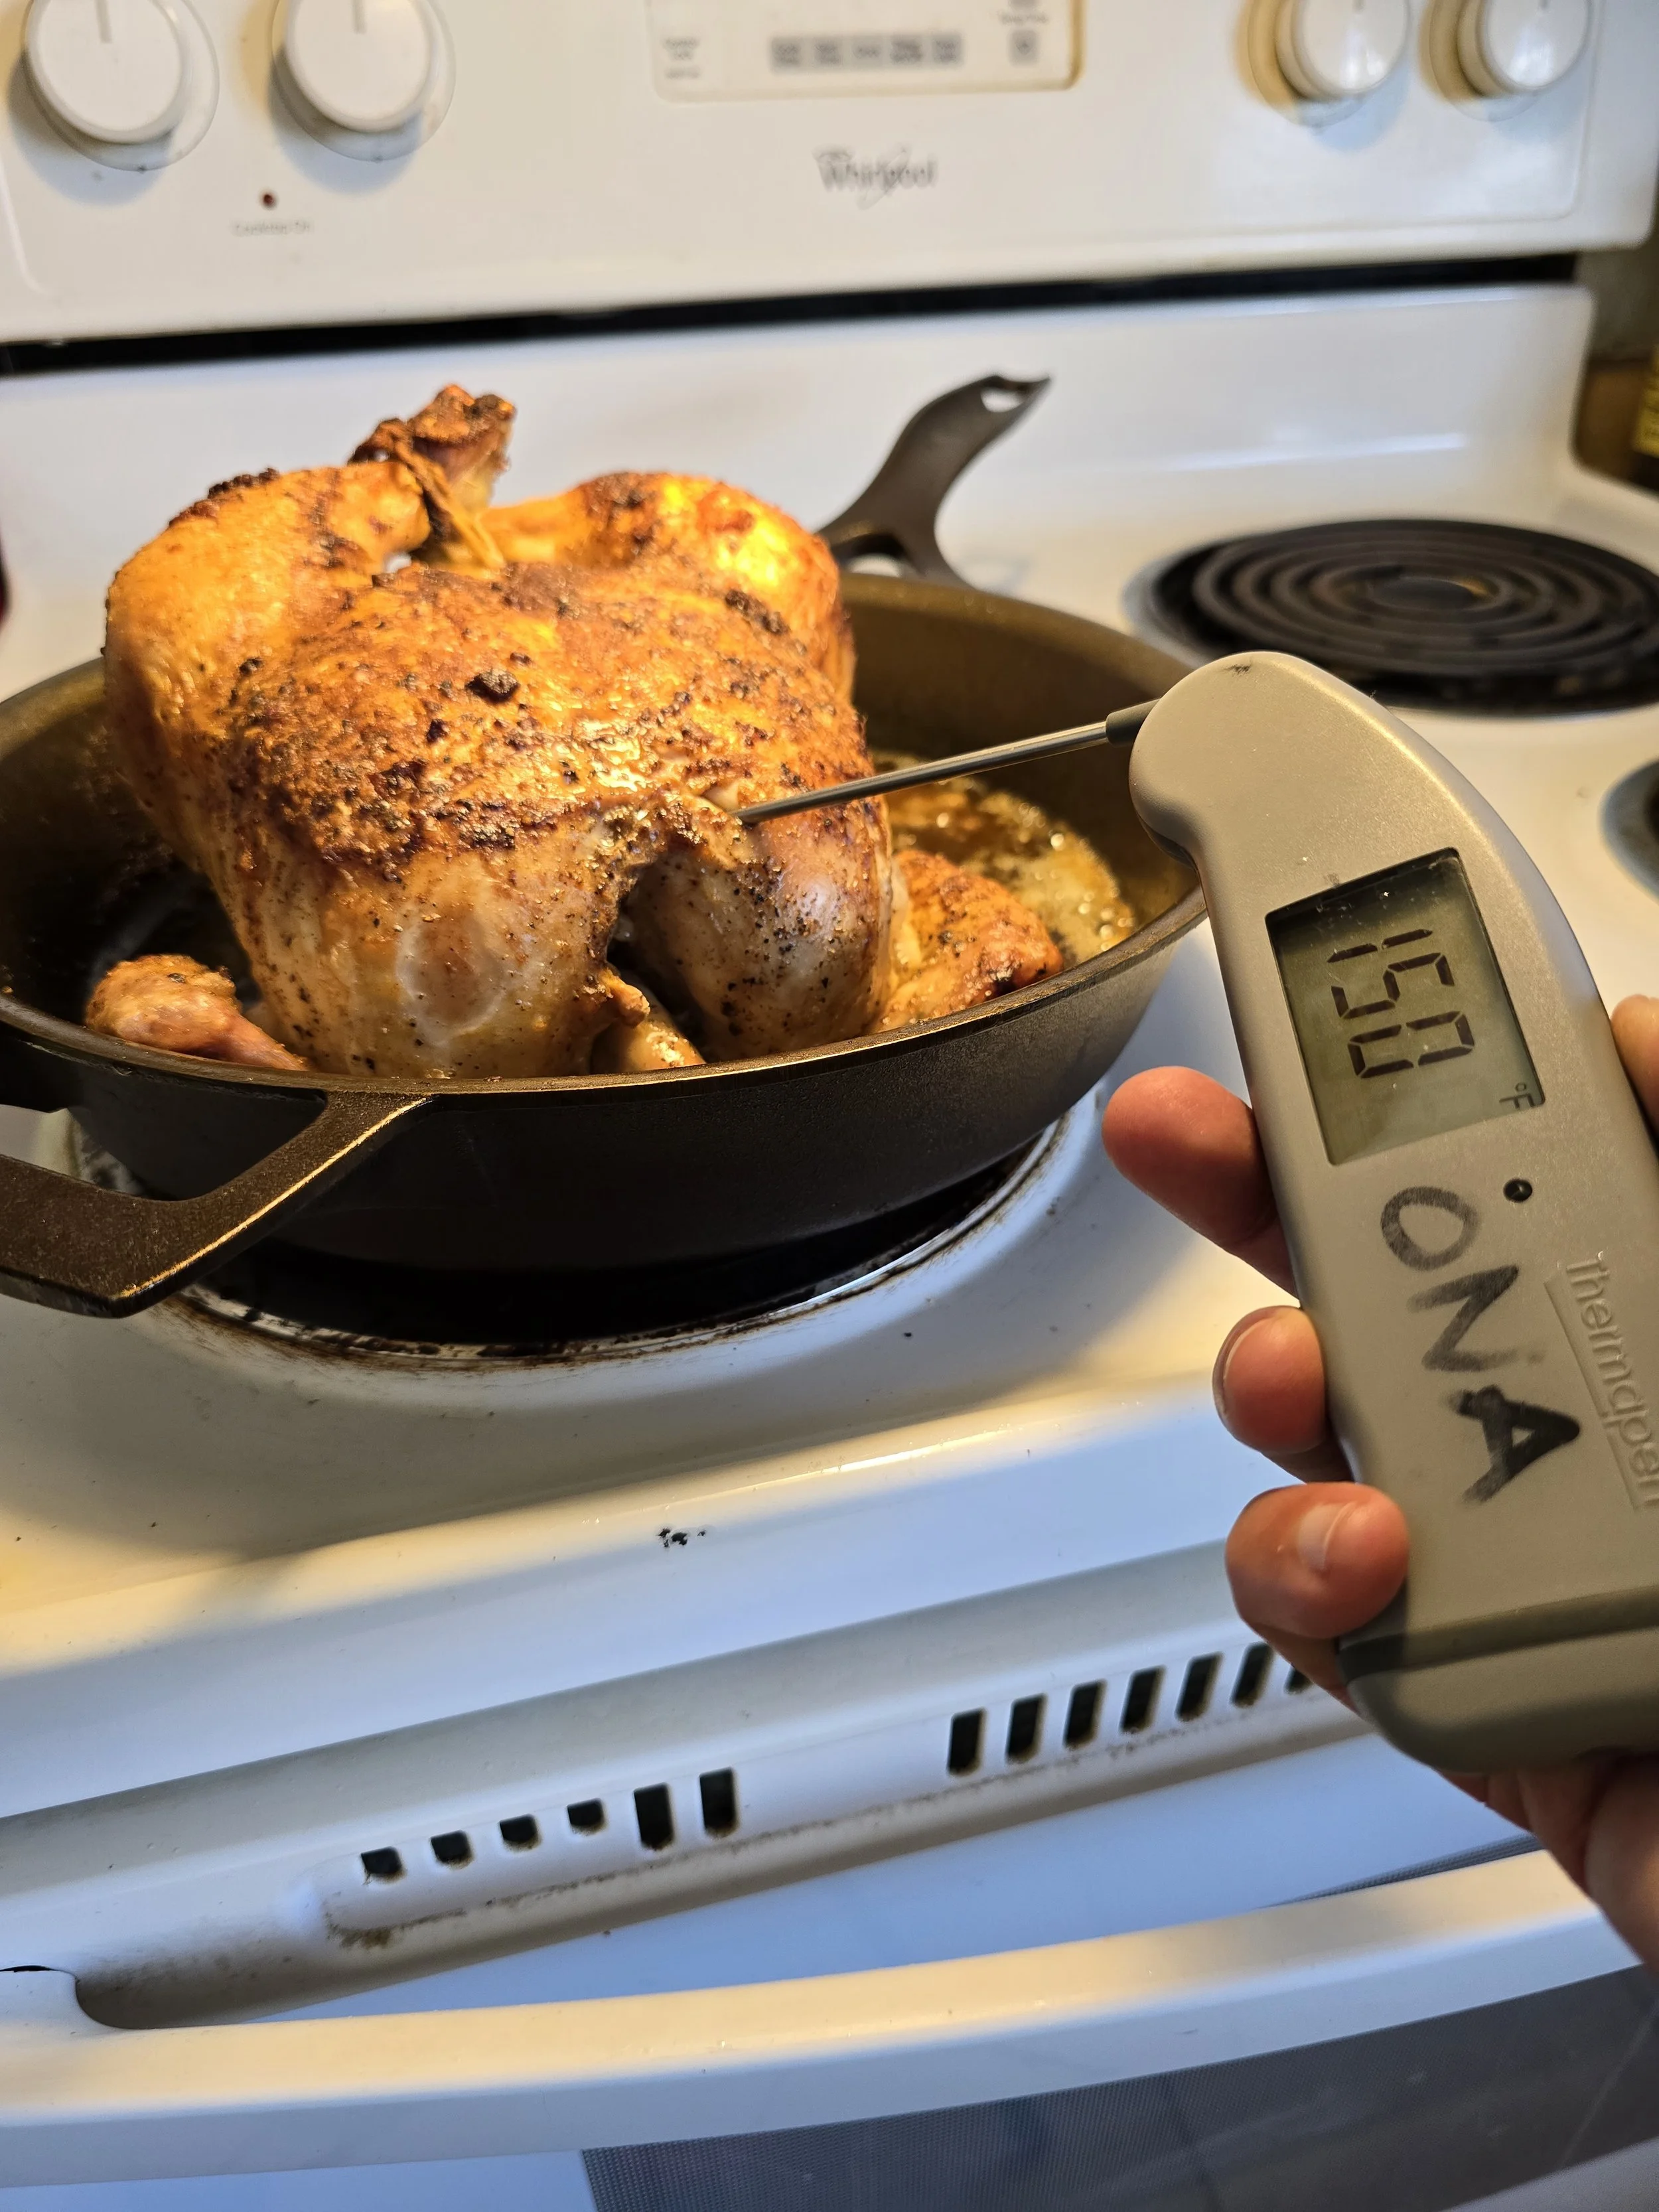
This method can easily be adapted for a single leg, breast, half-chicken, or a spatchcocked bird. The key constant? Temperature. That’s the most important element of this recipe — and the one tool you absolutely can’t do without. Once your meat hits 150°F, no matter the cut, it’s time to build your pan sauce. I love my ThermoWorks (not affiliated or sponsored) instant-read thermometer, but any reliable meat thermometer will do — even an affordable dial-read one from your local restaurant supply store or cooking tool section at your local grocer.
If you absolutely can’t stand sherry vinegar (or can’t find it — though it’s fairly common in most U.S. grocery stores and co-ops), you can substitute an equal amount of:
White wine vinegar
A very dry white wine
Dry sherry
Red wine vinegar
Fresh lemon or lime juice
That said, I do encourage you to try it with the sherry vinegar if you can. It is exquisite.
All you need to finish this meal is a simple lemony side salad of arugula or mixed baby greens and some rustic sourdough, but it pairs well with just about anything — the sides are totally up to you. I hope you enjoy this meal as much as we do in my home, and that it’s one you’ll save and pass down for generations.
Ingredients
For the Chicken:
1 whole chicken (5–6 pounds)
Kosher salt (for dry brining and seasoning)
Freshly ground black pepper (to taste)
2–4 tablespoons butter, softened (for under the skin)
Optional: finishing salt, such as Maldon or San Juan Sea Salt (not sponsored)
For the Pan Sauce:
1–2 oz butter
4 oz (½ cup) chicken broth, plus more as needed
2–3 tablespoons fine sherry vinegar, plus more to taste
Recommended Tools:
¼ sheet pan and rack (for fridge drying)
10–12 inch Cast Iron Skillet – I use a Stargazer (this is an affiliate link, but I only recommend products I truly believe in and use myself)
Butcher’s twine (for trussing)
Instant-read meat thermometer (essential)
One large spoon (for basting)
Total Time Estimate (not including overnight salting):
Prep Time (Day Of):
Preheat oven, prep butter, season chicken: 15–20 minutes
Searing and initial roasting (steps 5–7): 40–45 minutes
Additional roasting & sauce building (steps 8–10): 30–40 minutes, depending on chicken size and temperature checks
Final sauce reduction and temping: 15–20 minutes
Rest time: 10 minutes
Estimated Total Time (Day Of):
1 hour 45 minutes – 2 hours 15 minutes
Per 5–6 pound chicken (if your chicken is smaller or larger, adjust times based on internal temperature)
The night before cooking:
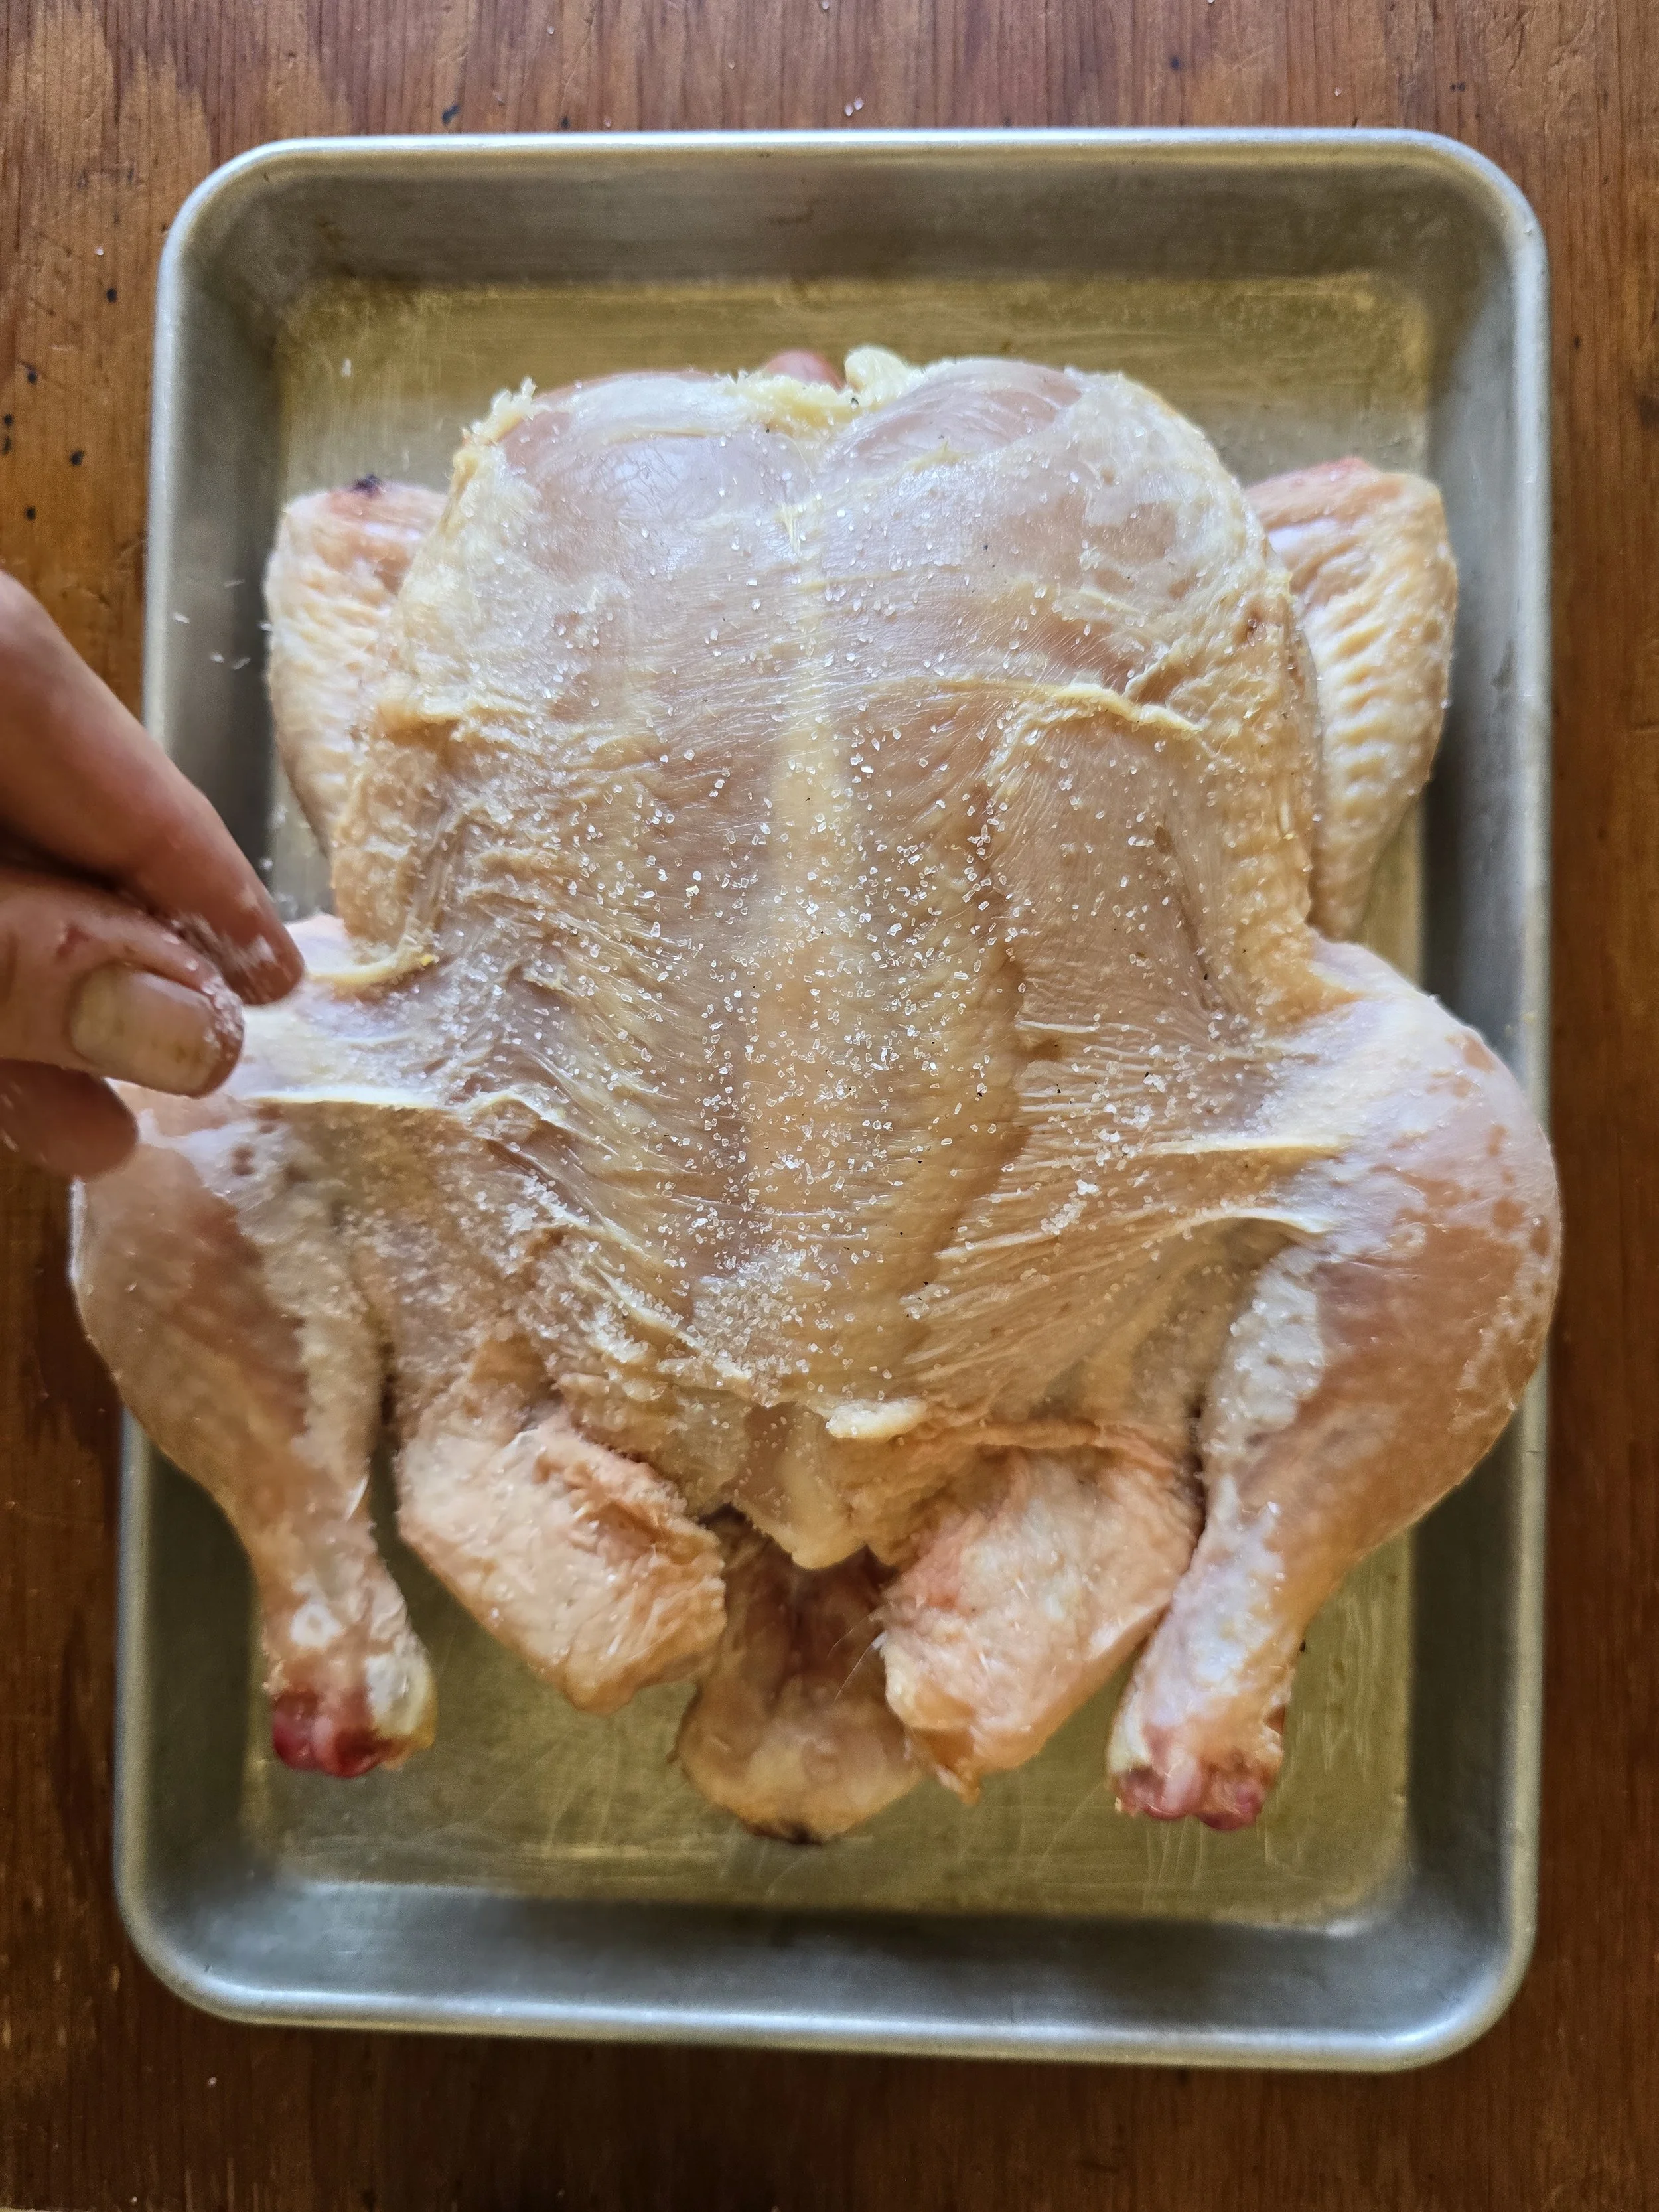
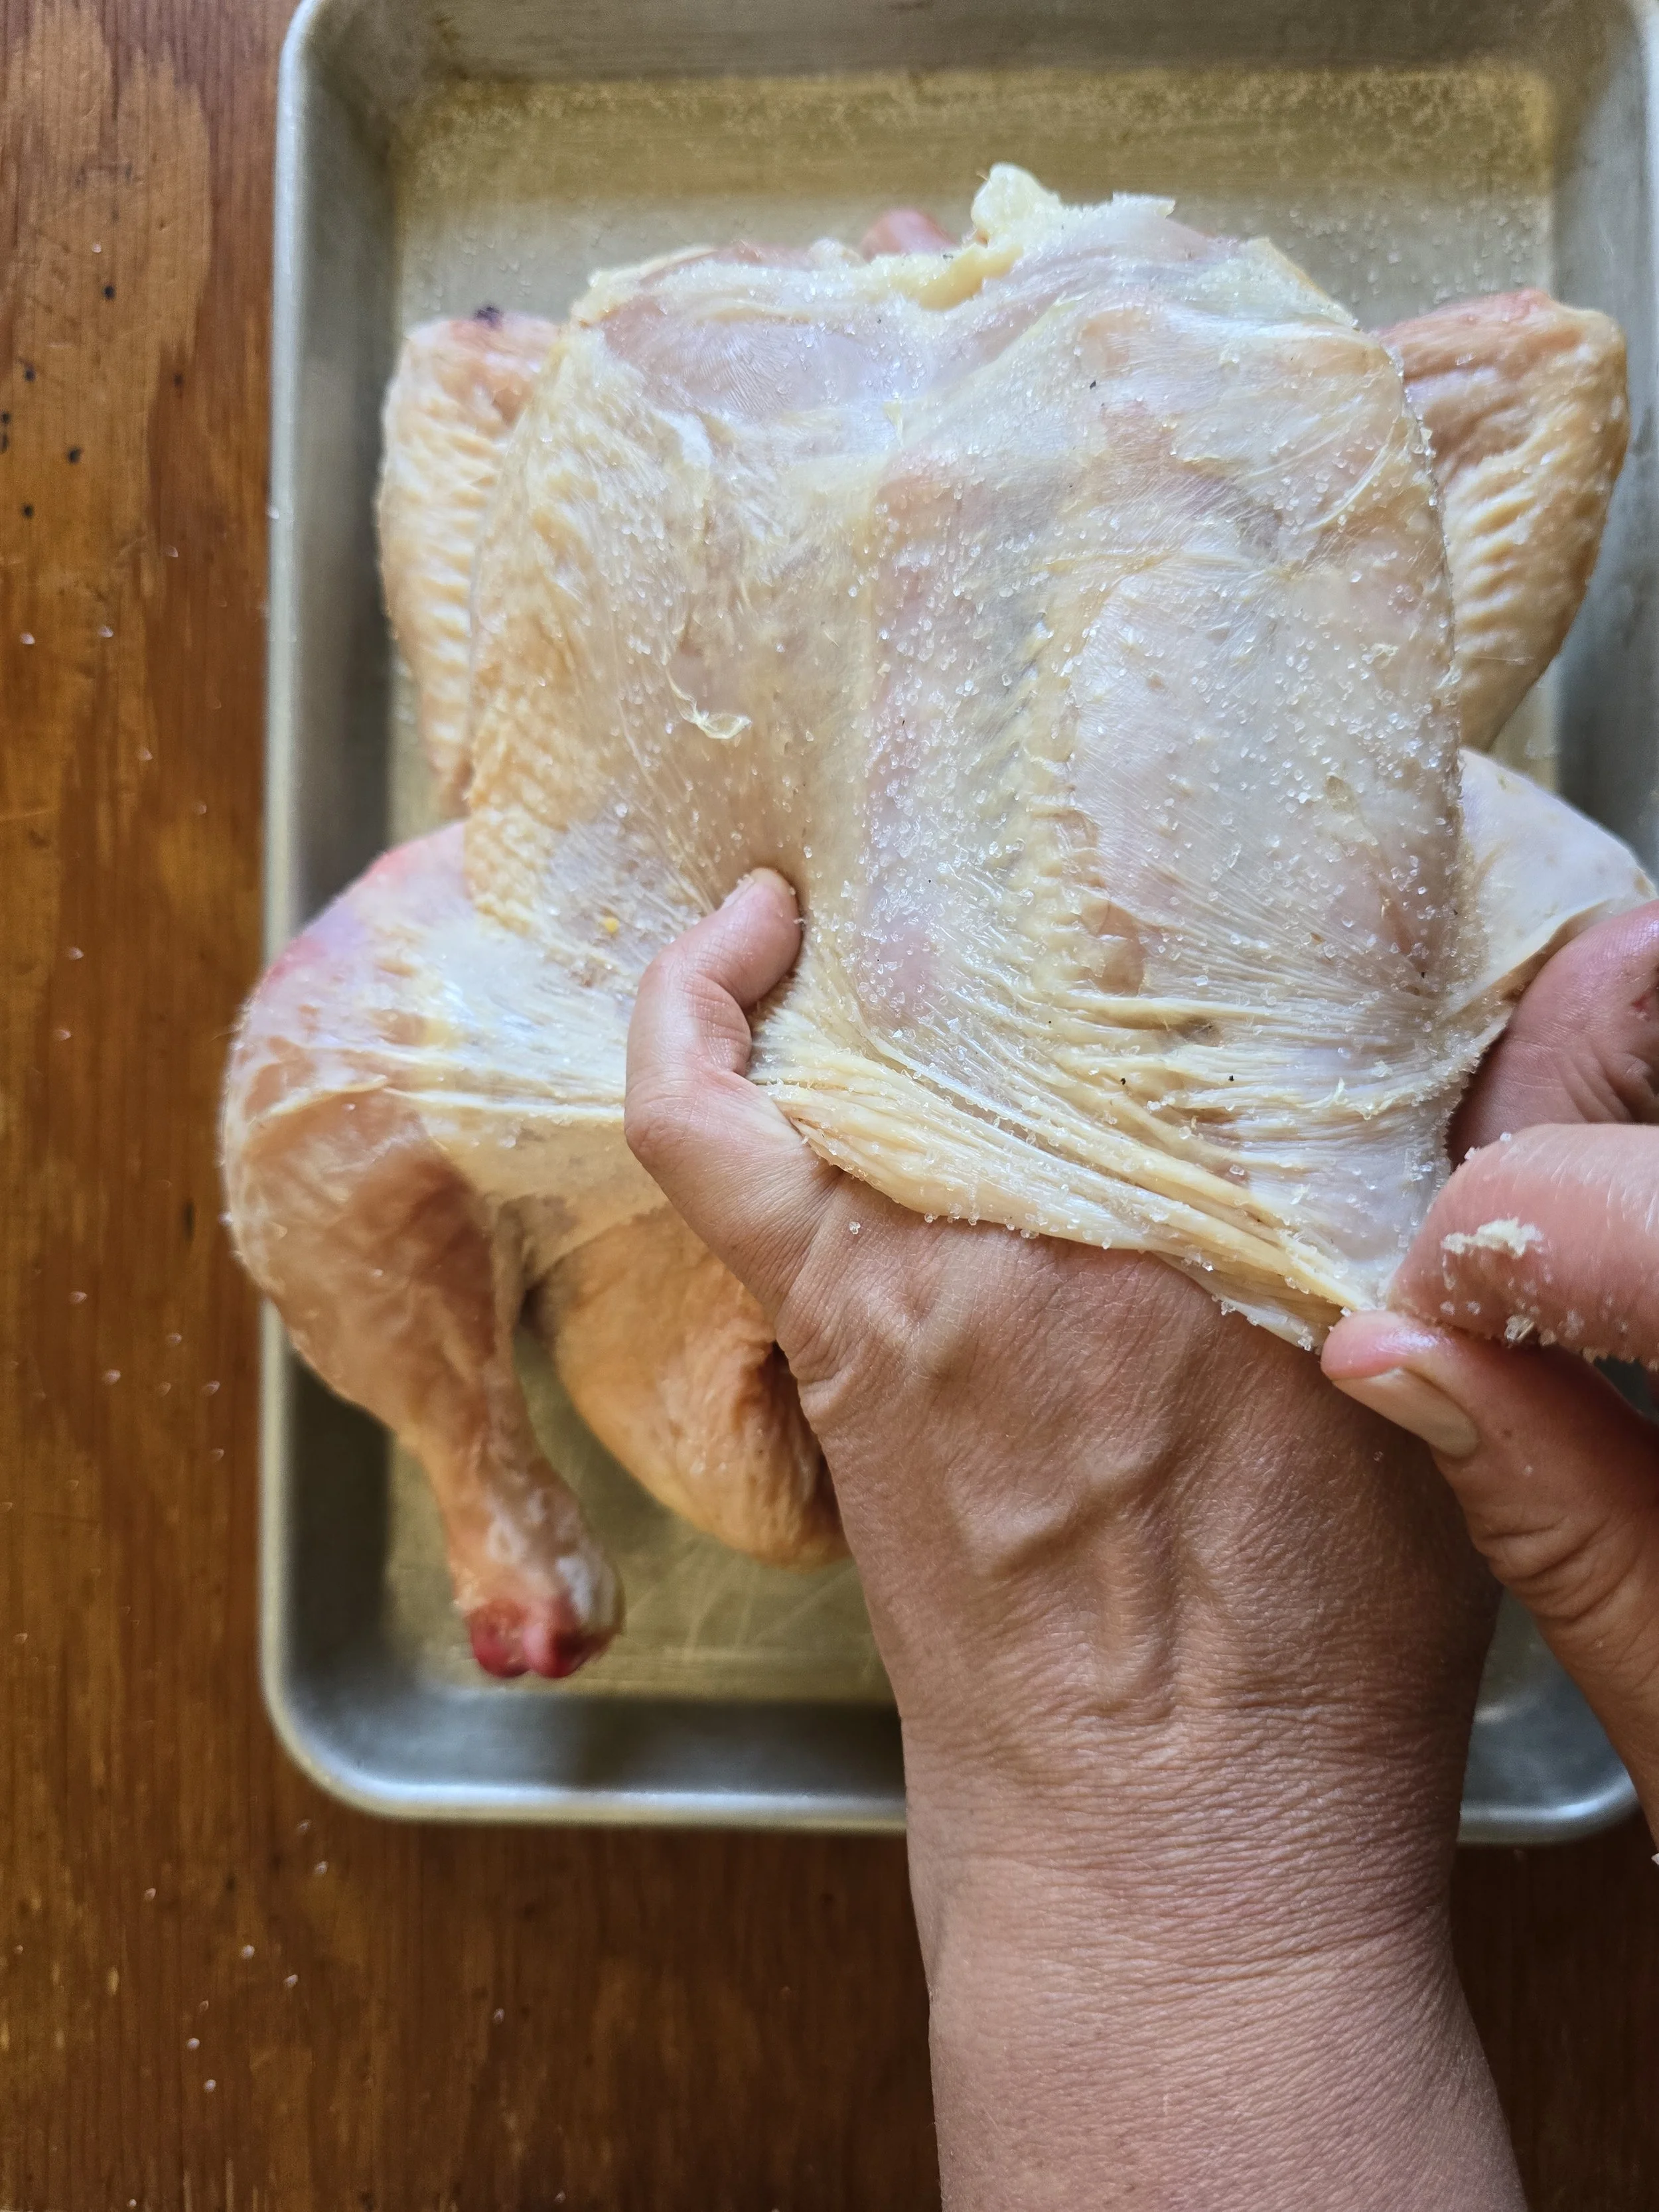
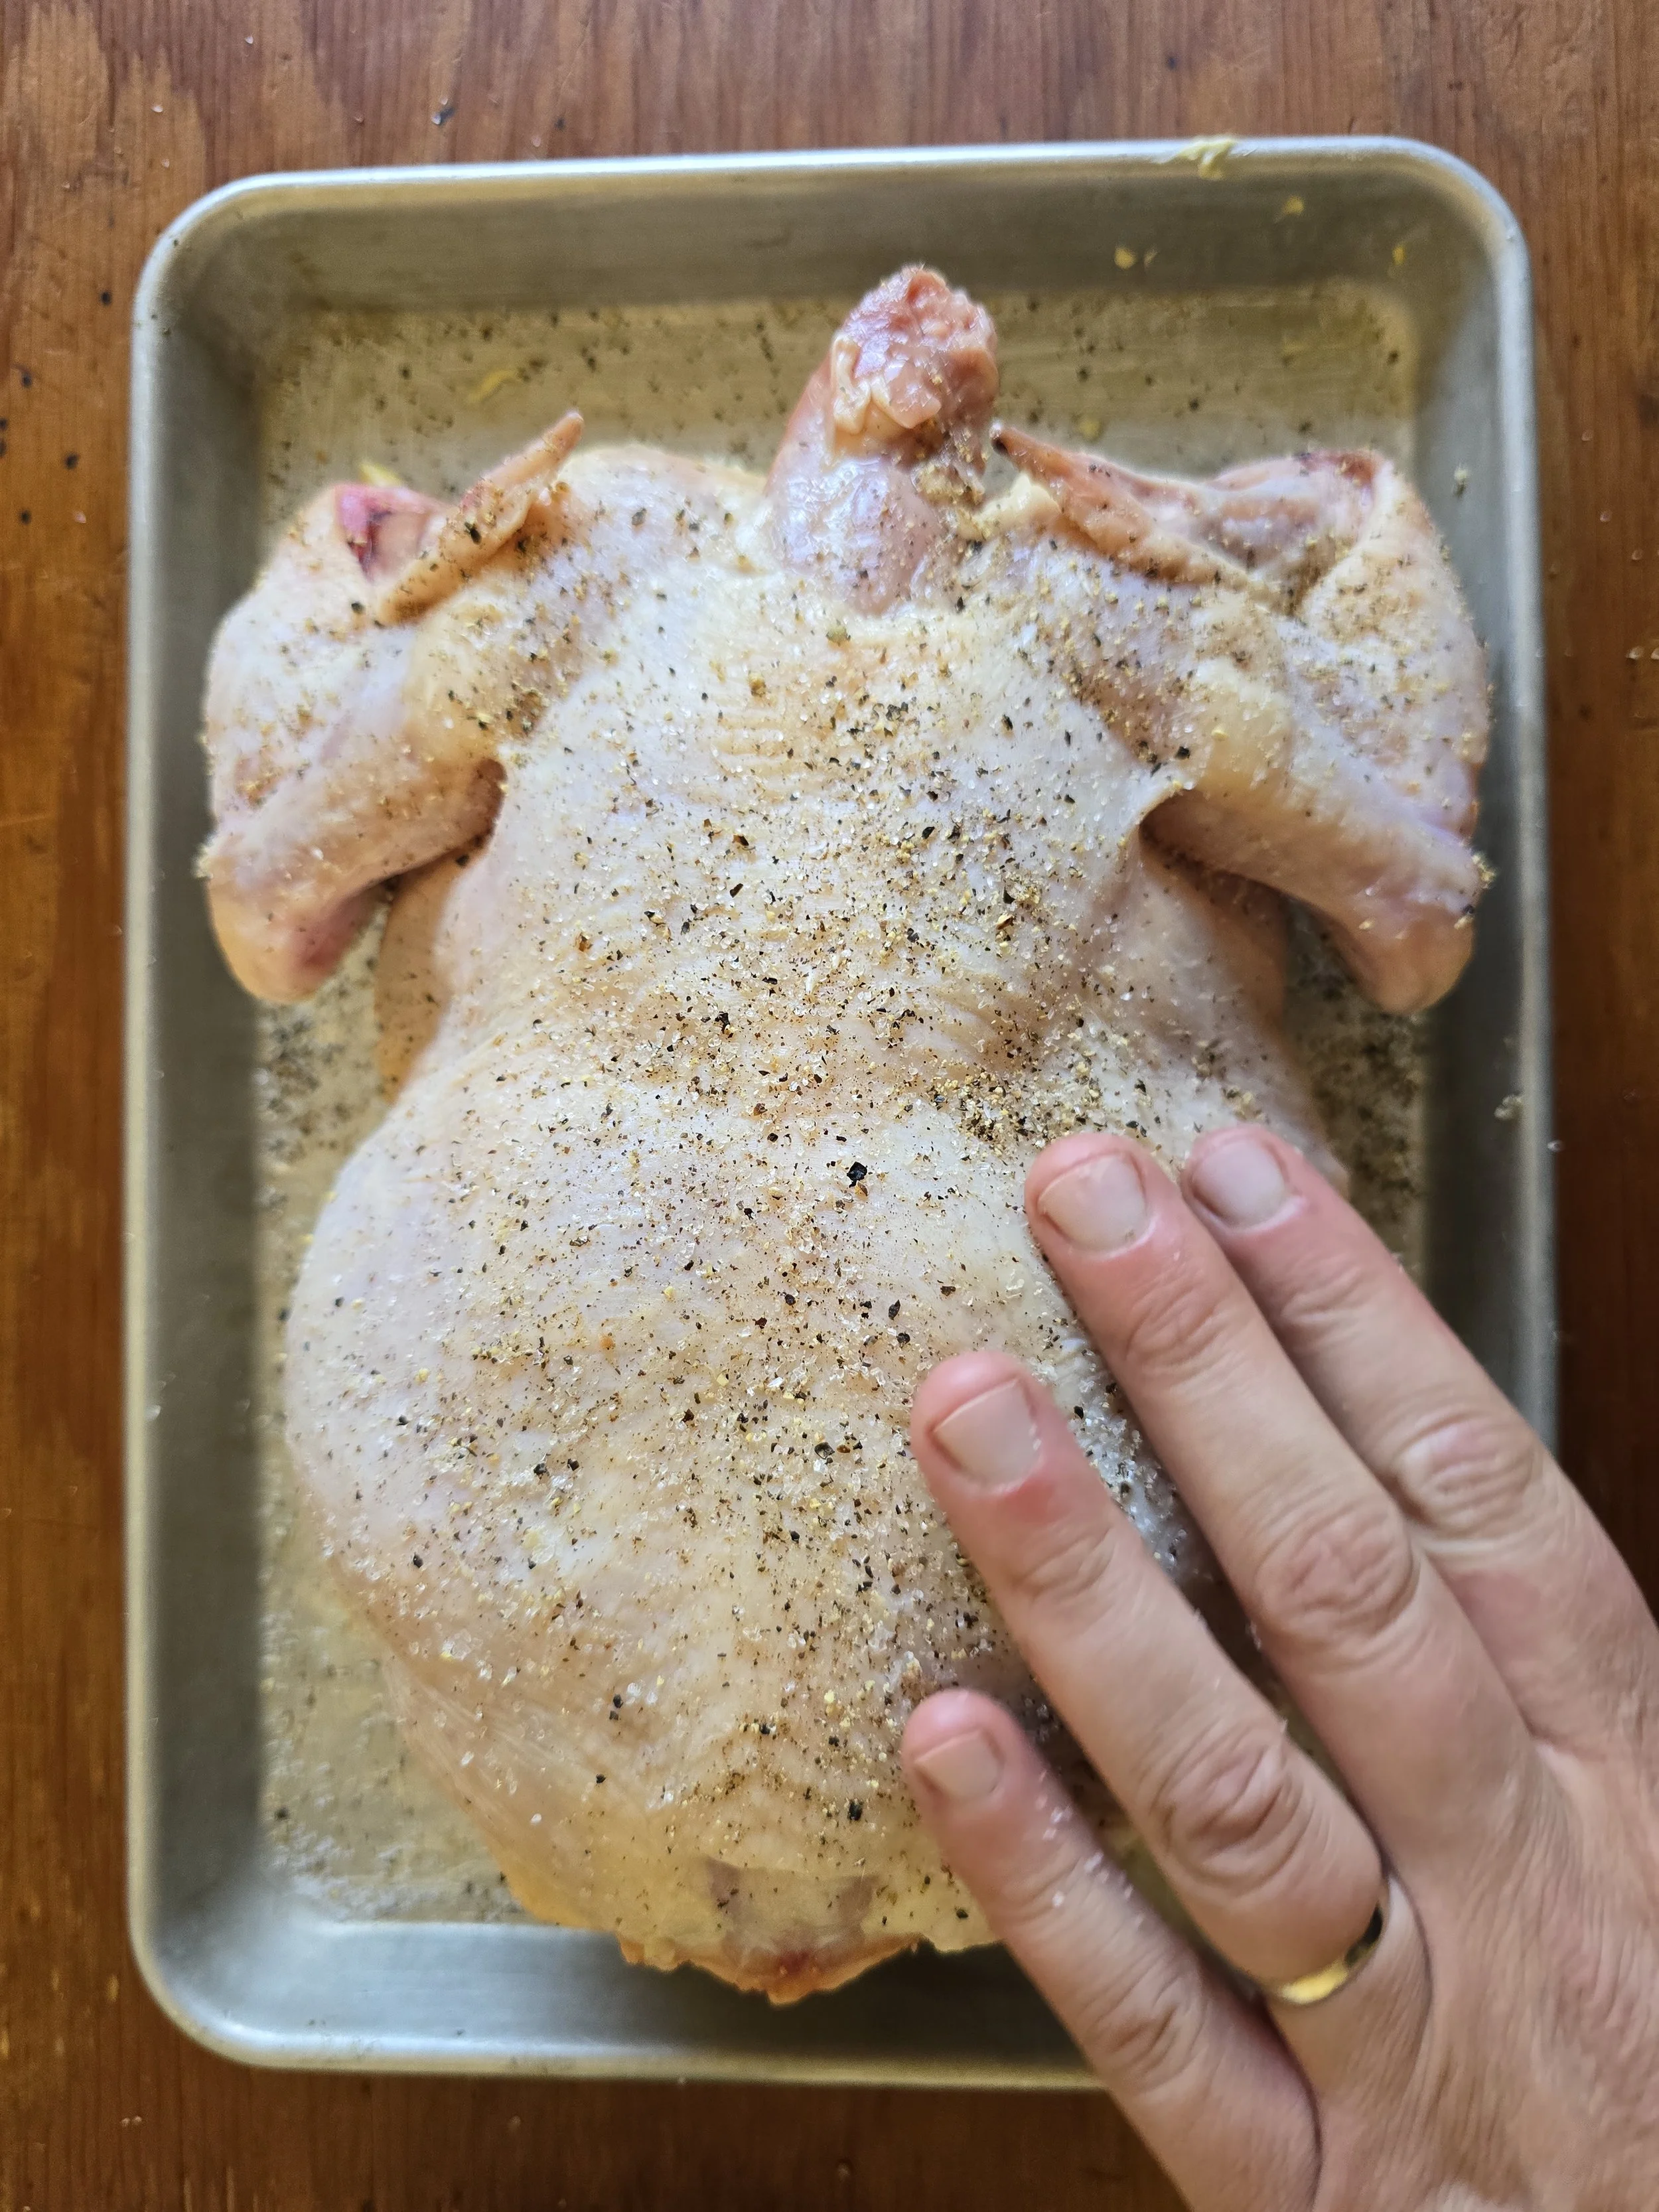
Unwrap the chicken, pat it dry, salt it generously, and leave it uncovered in the fridge overnight so the skin can dry out. Make sure it's contained to prevent drips — I prefer a ¼ sheet pan because it’s compact and has a rim to catch any juices. A rack insert helps air circulate fully around the bird.
If you don’t have time to start this the night before, unwrap, dry, and salt it for as many hours as you can before cooking. Drying the skin helps it brown, and pre-salting seasons the meat deeply.

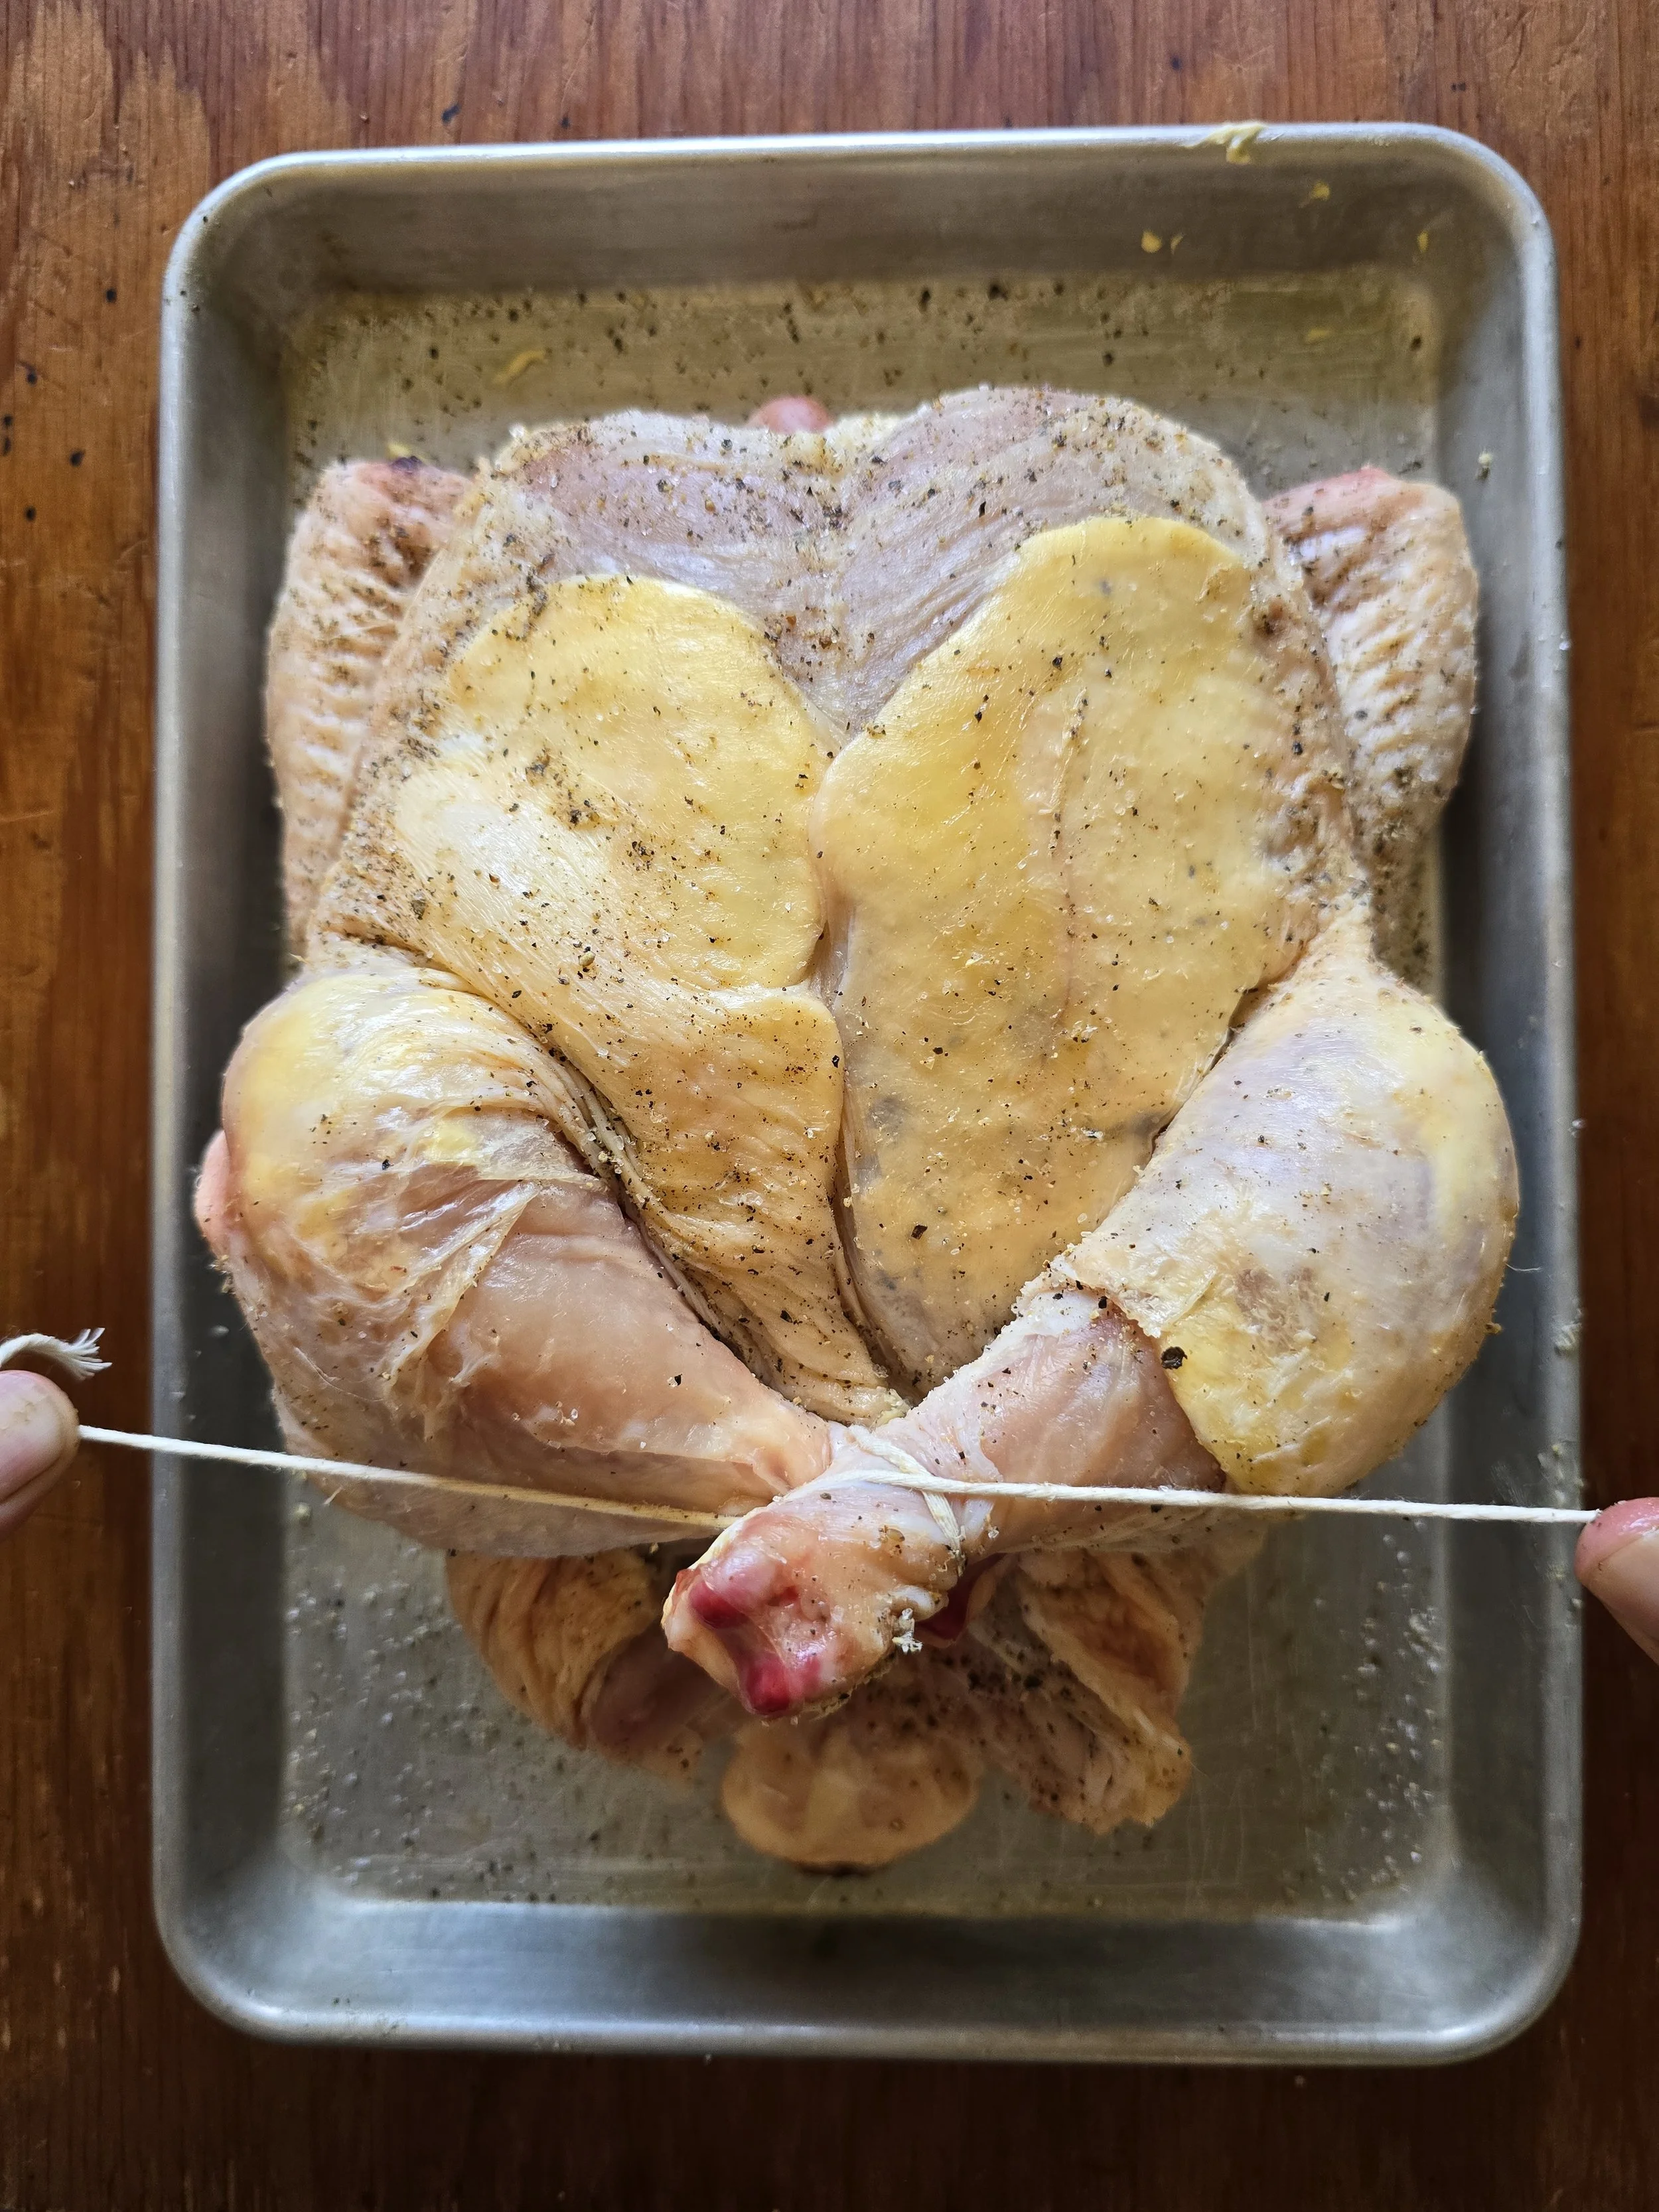
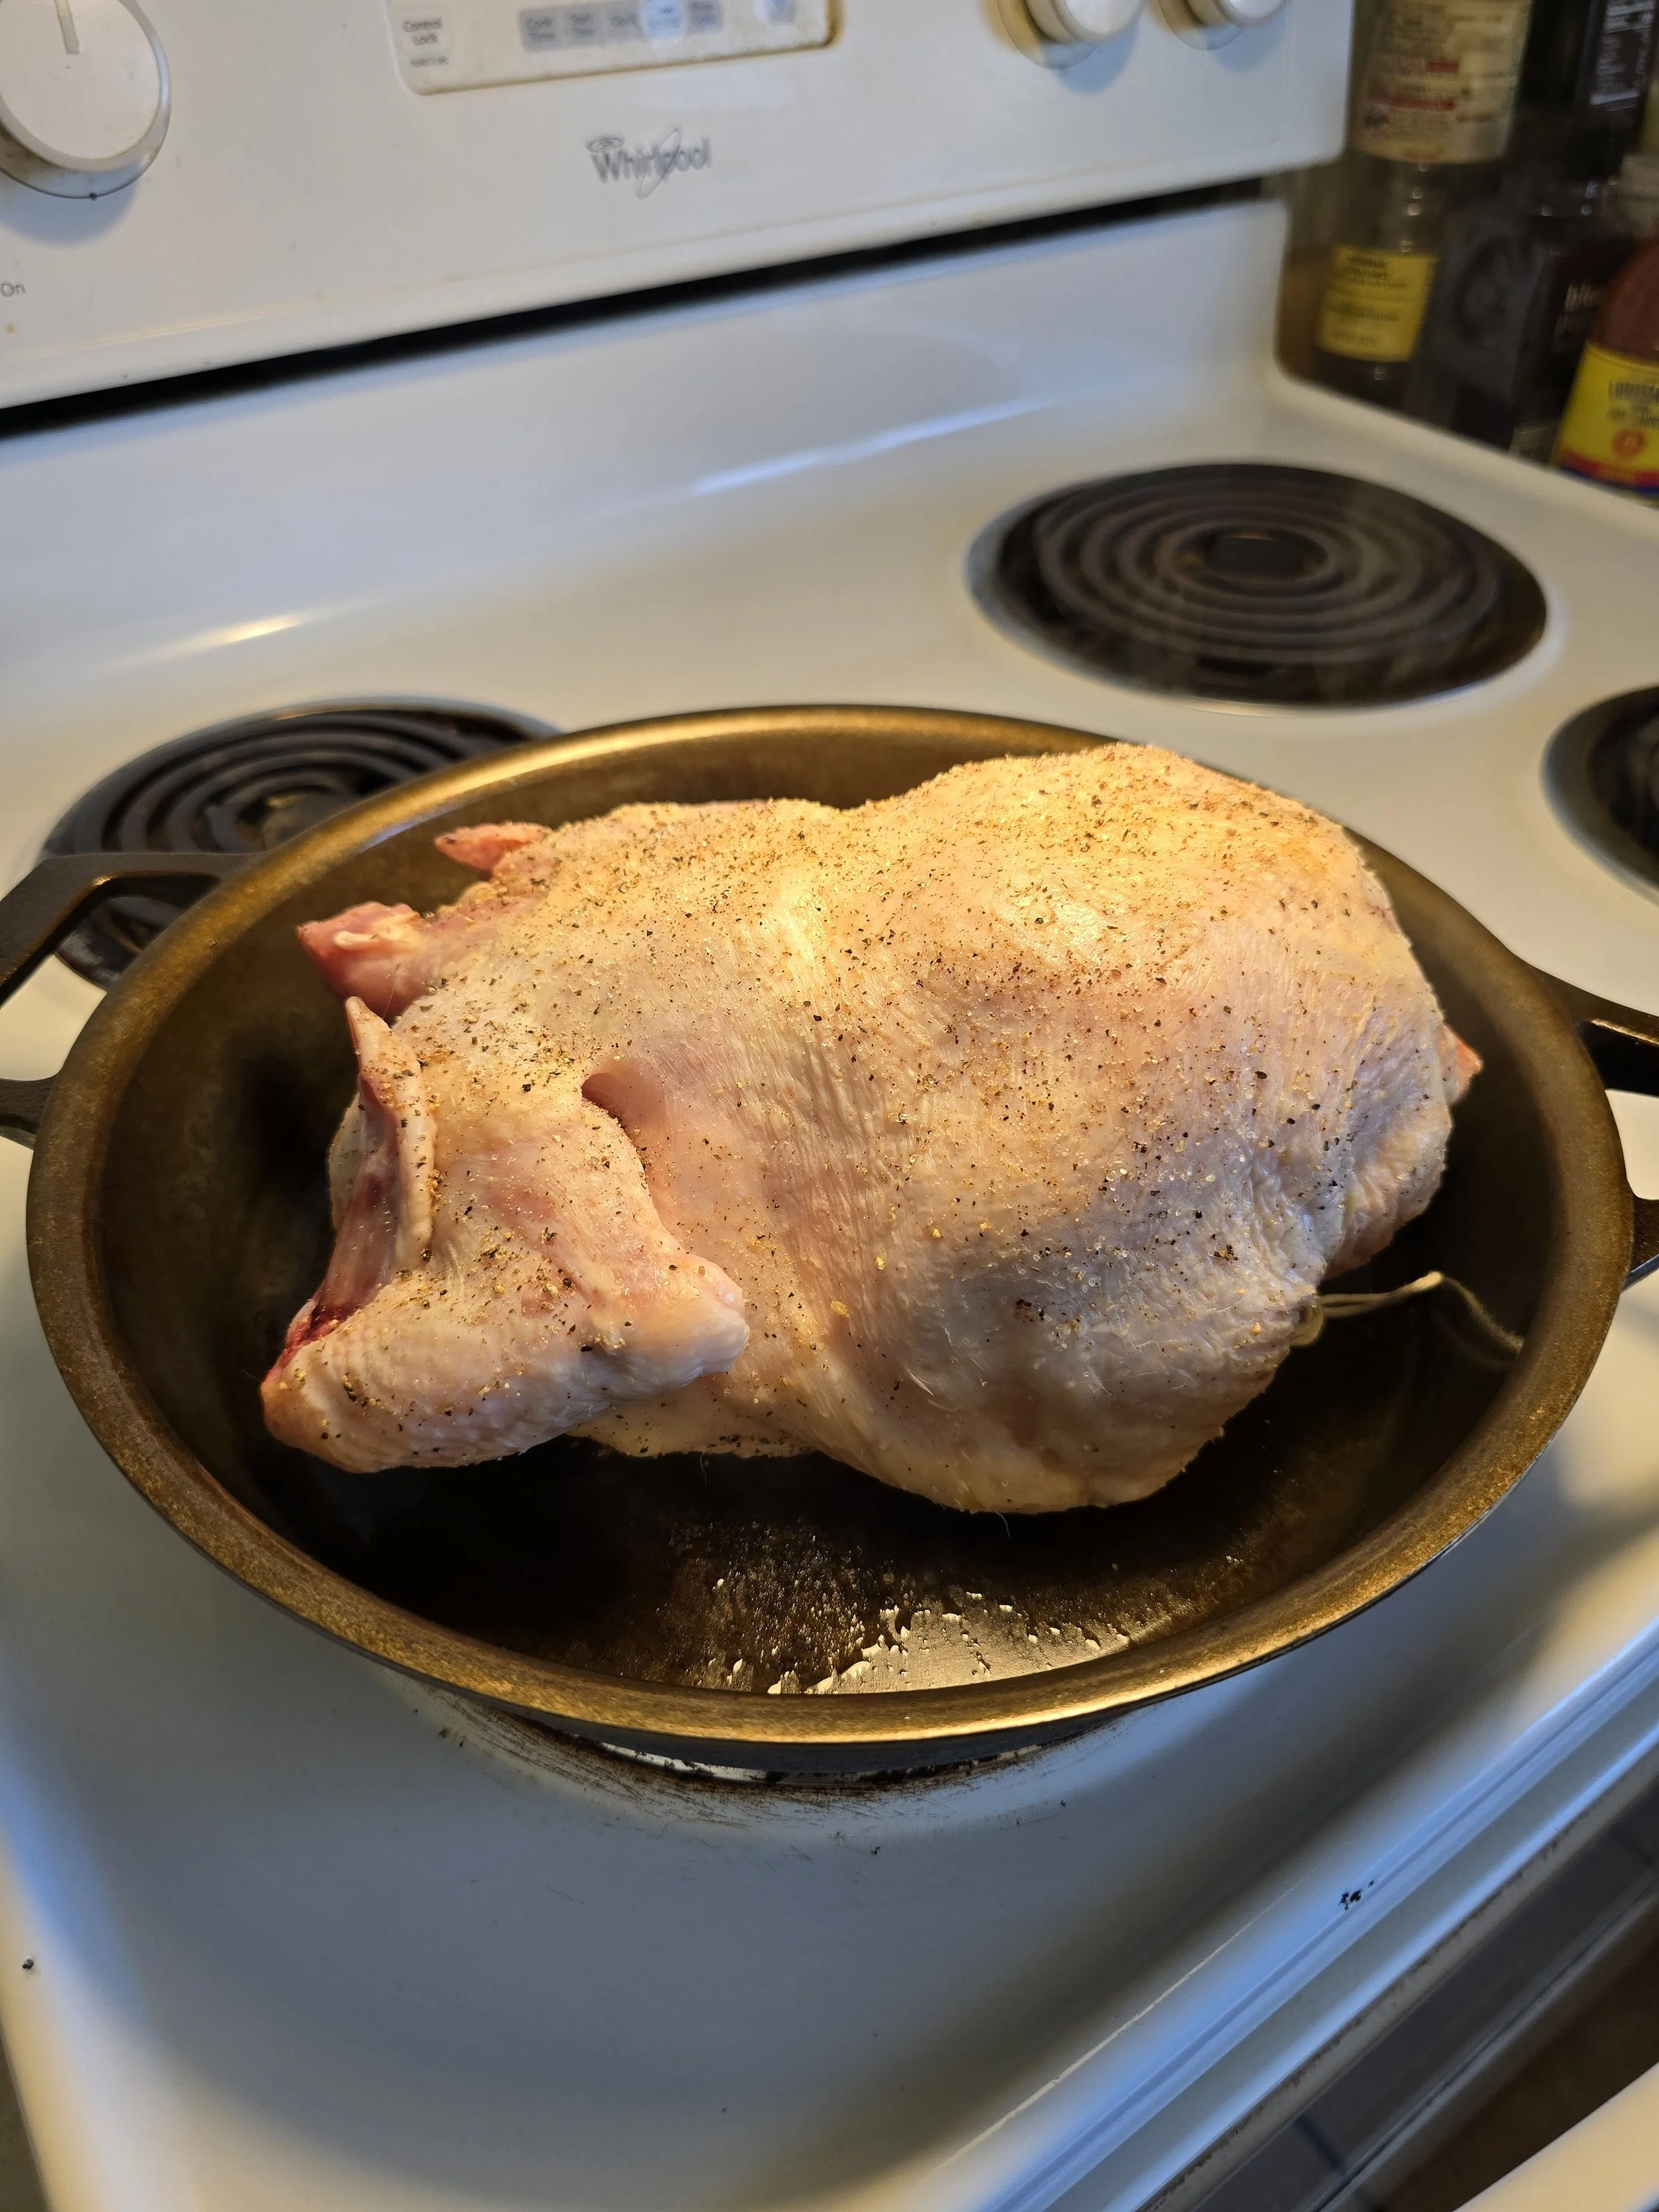
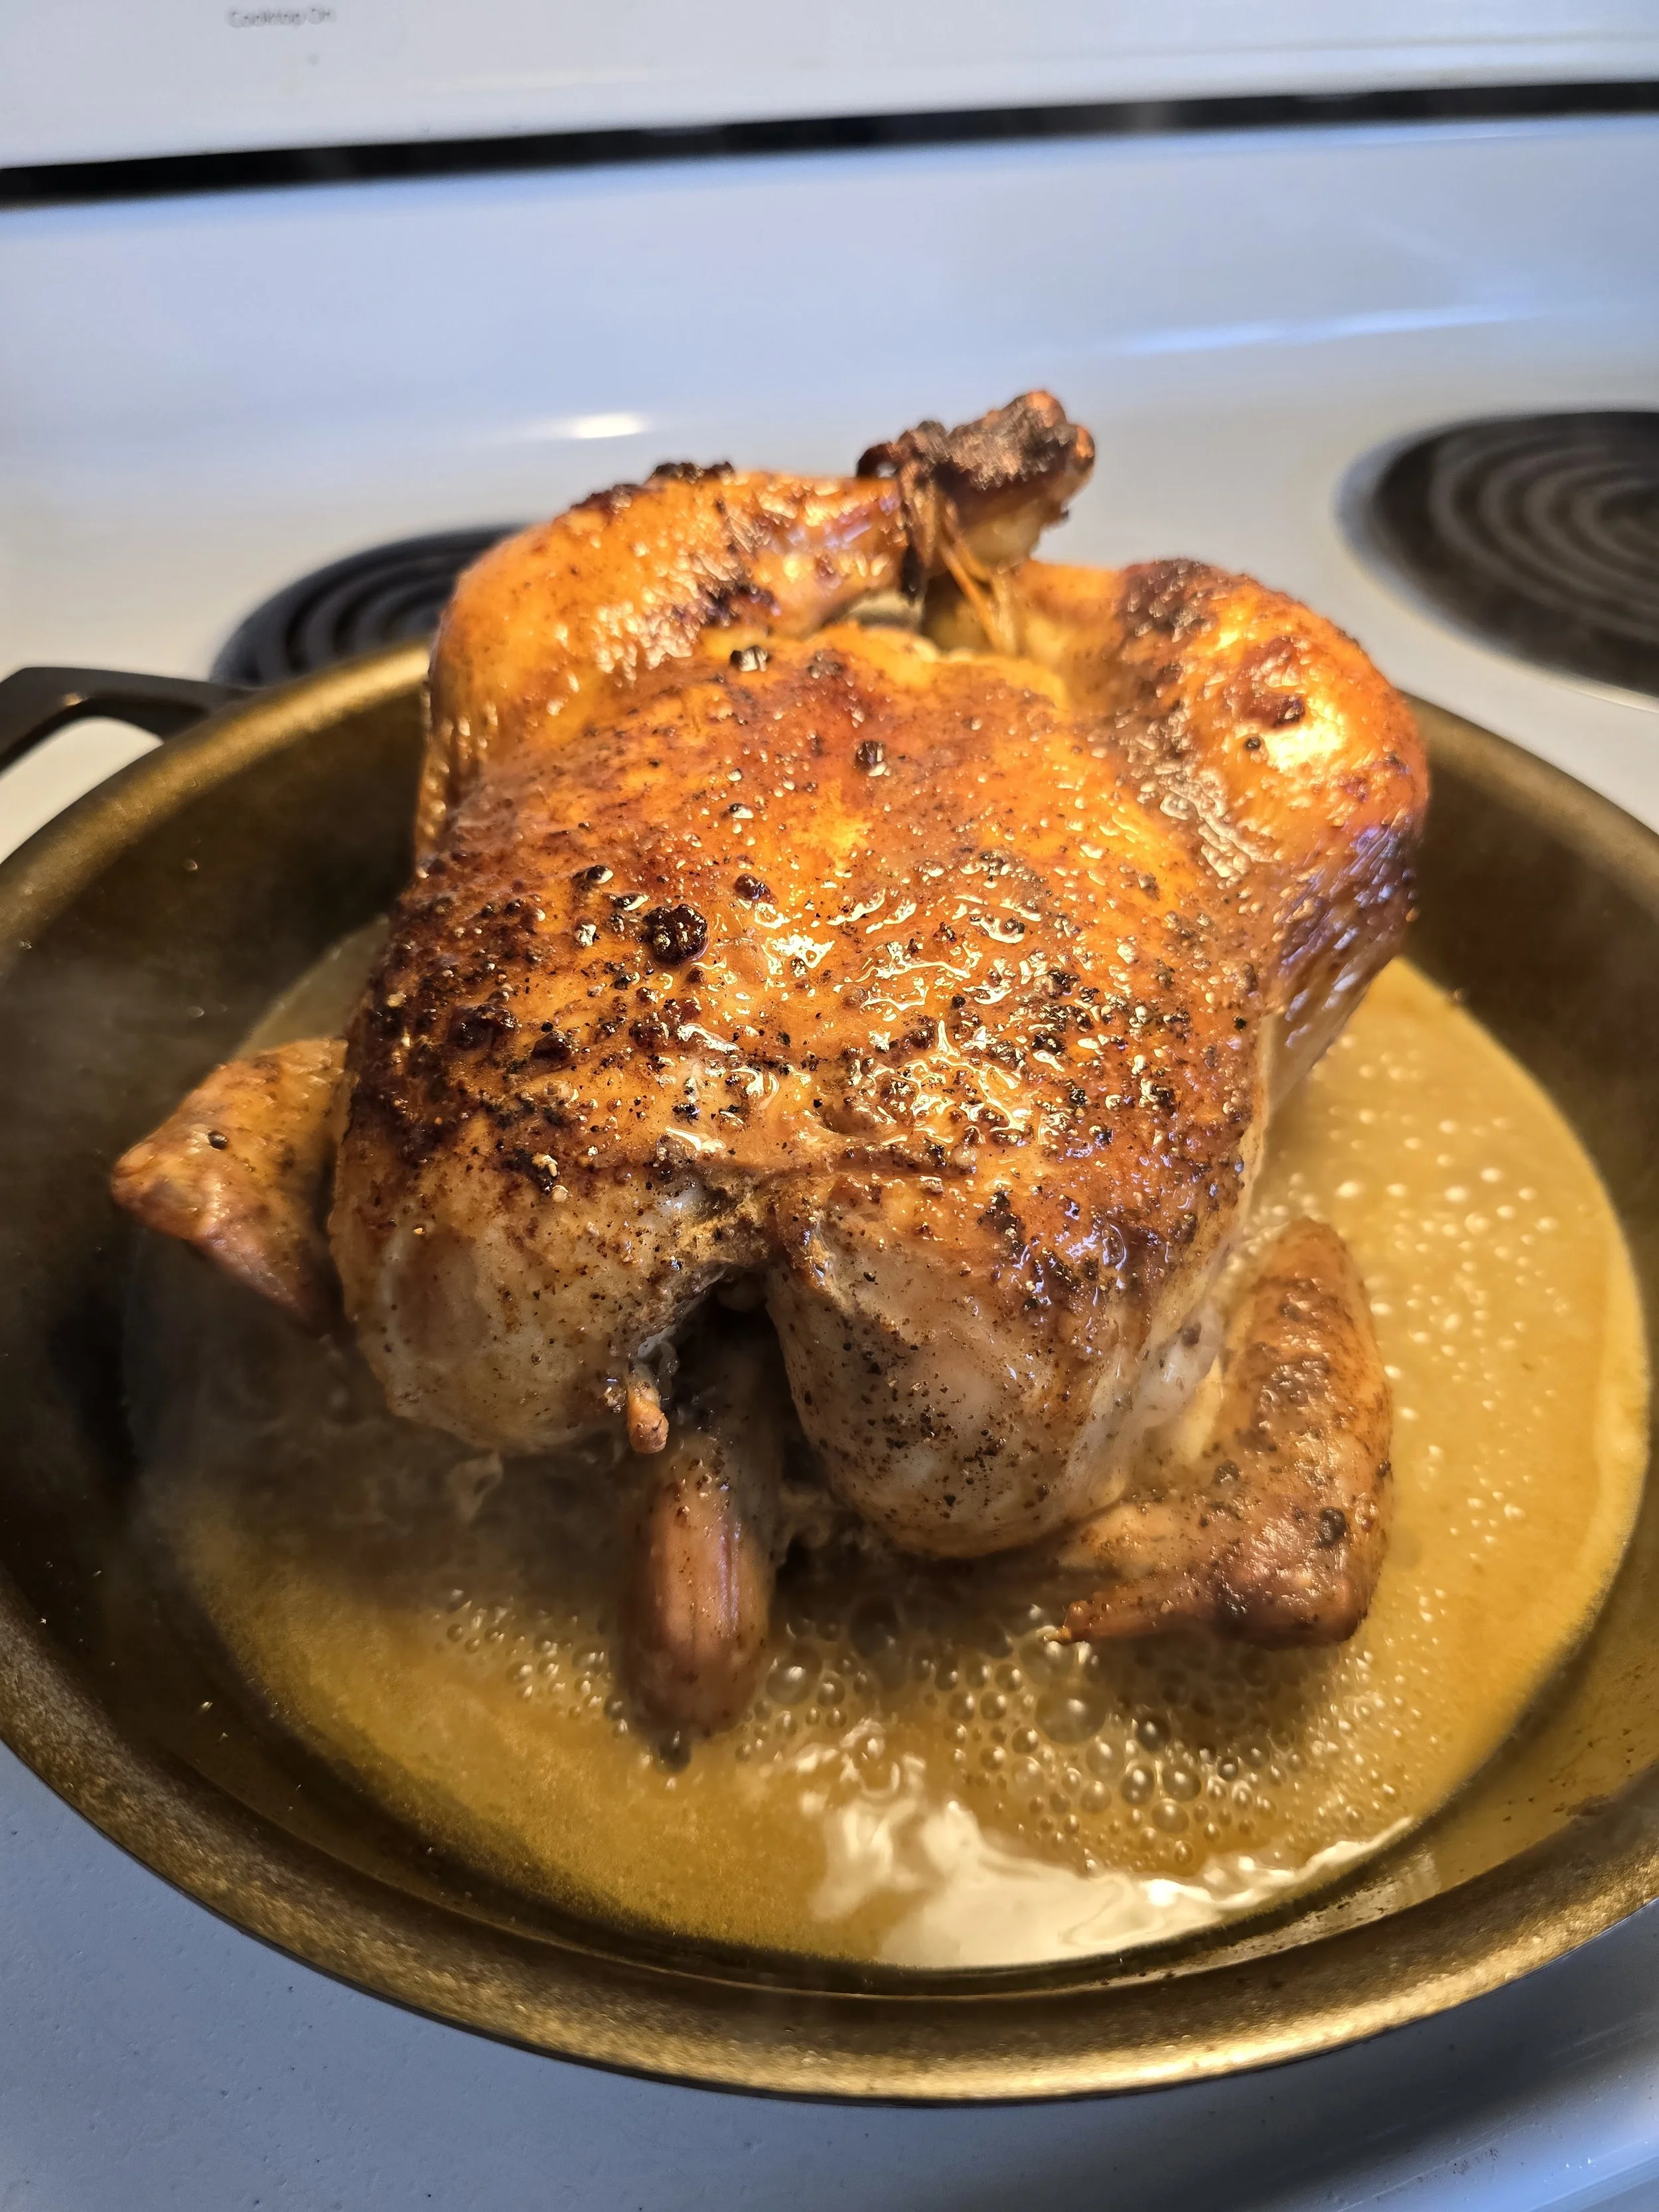
The chicken after salting and drying in the fridge overnight.
The following day:
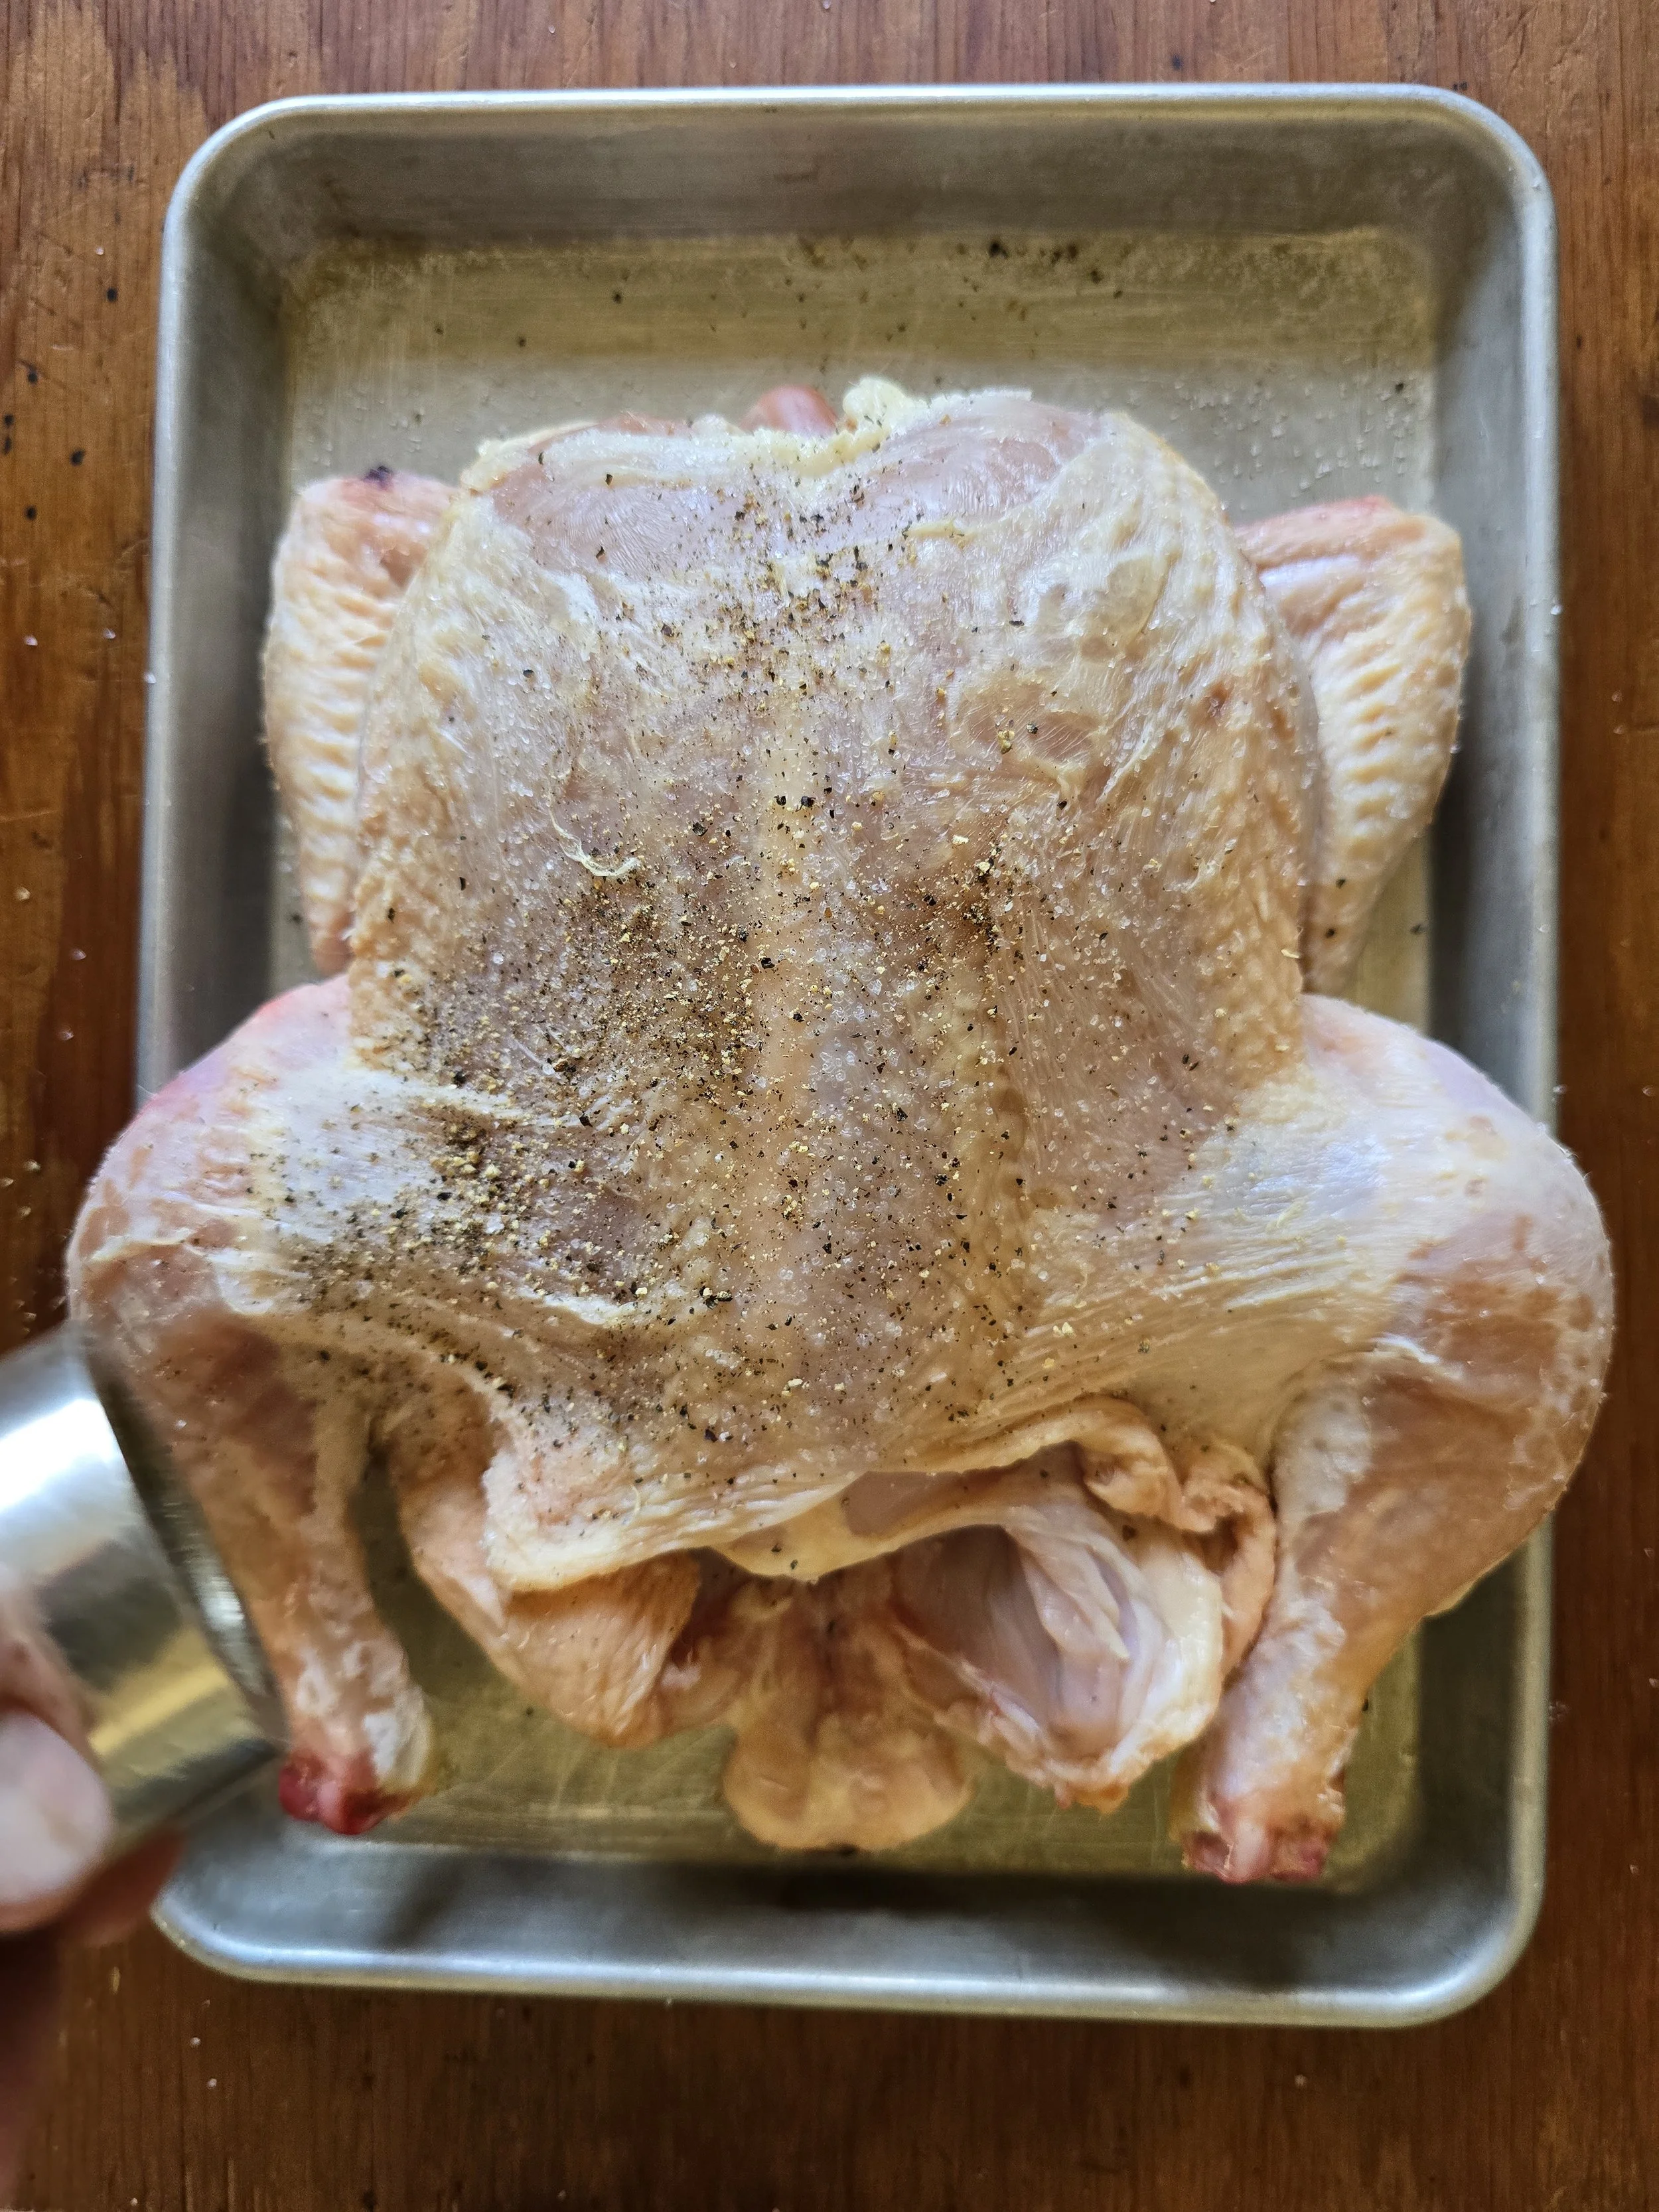
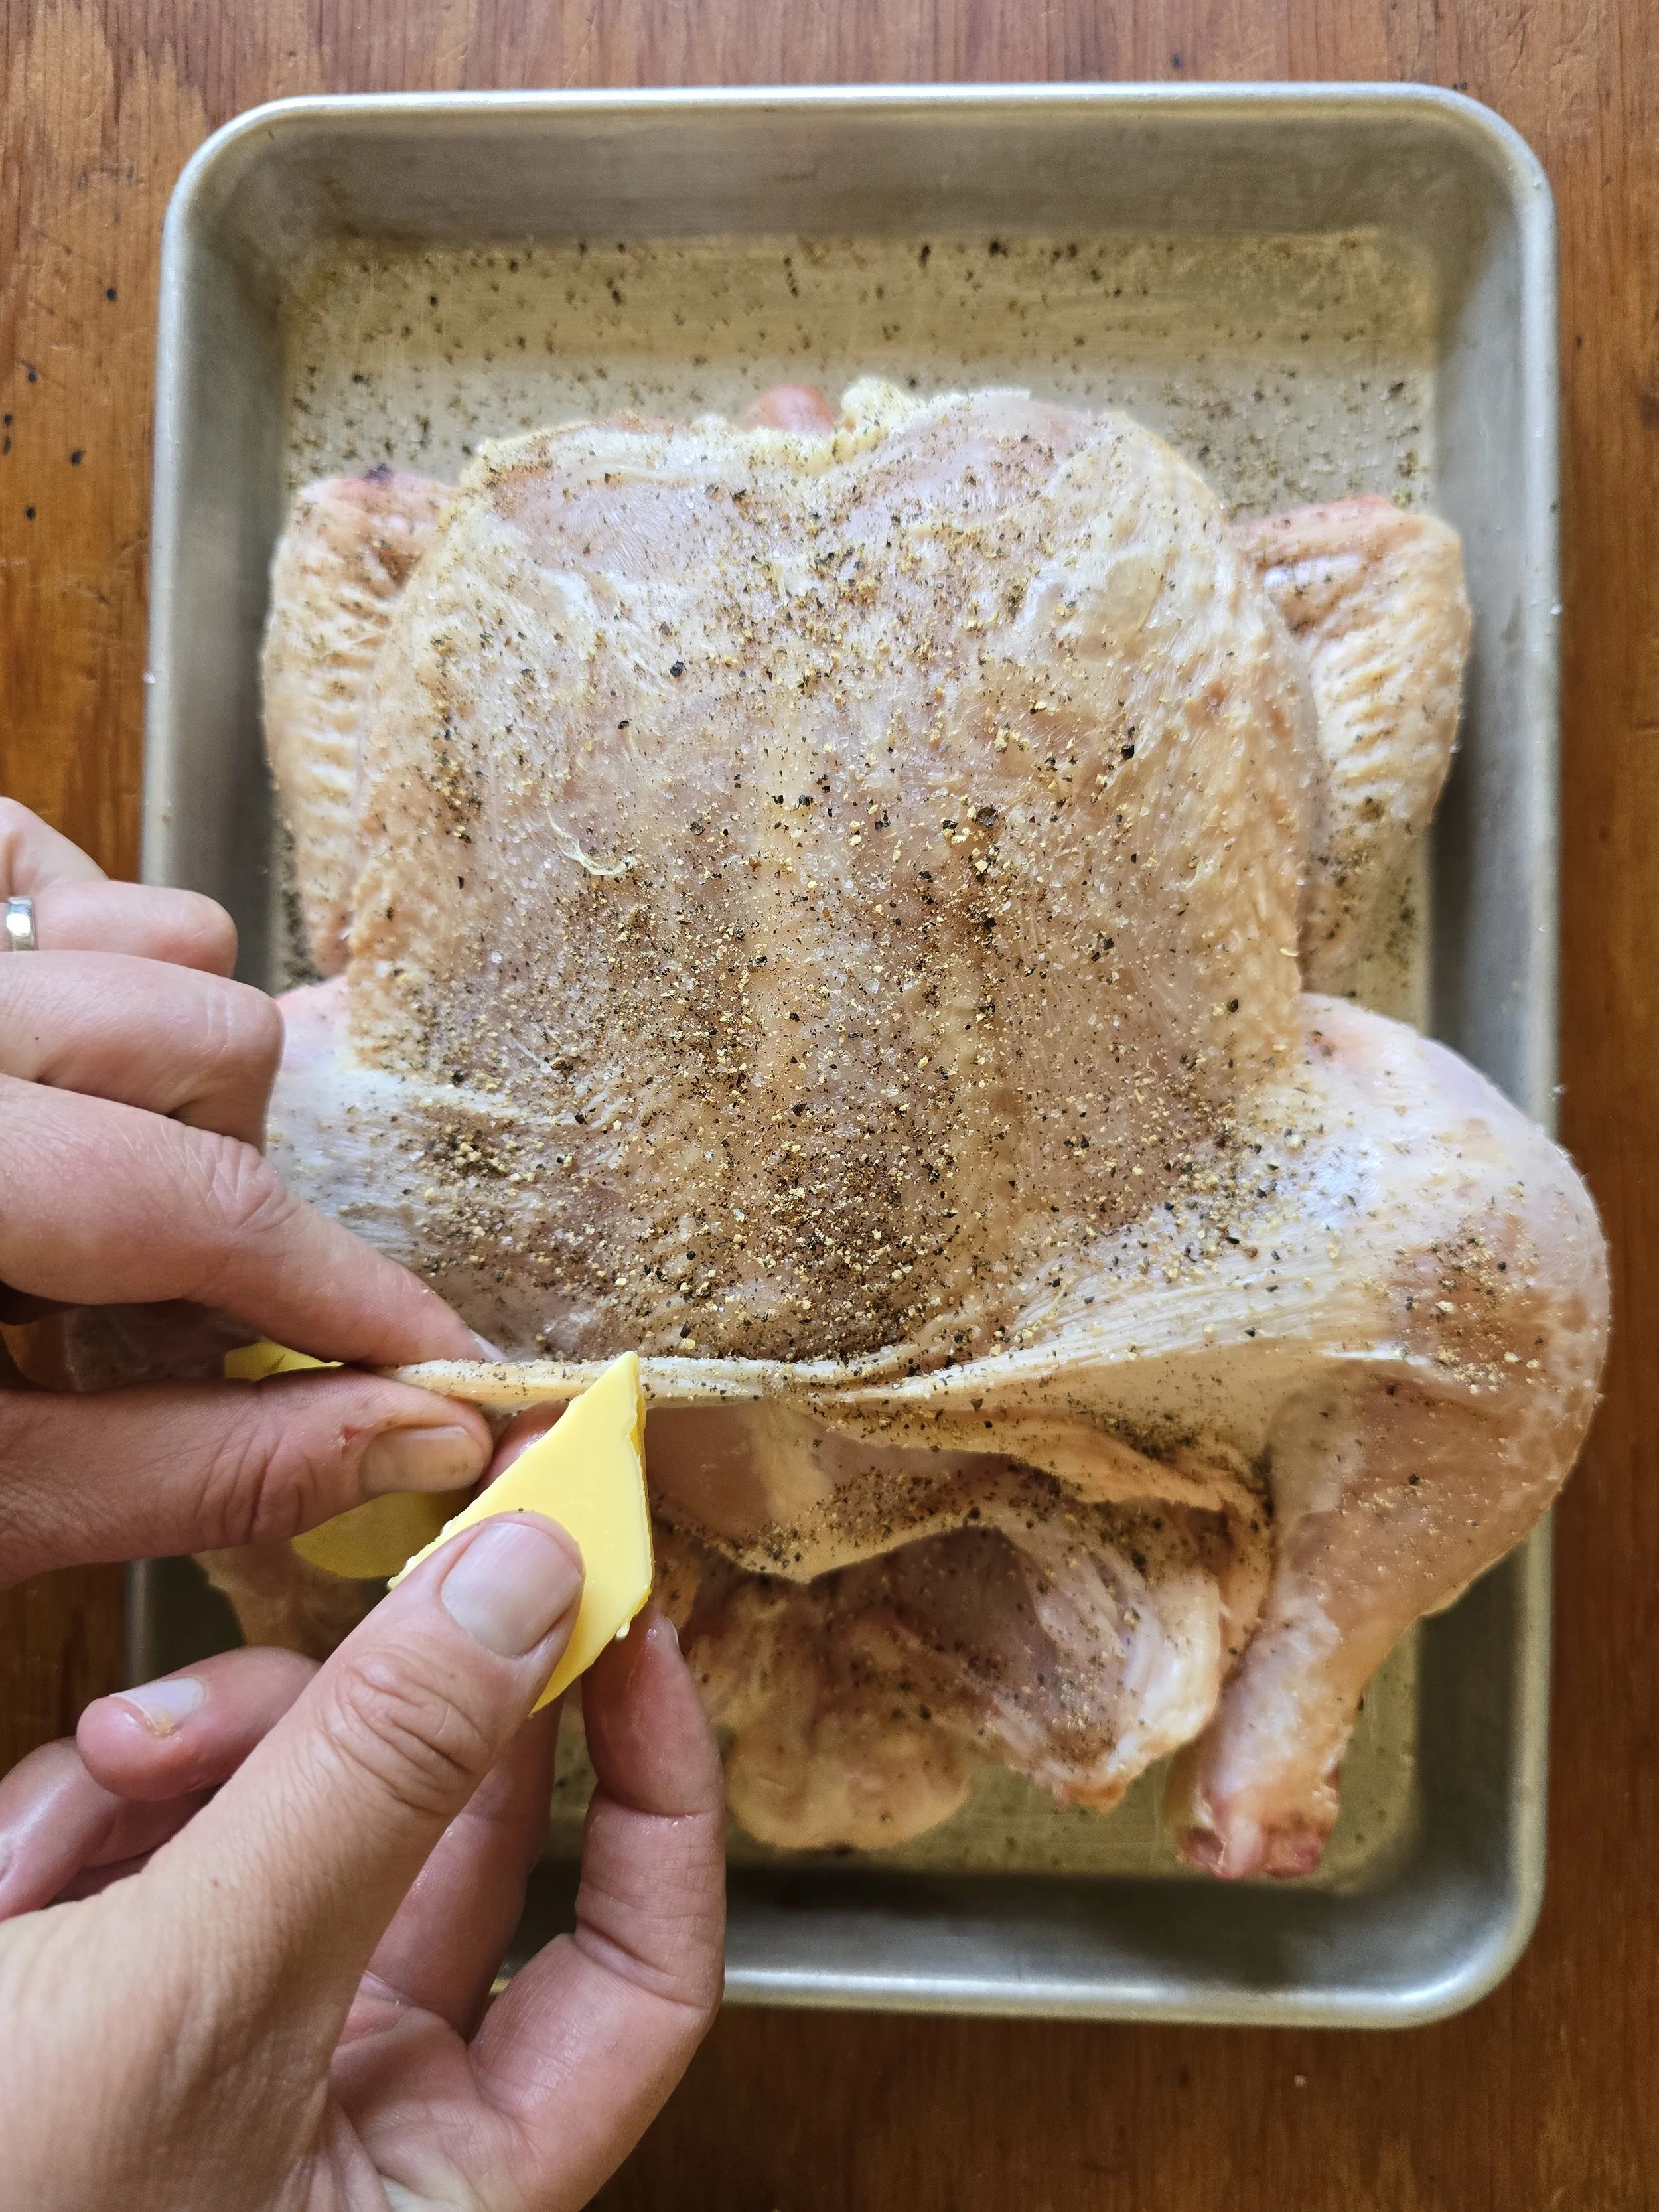
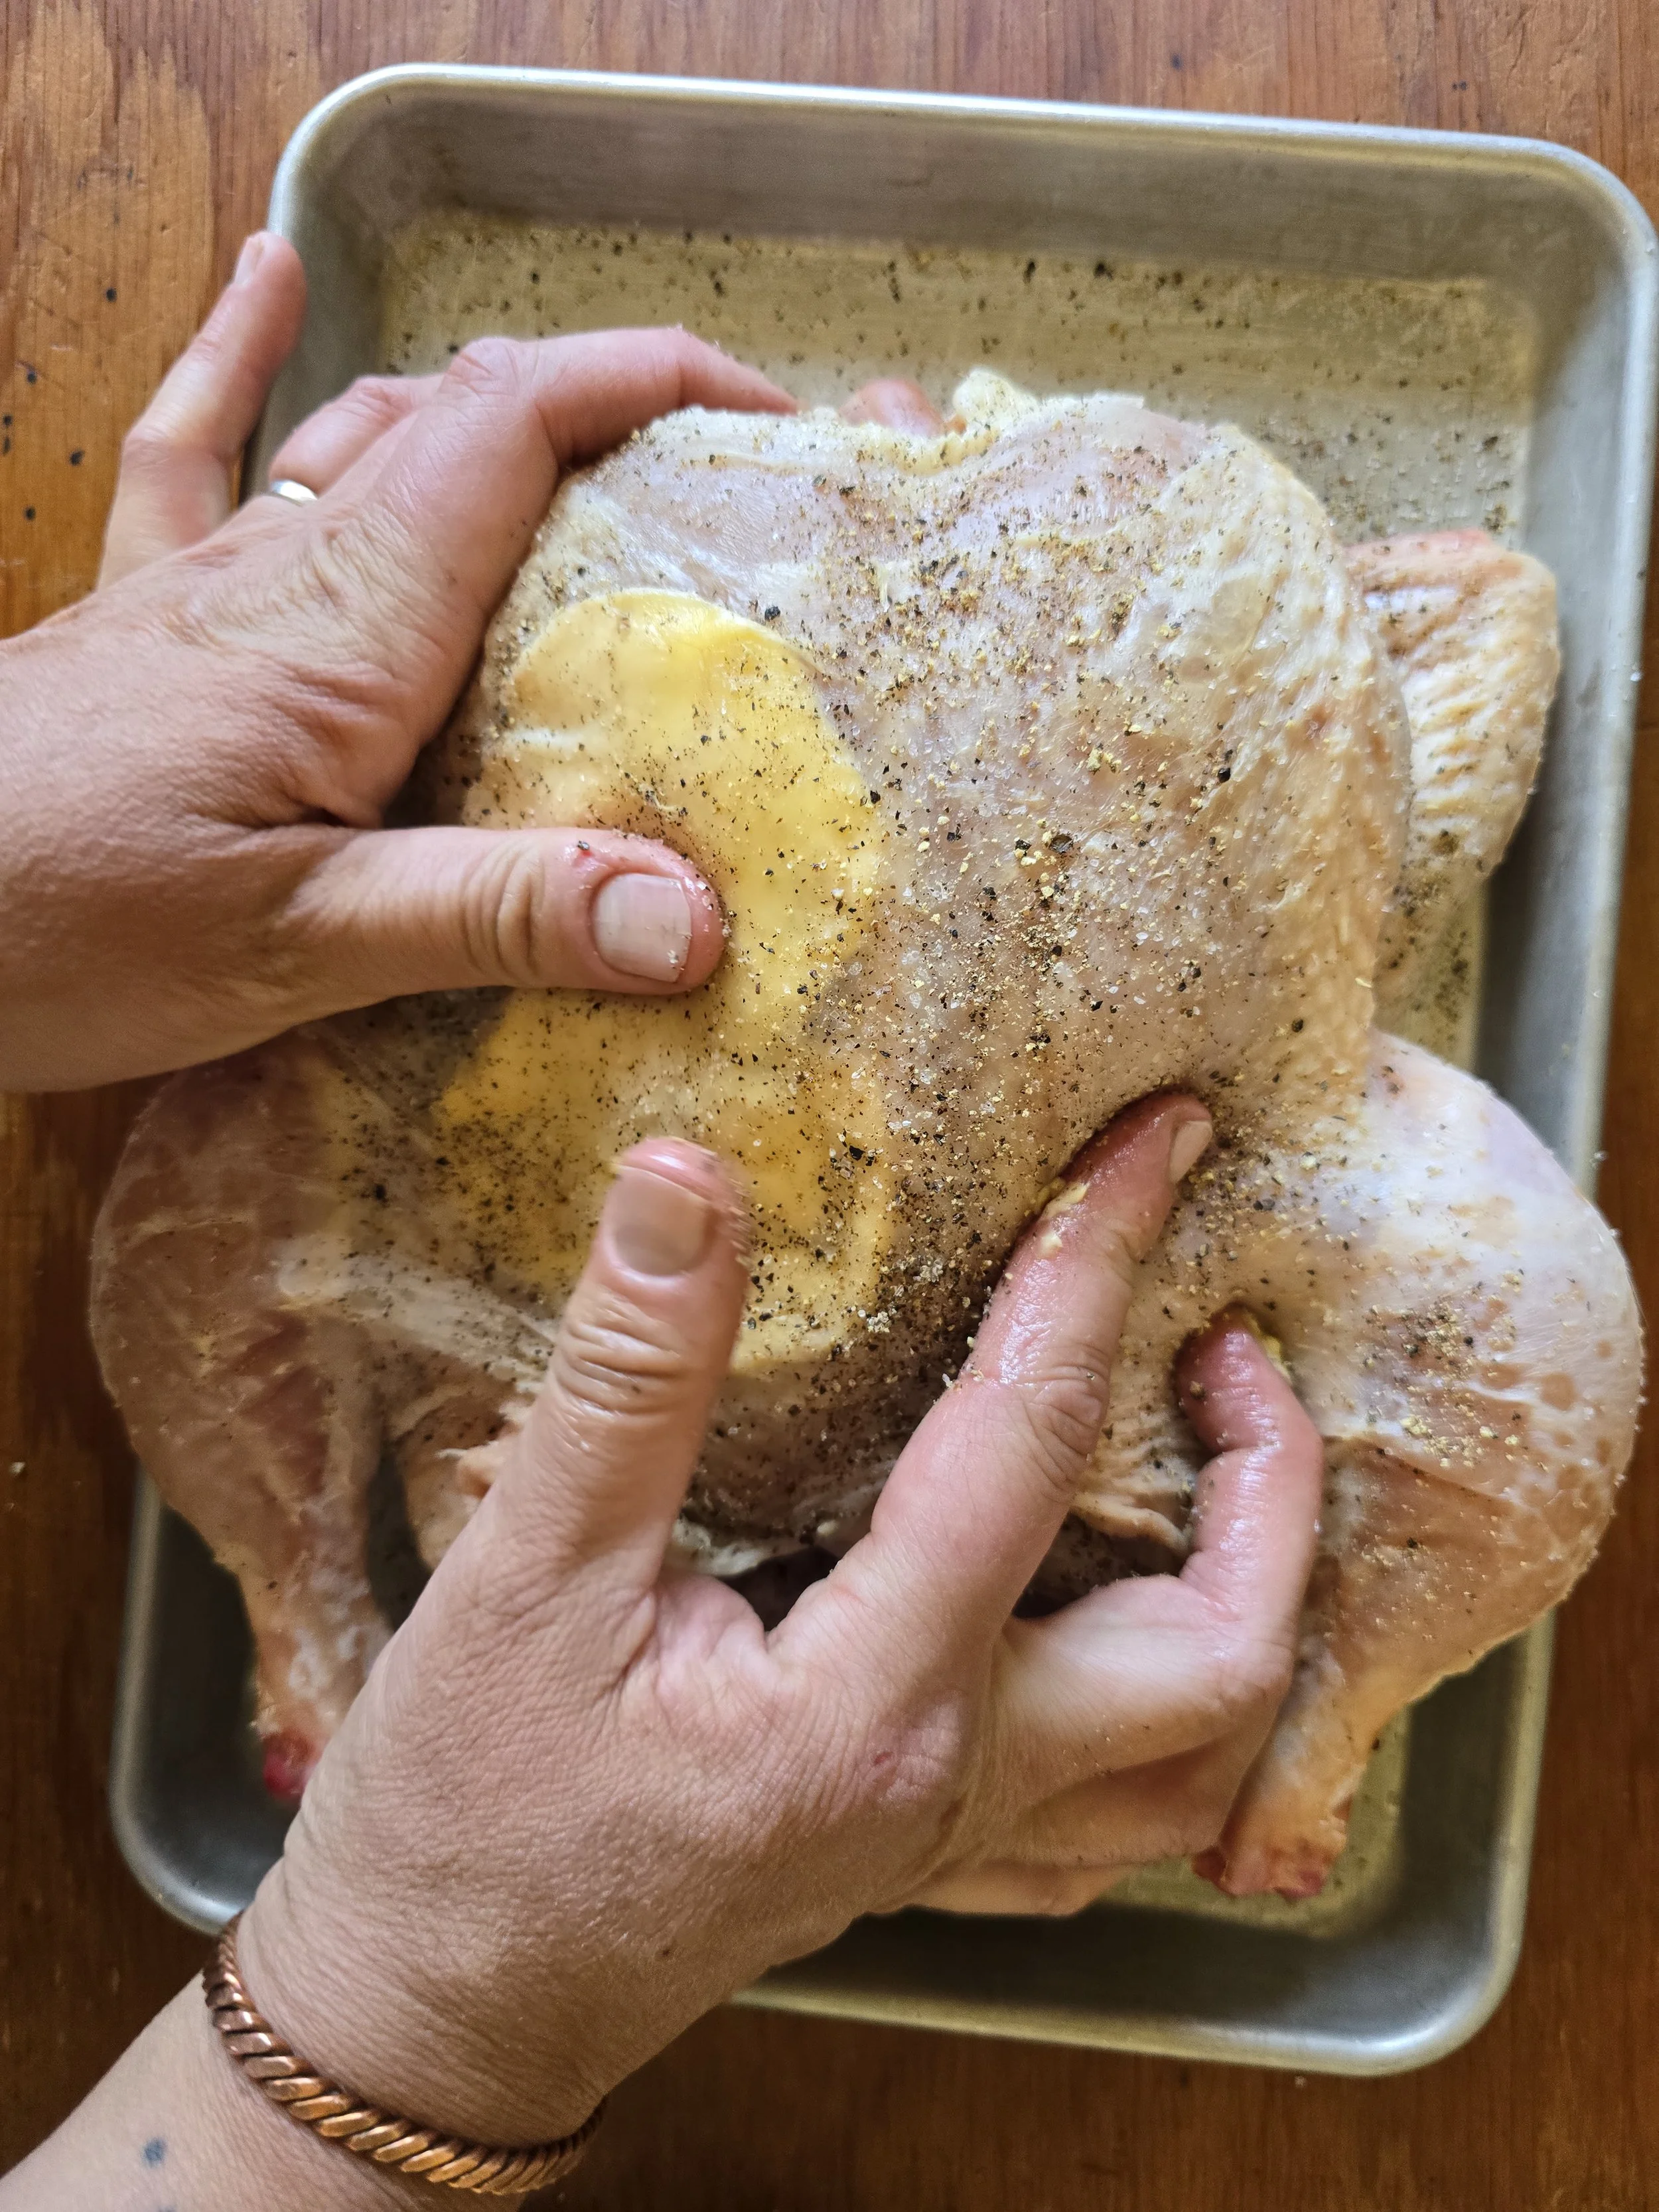
Preheat the oven to 400°F. Add a bit of finishing seasoning to the chicken — I enjoy a large flake salt for this, like Maldon or San Juan Sea Salt — and freshly cracked black pepper.
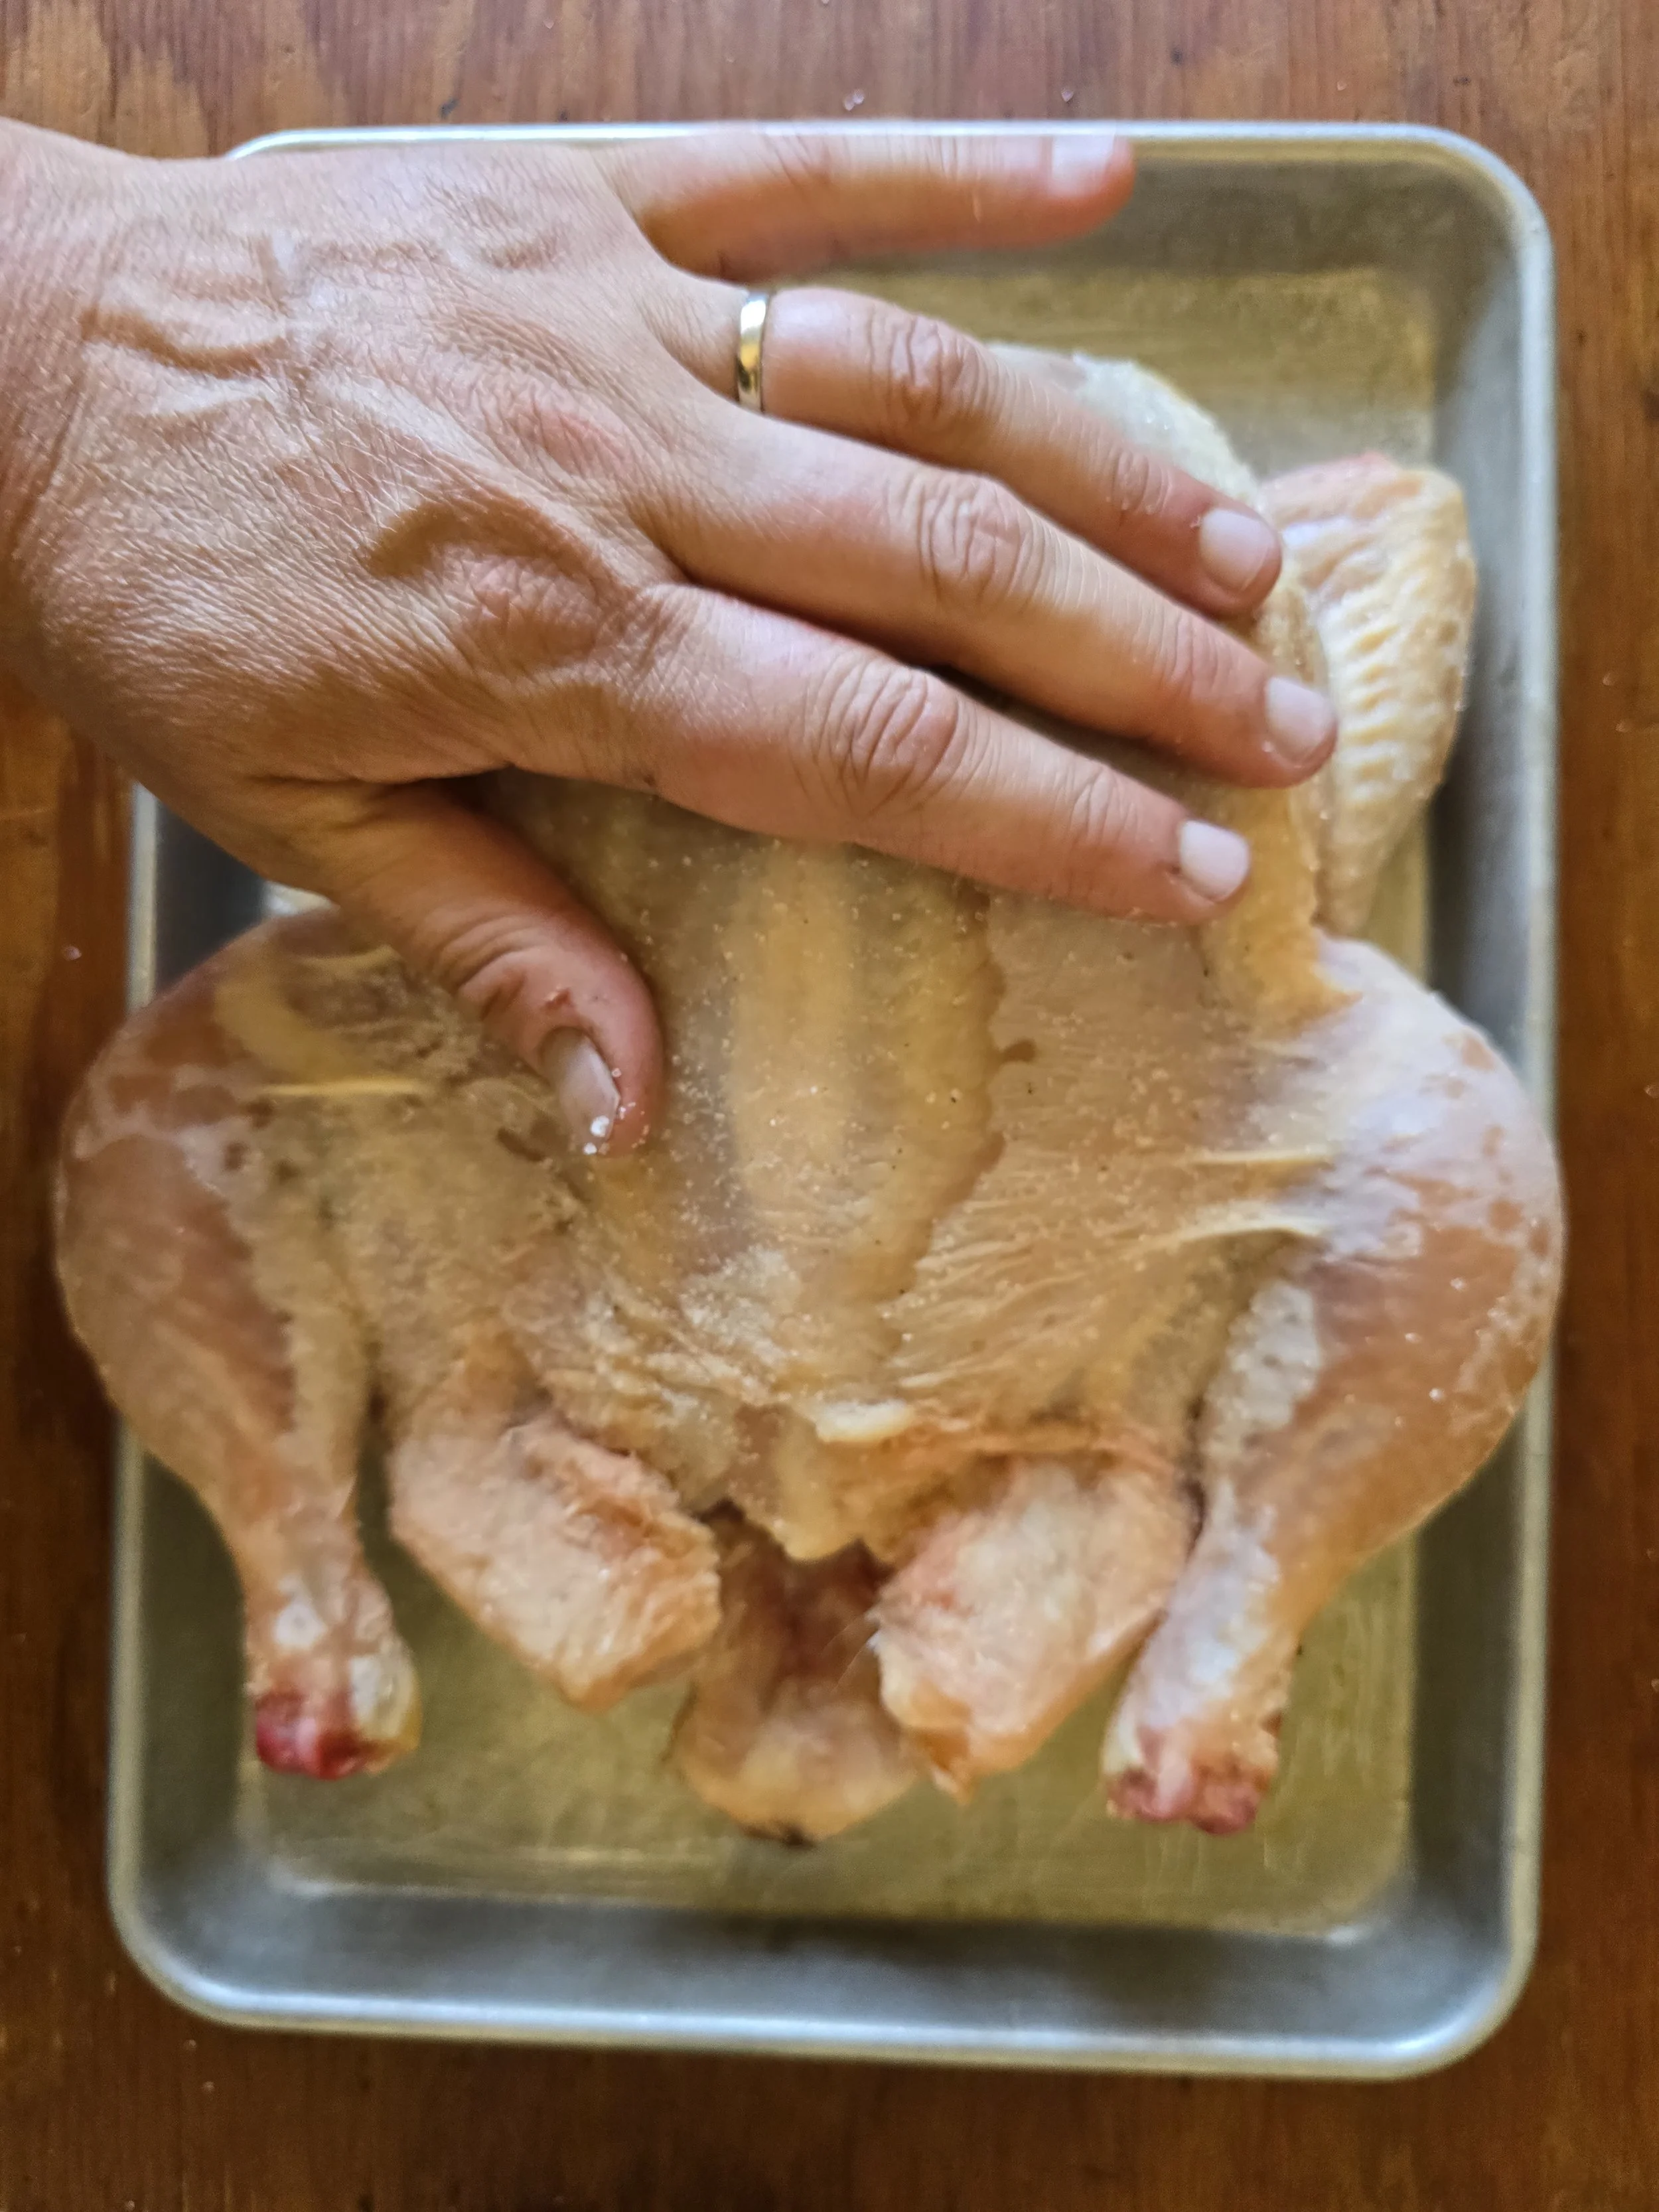
2. Preheat a skillet over medium-low heat. Stuff softened butter under the skin of the breasts and thighs.
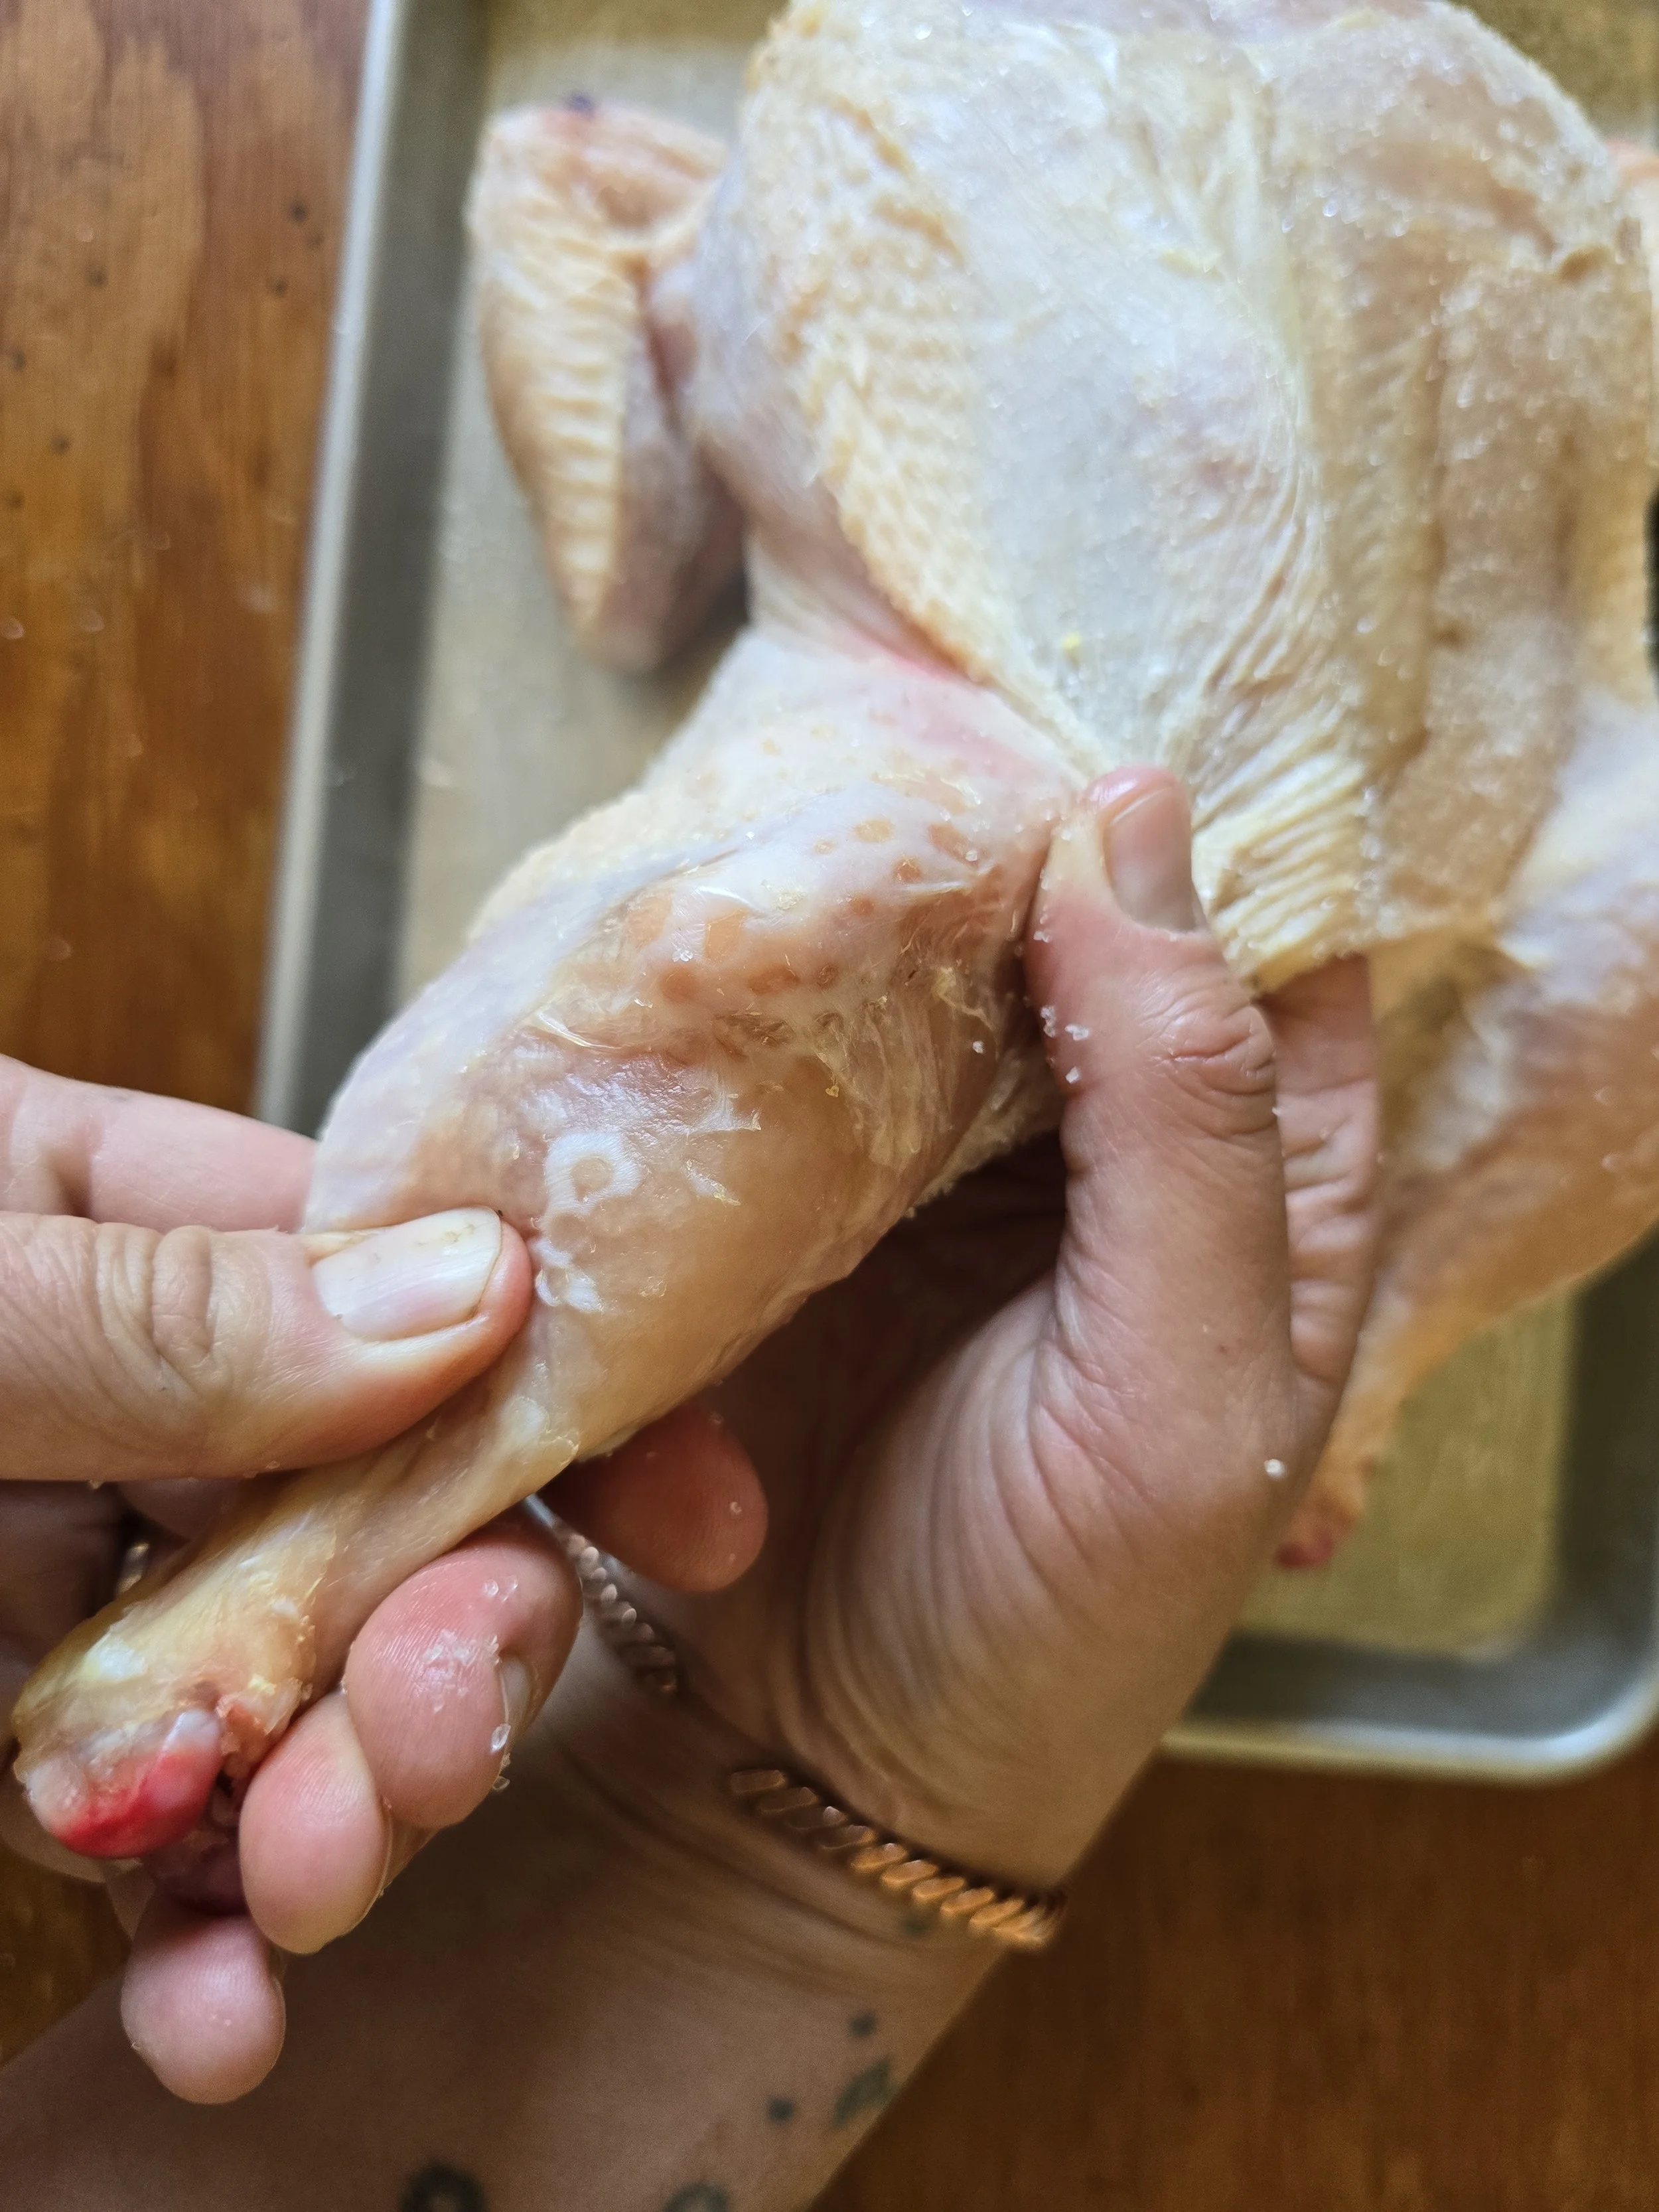
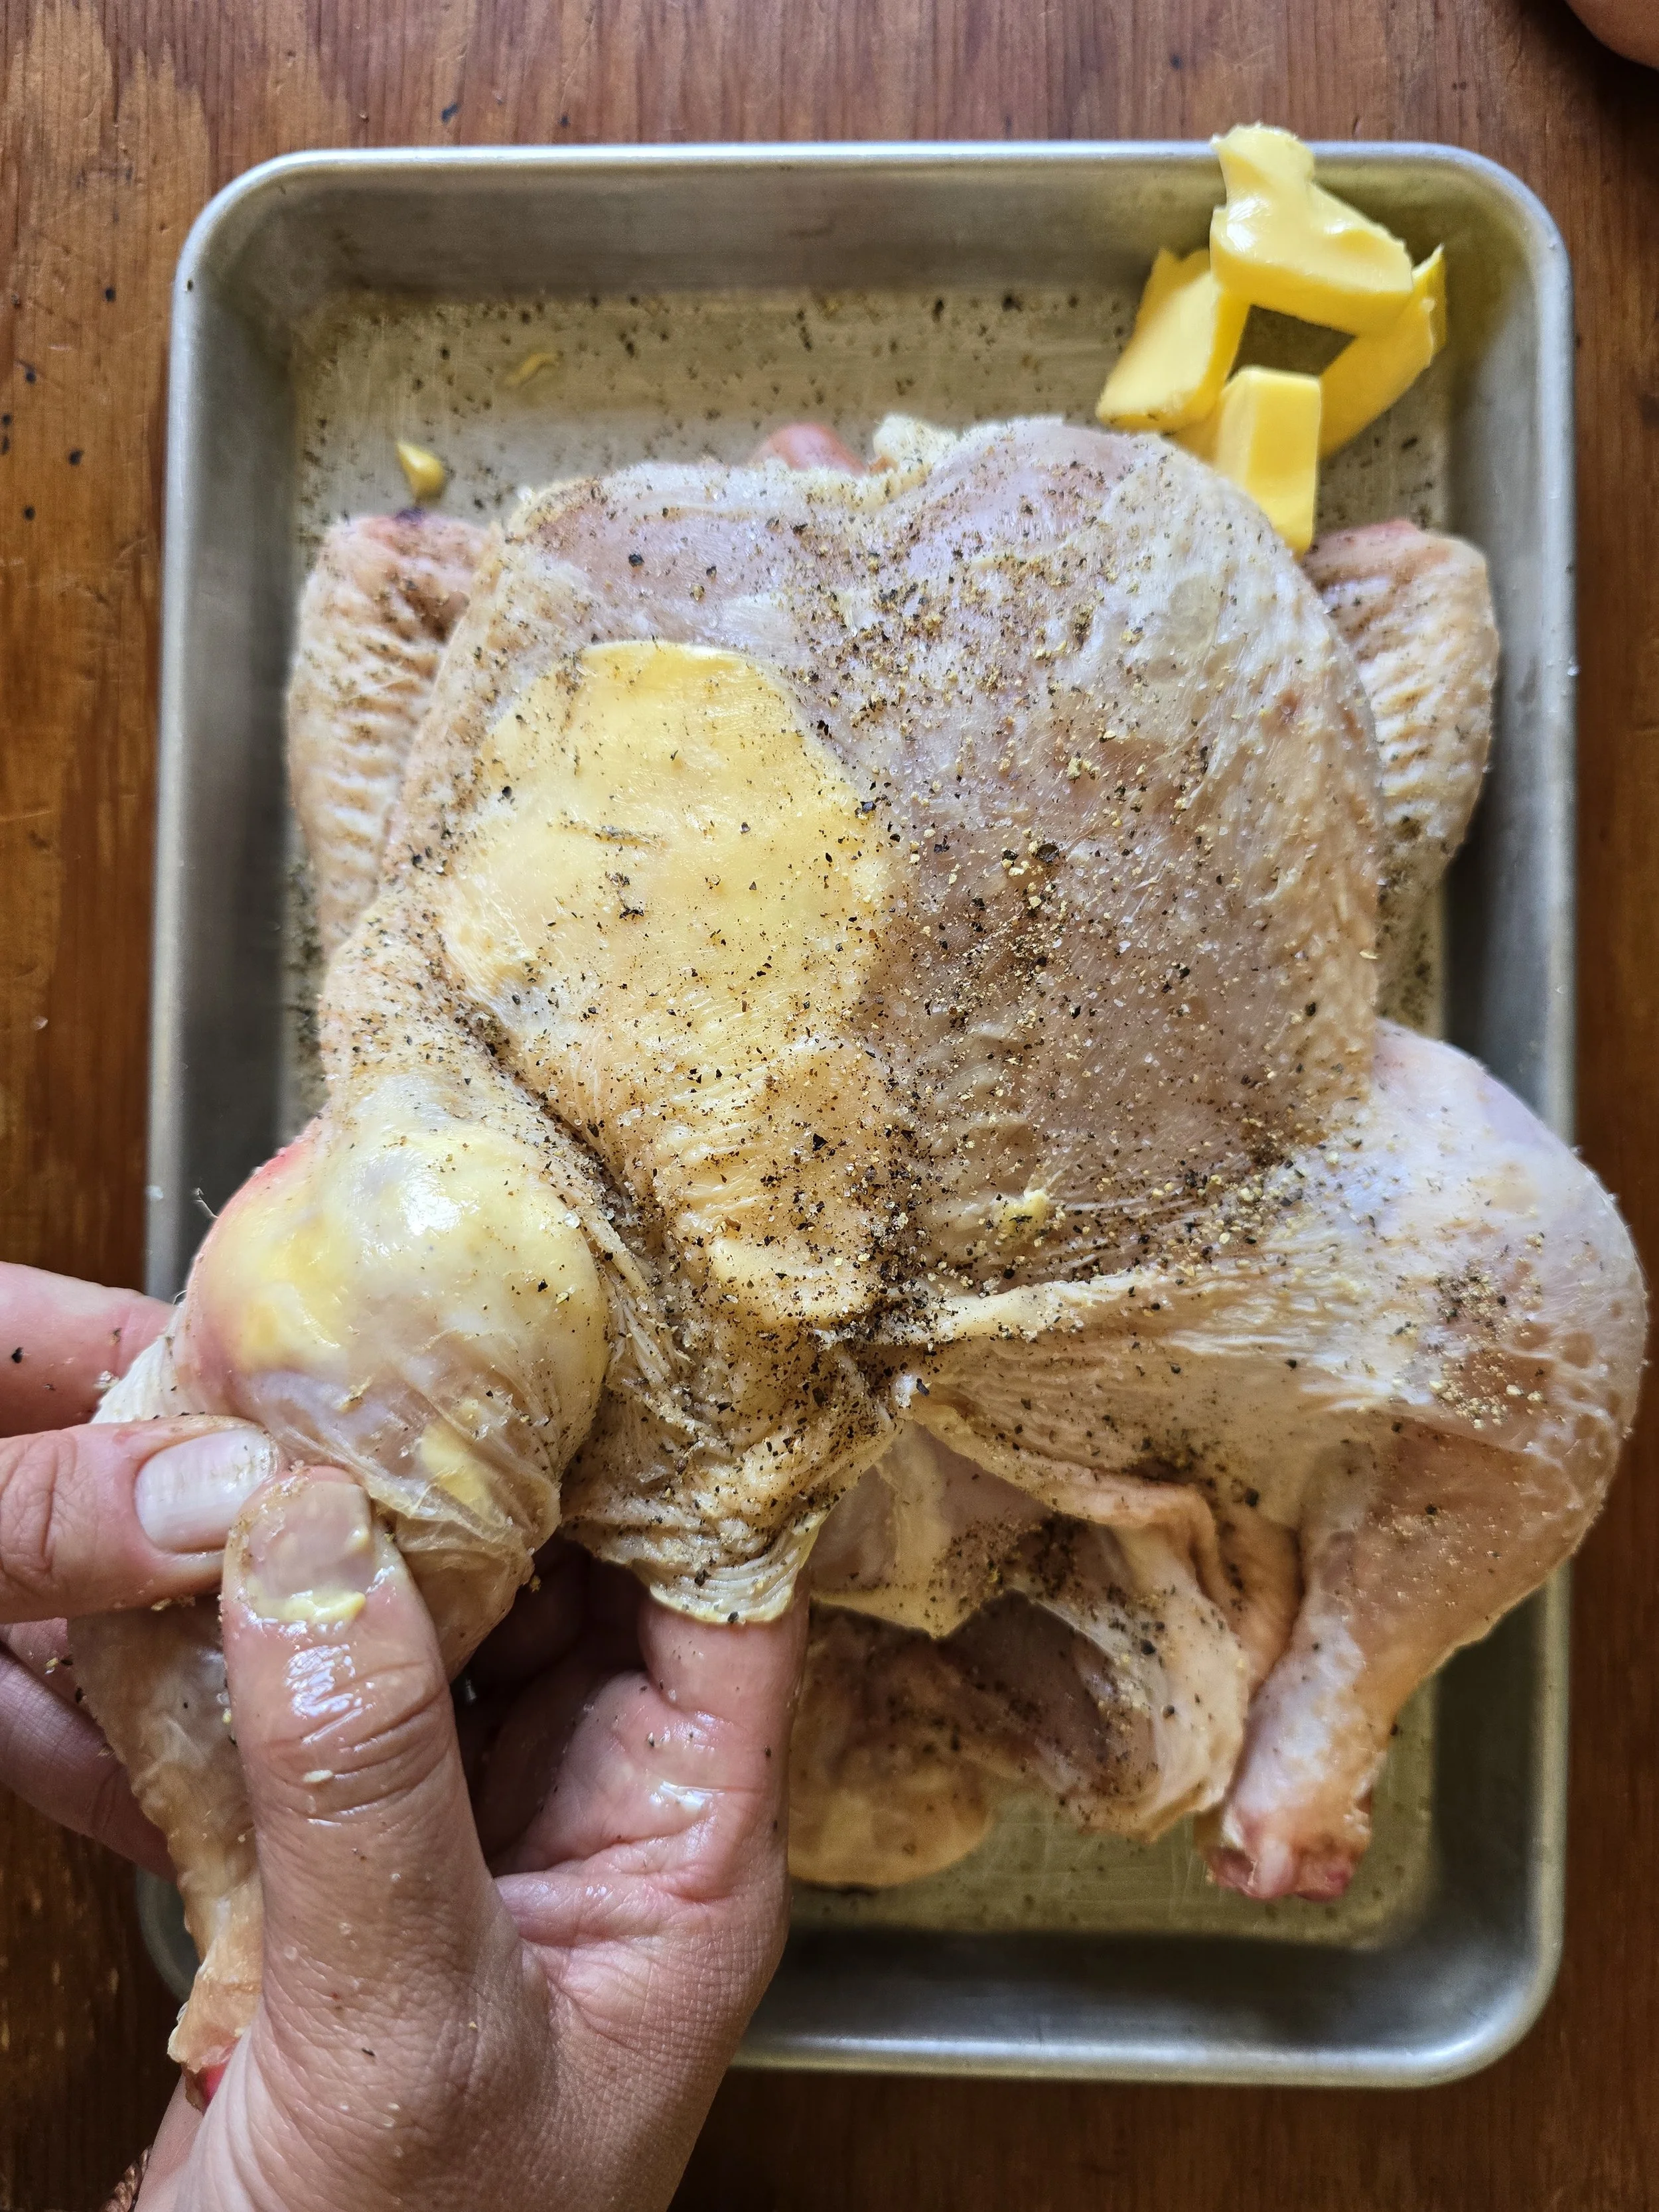
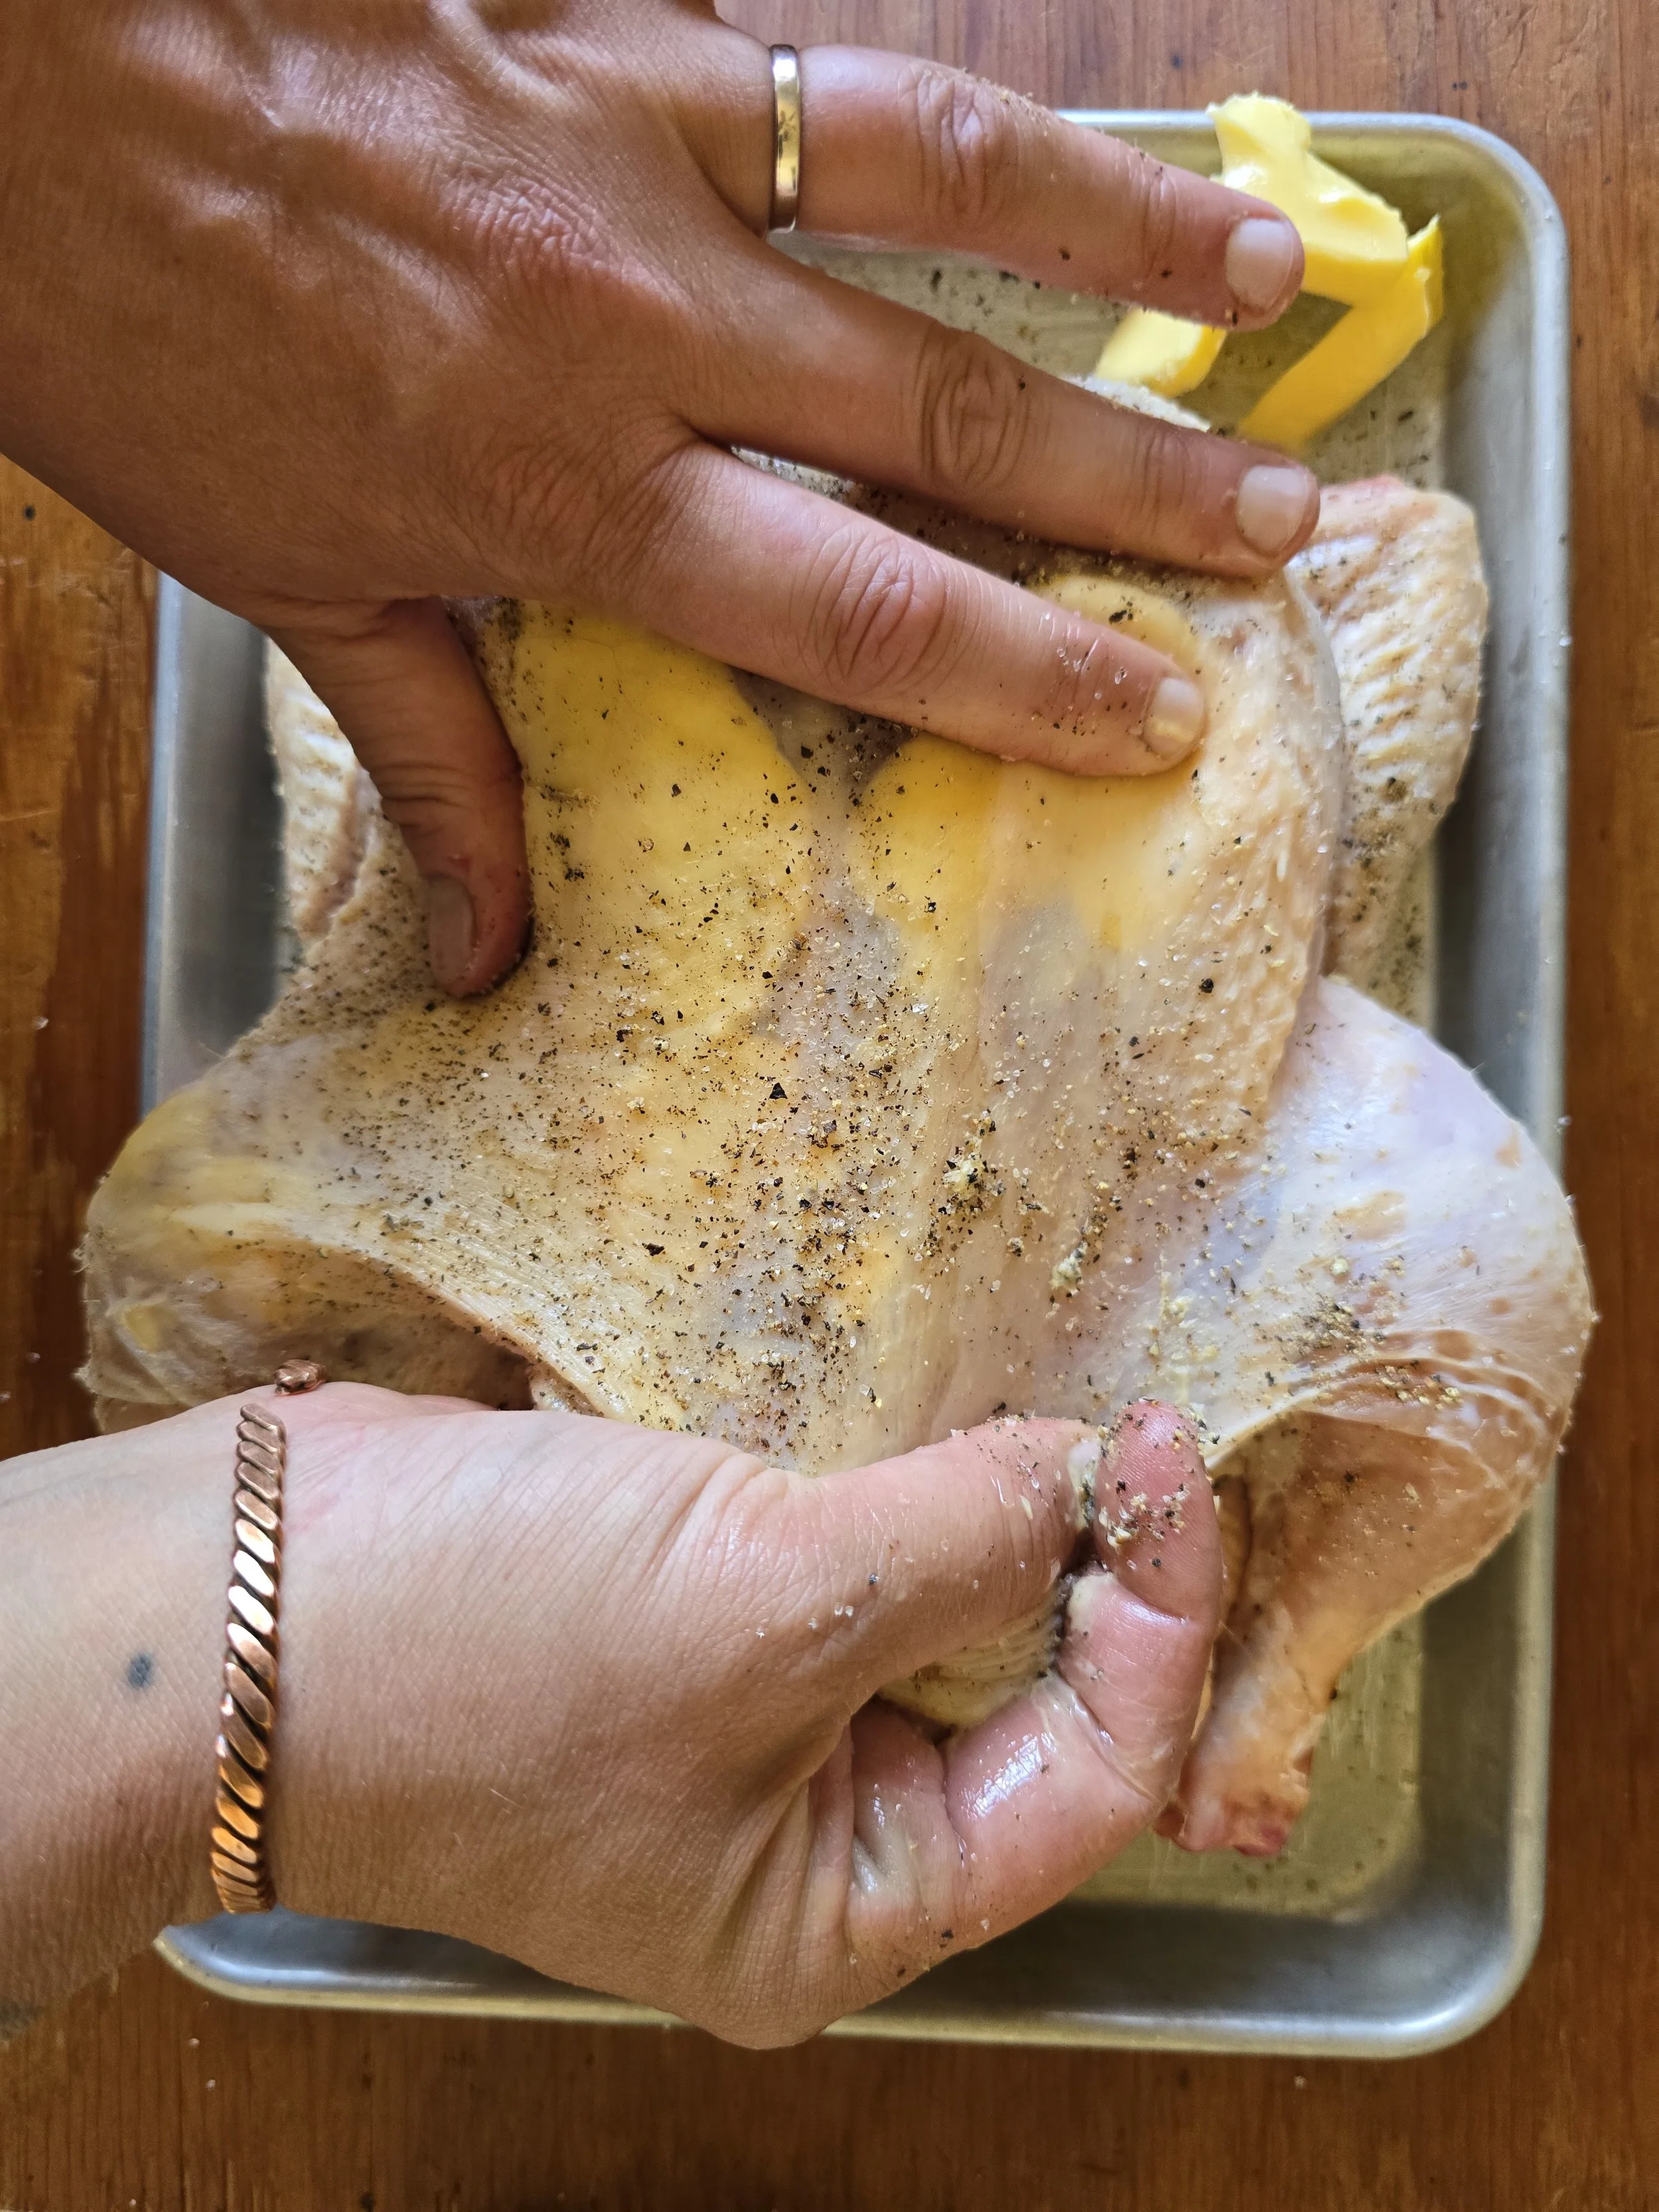
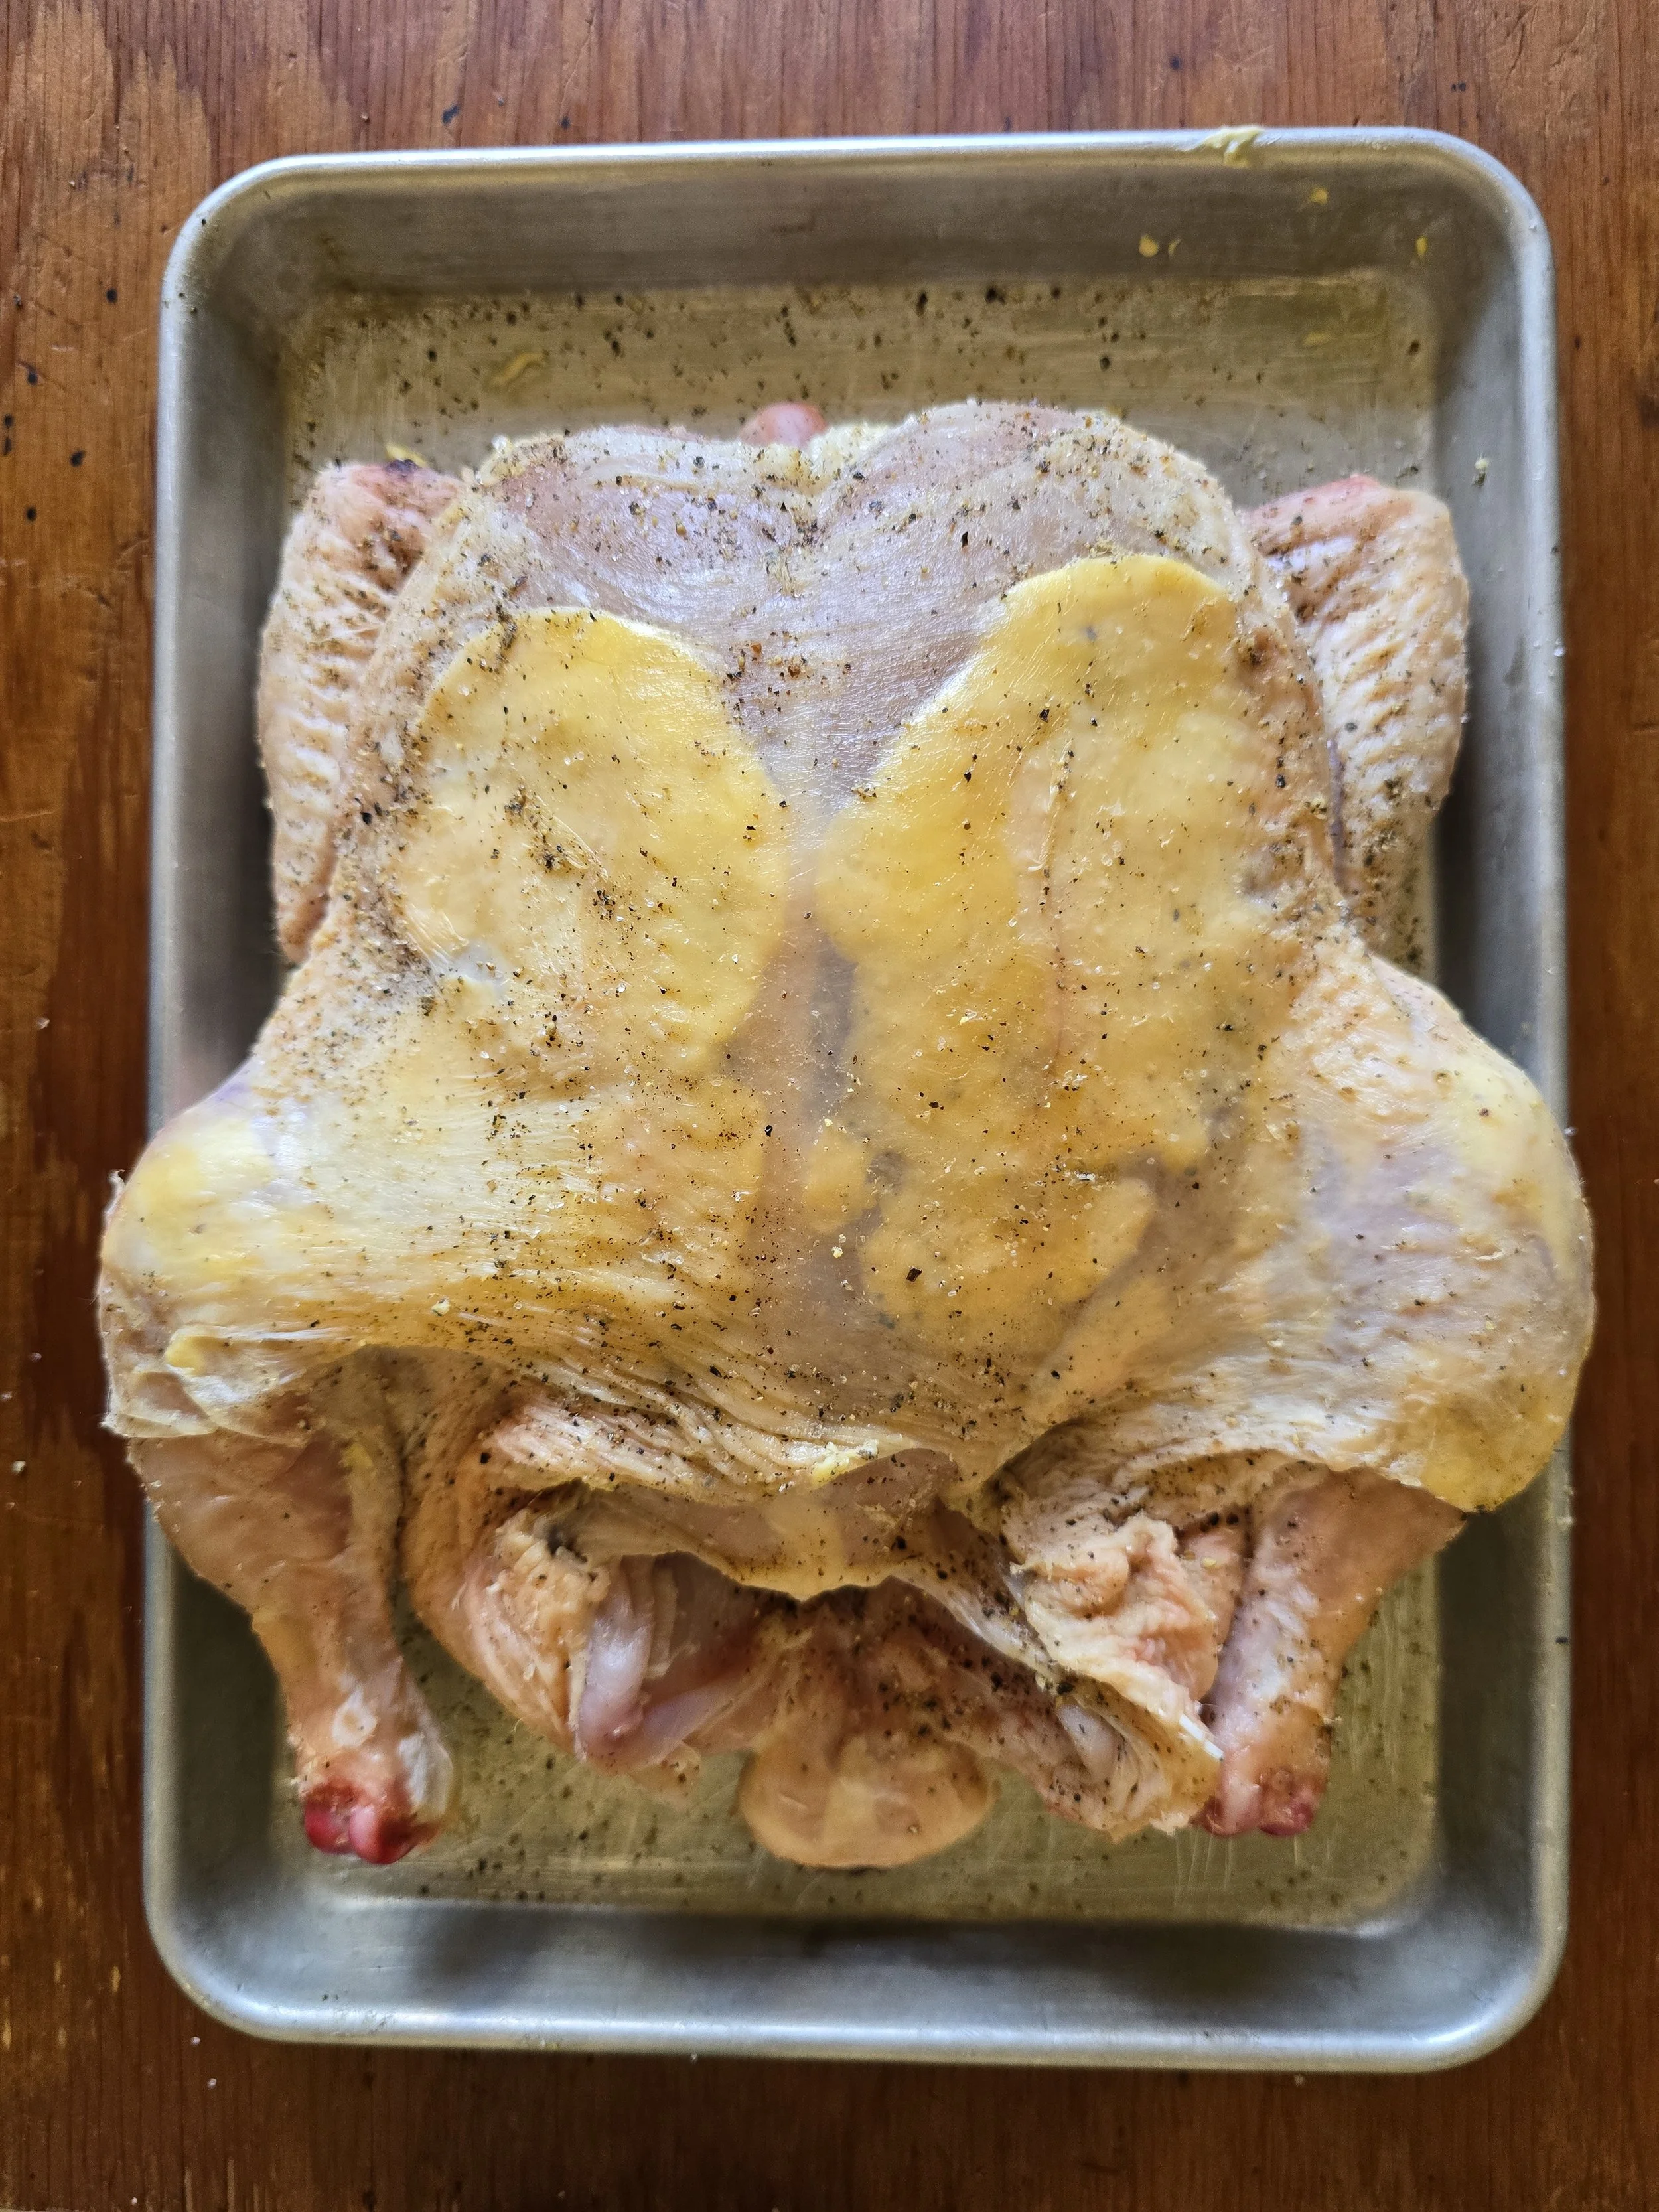
3. Fold the wings behind the back and tie the legs together.


4. Sear the chicken, breast-side down, in the preheated skillet with a tablespoon or so of high heat safe grease or oil, I use tallow, until the skin is a saturated golden brown. Be careful not to burn it.
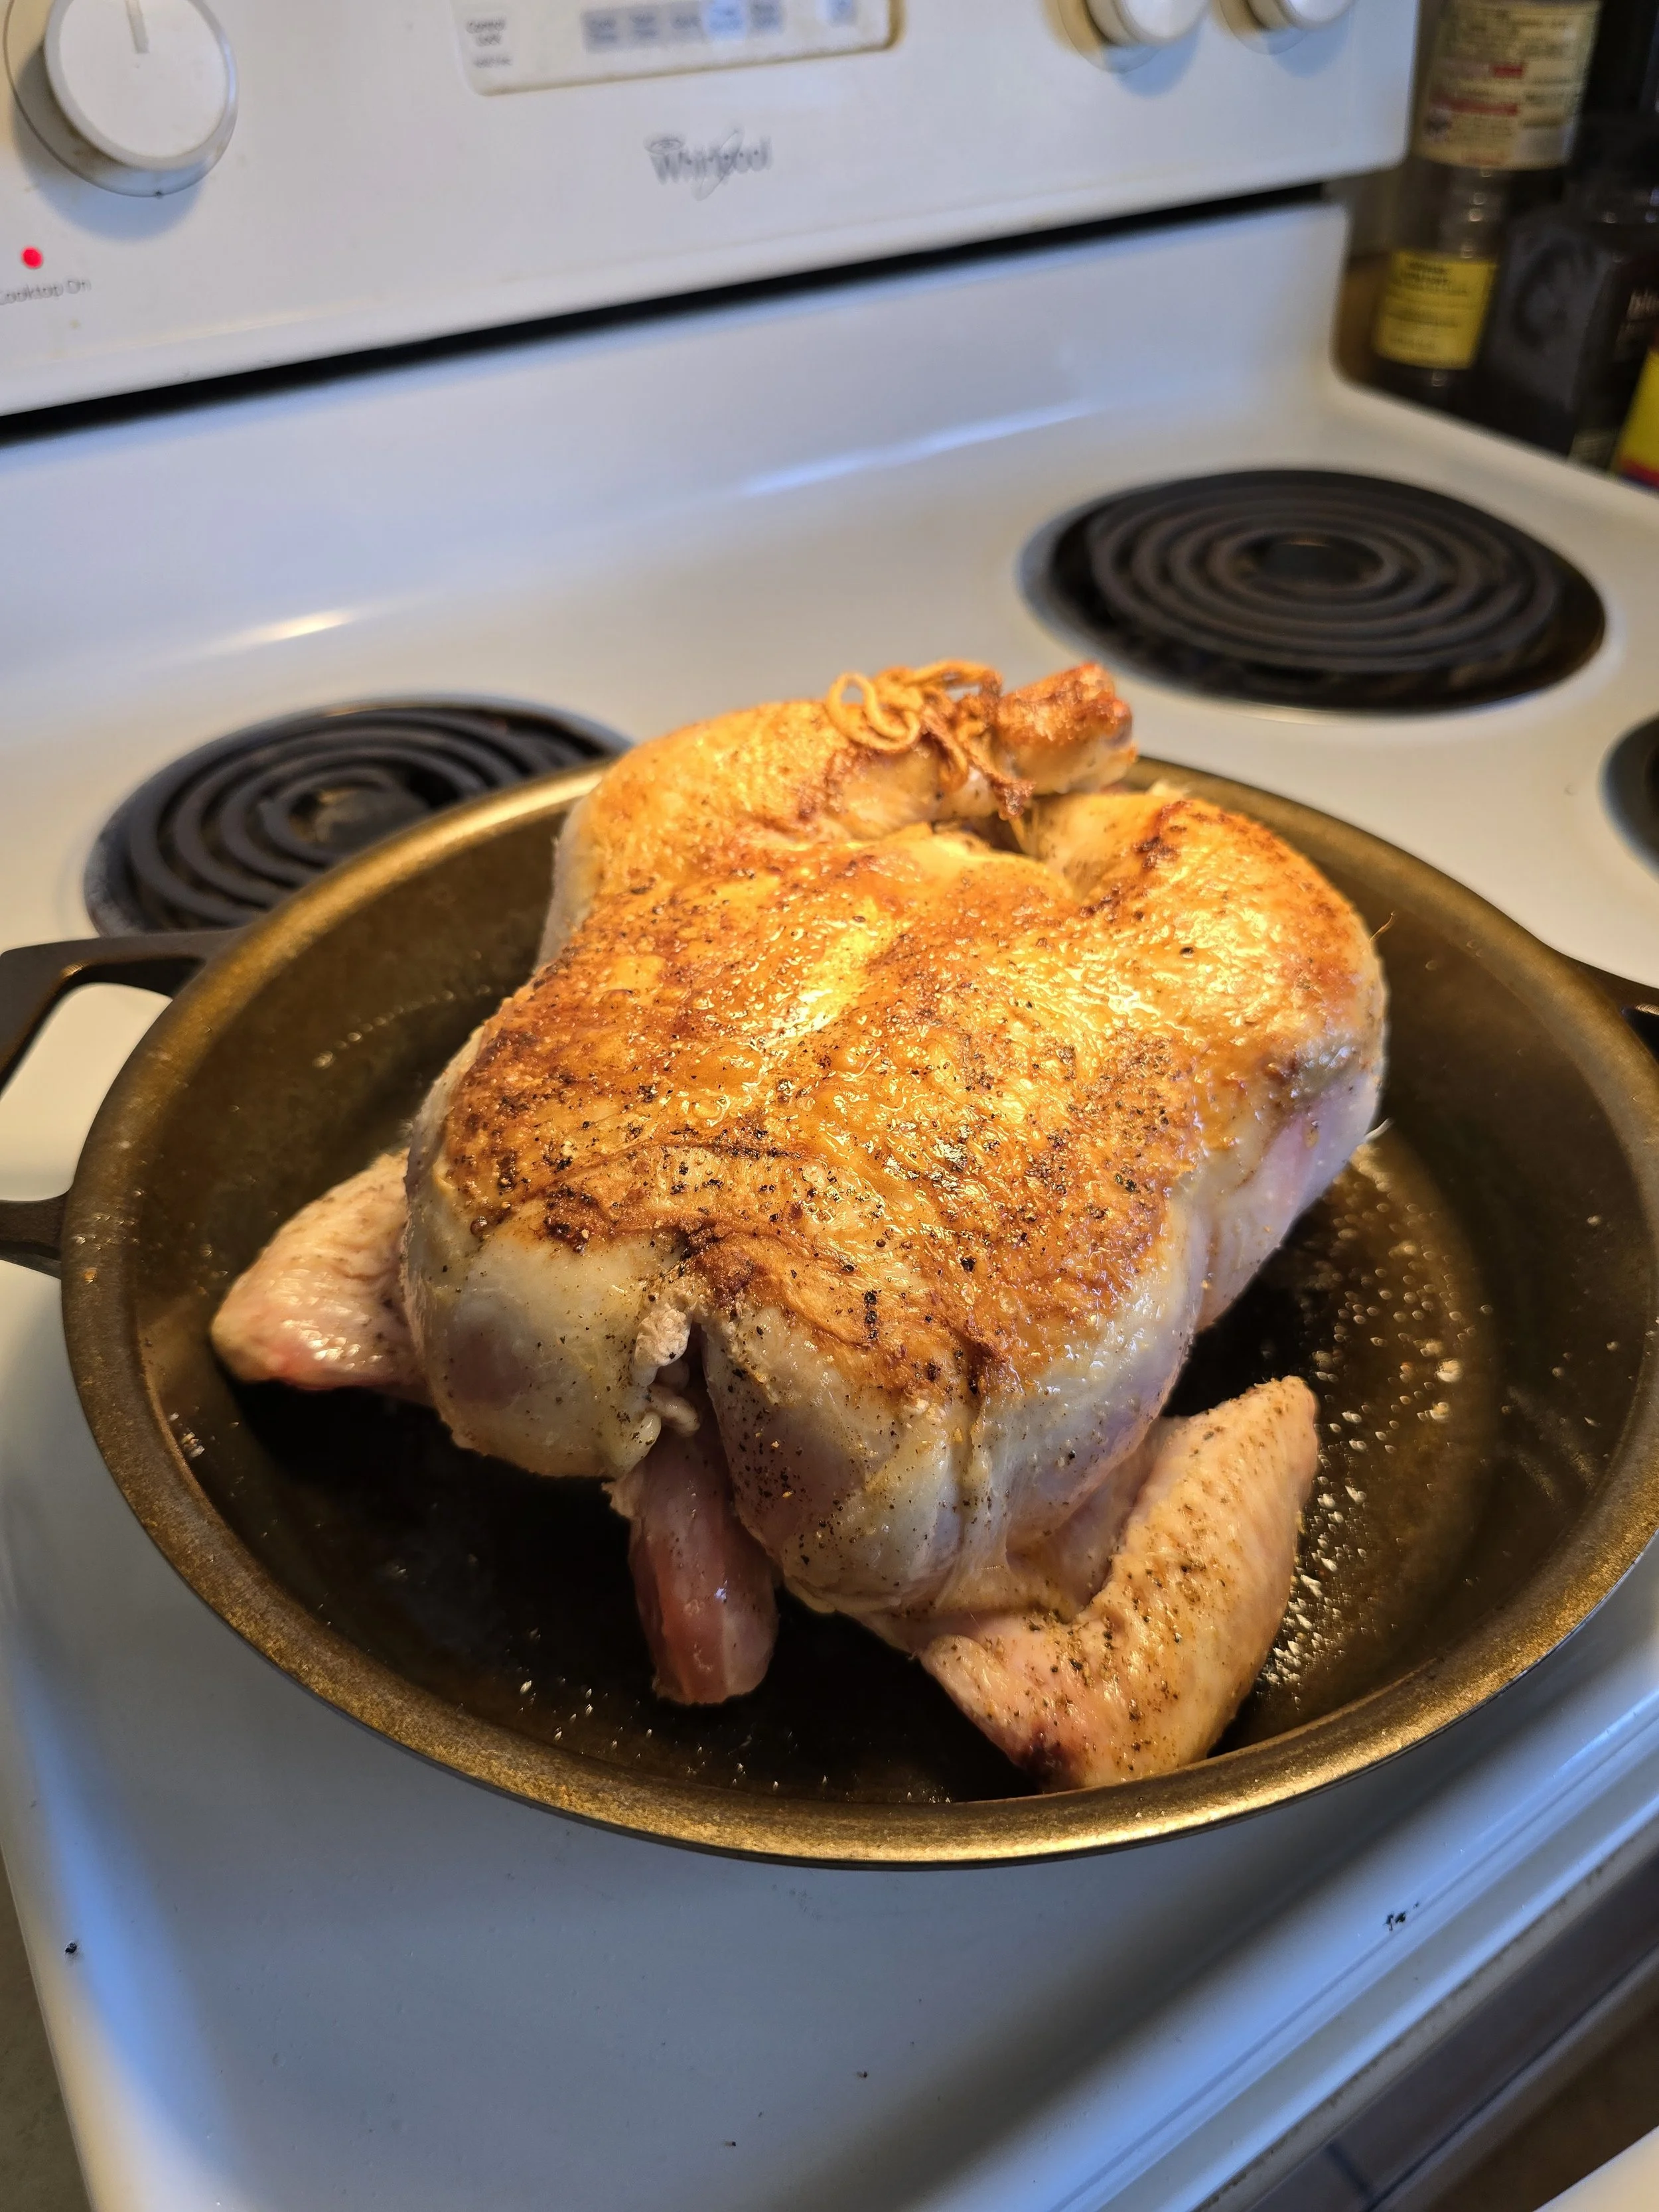
5. Flip the chicken breast-side up. Baste with any juices or melted butter in the skillet, then roast in the skillet at 400°F for 25 minutes.

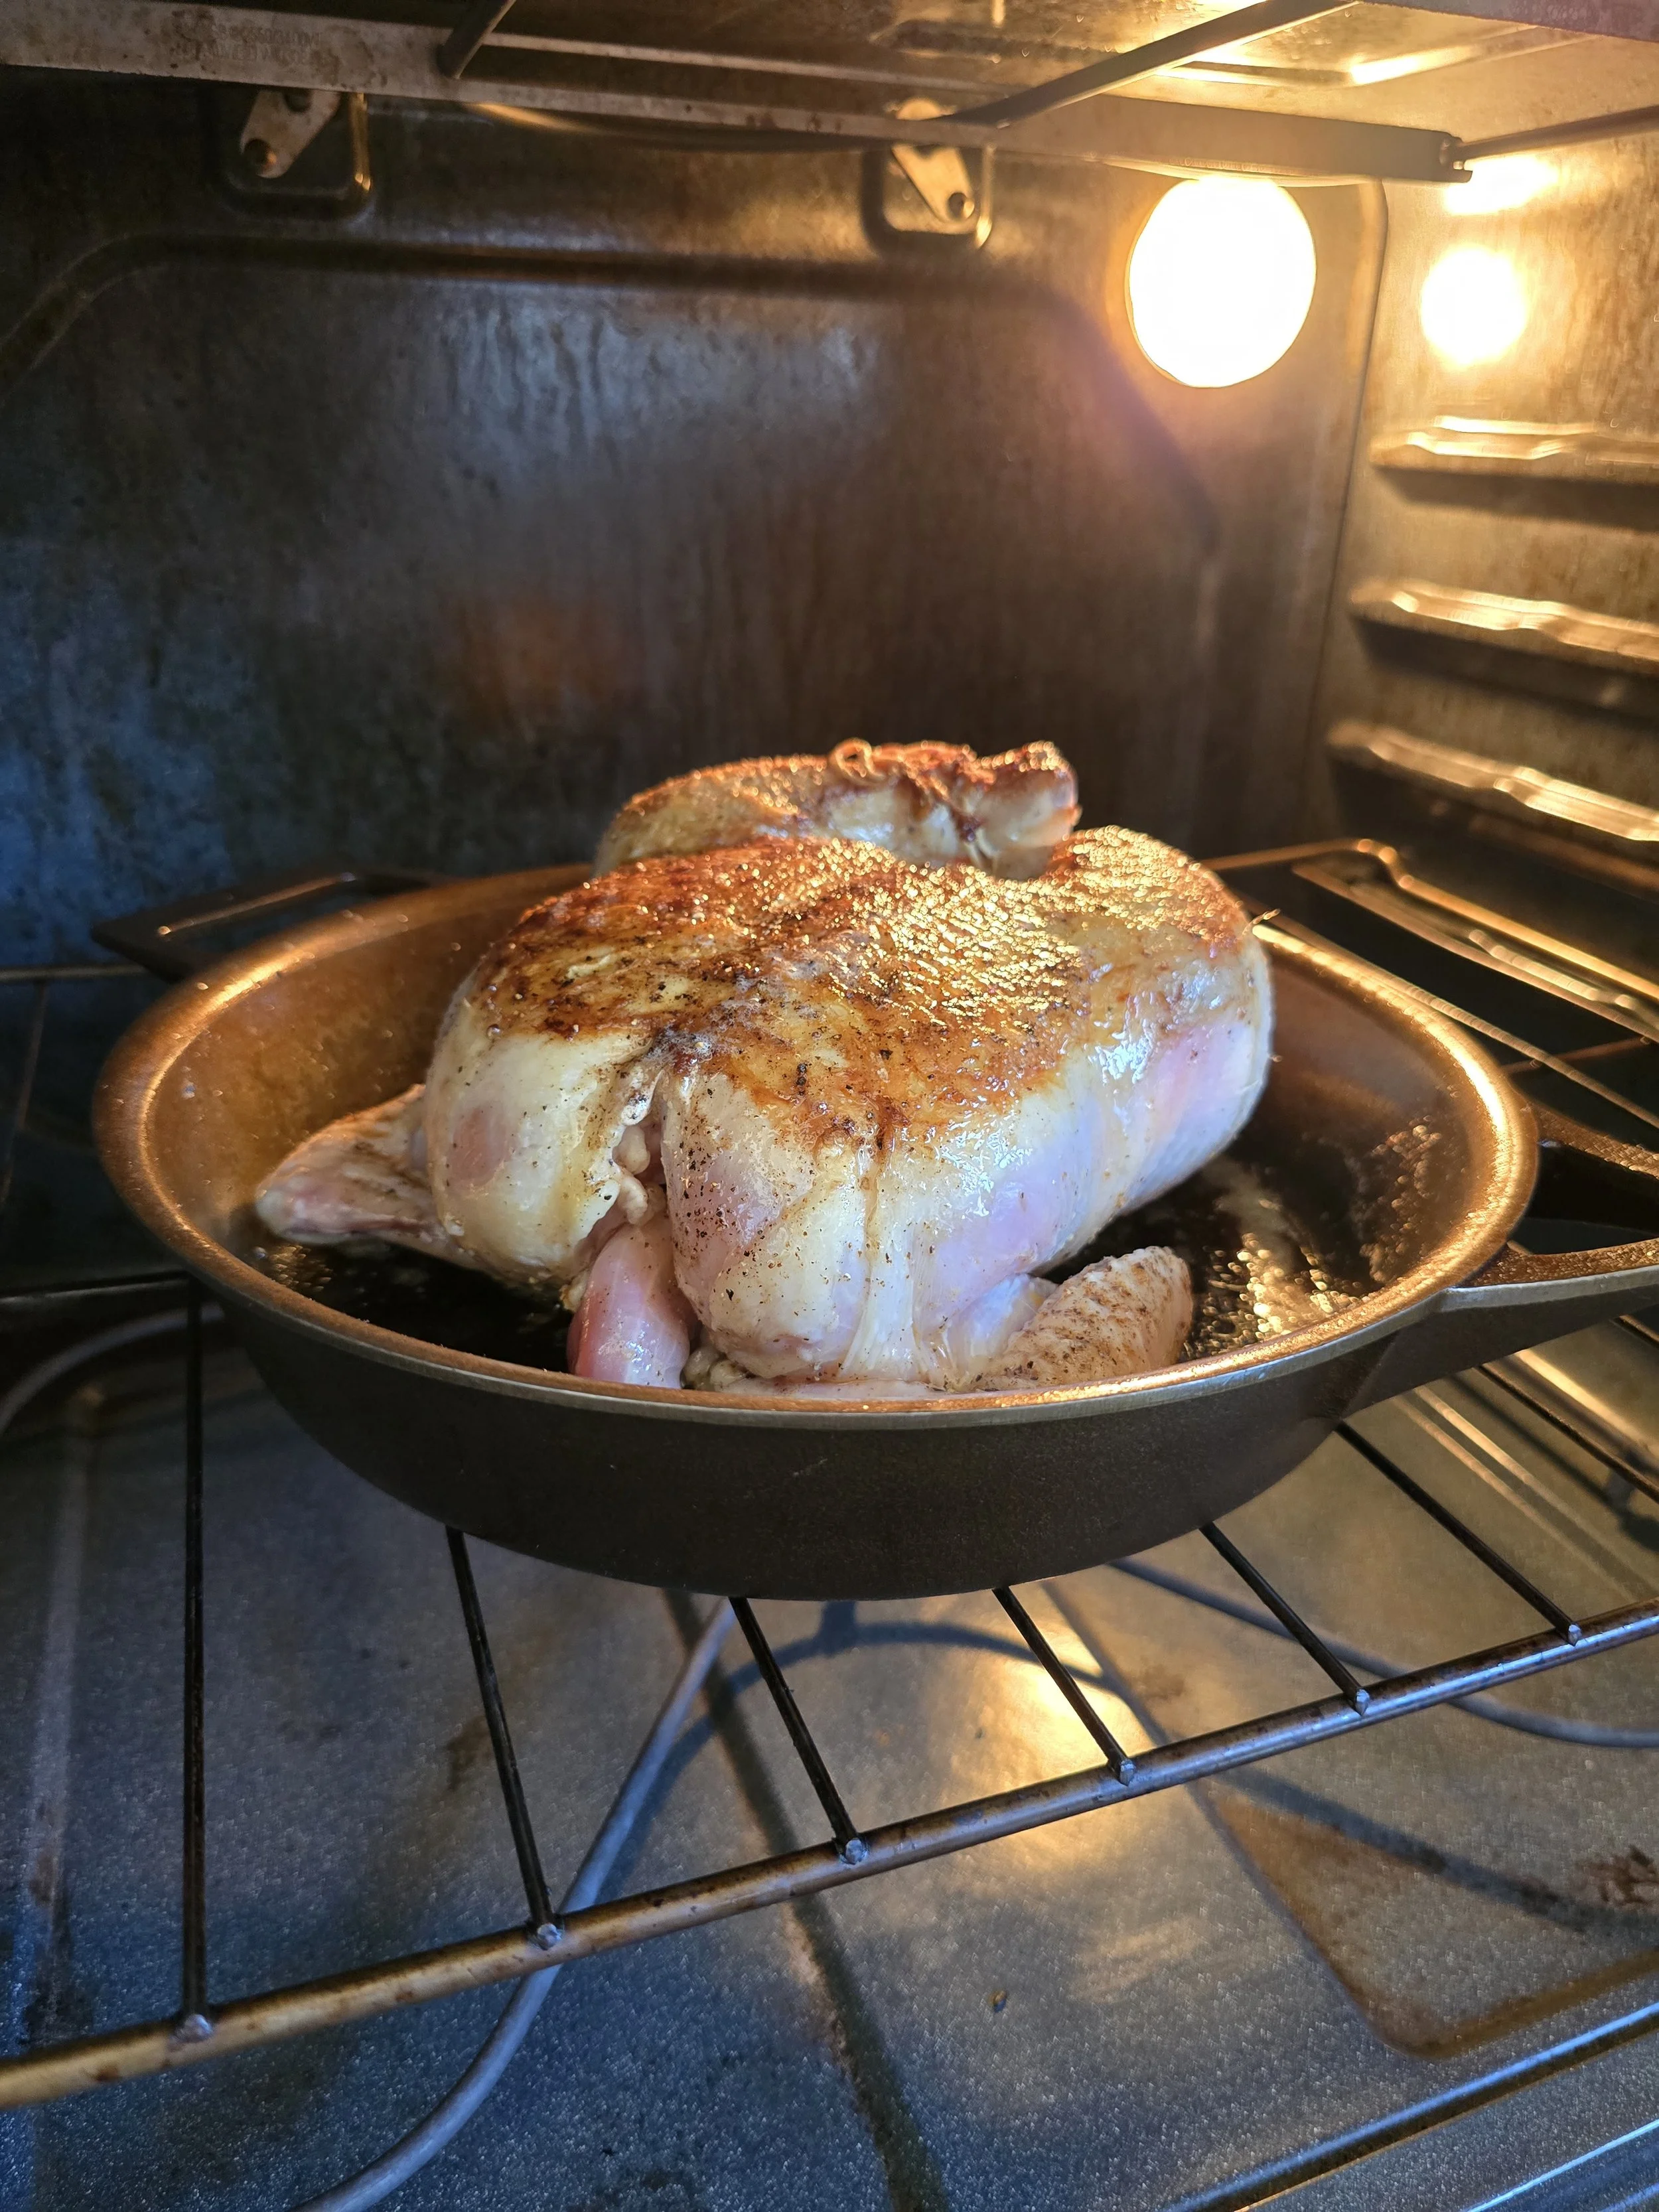
6. After 25 minutes, take temperature in the thickest part of the bird, baste again and continue roasting at 400°F for another 15–20 minutes.
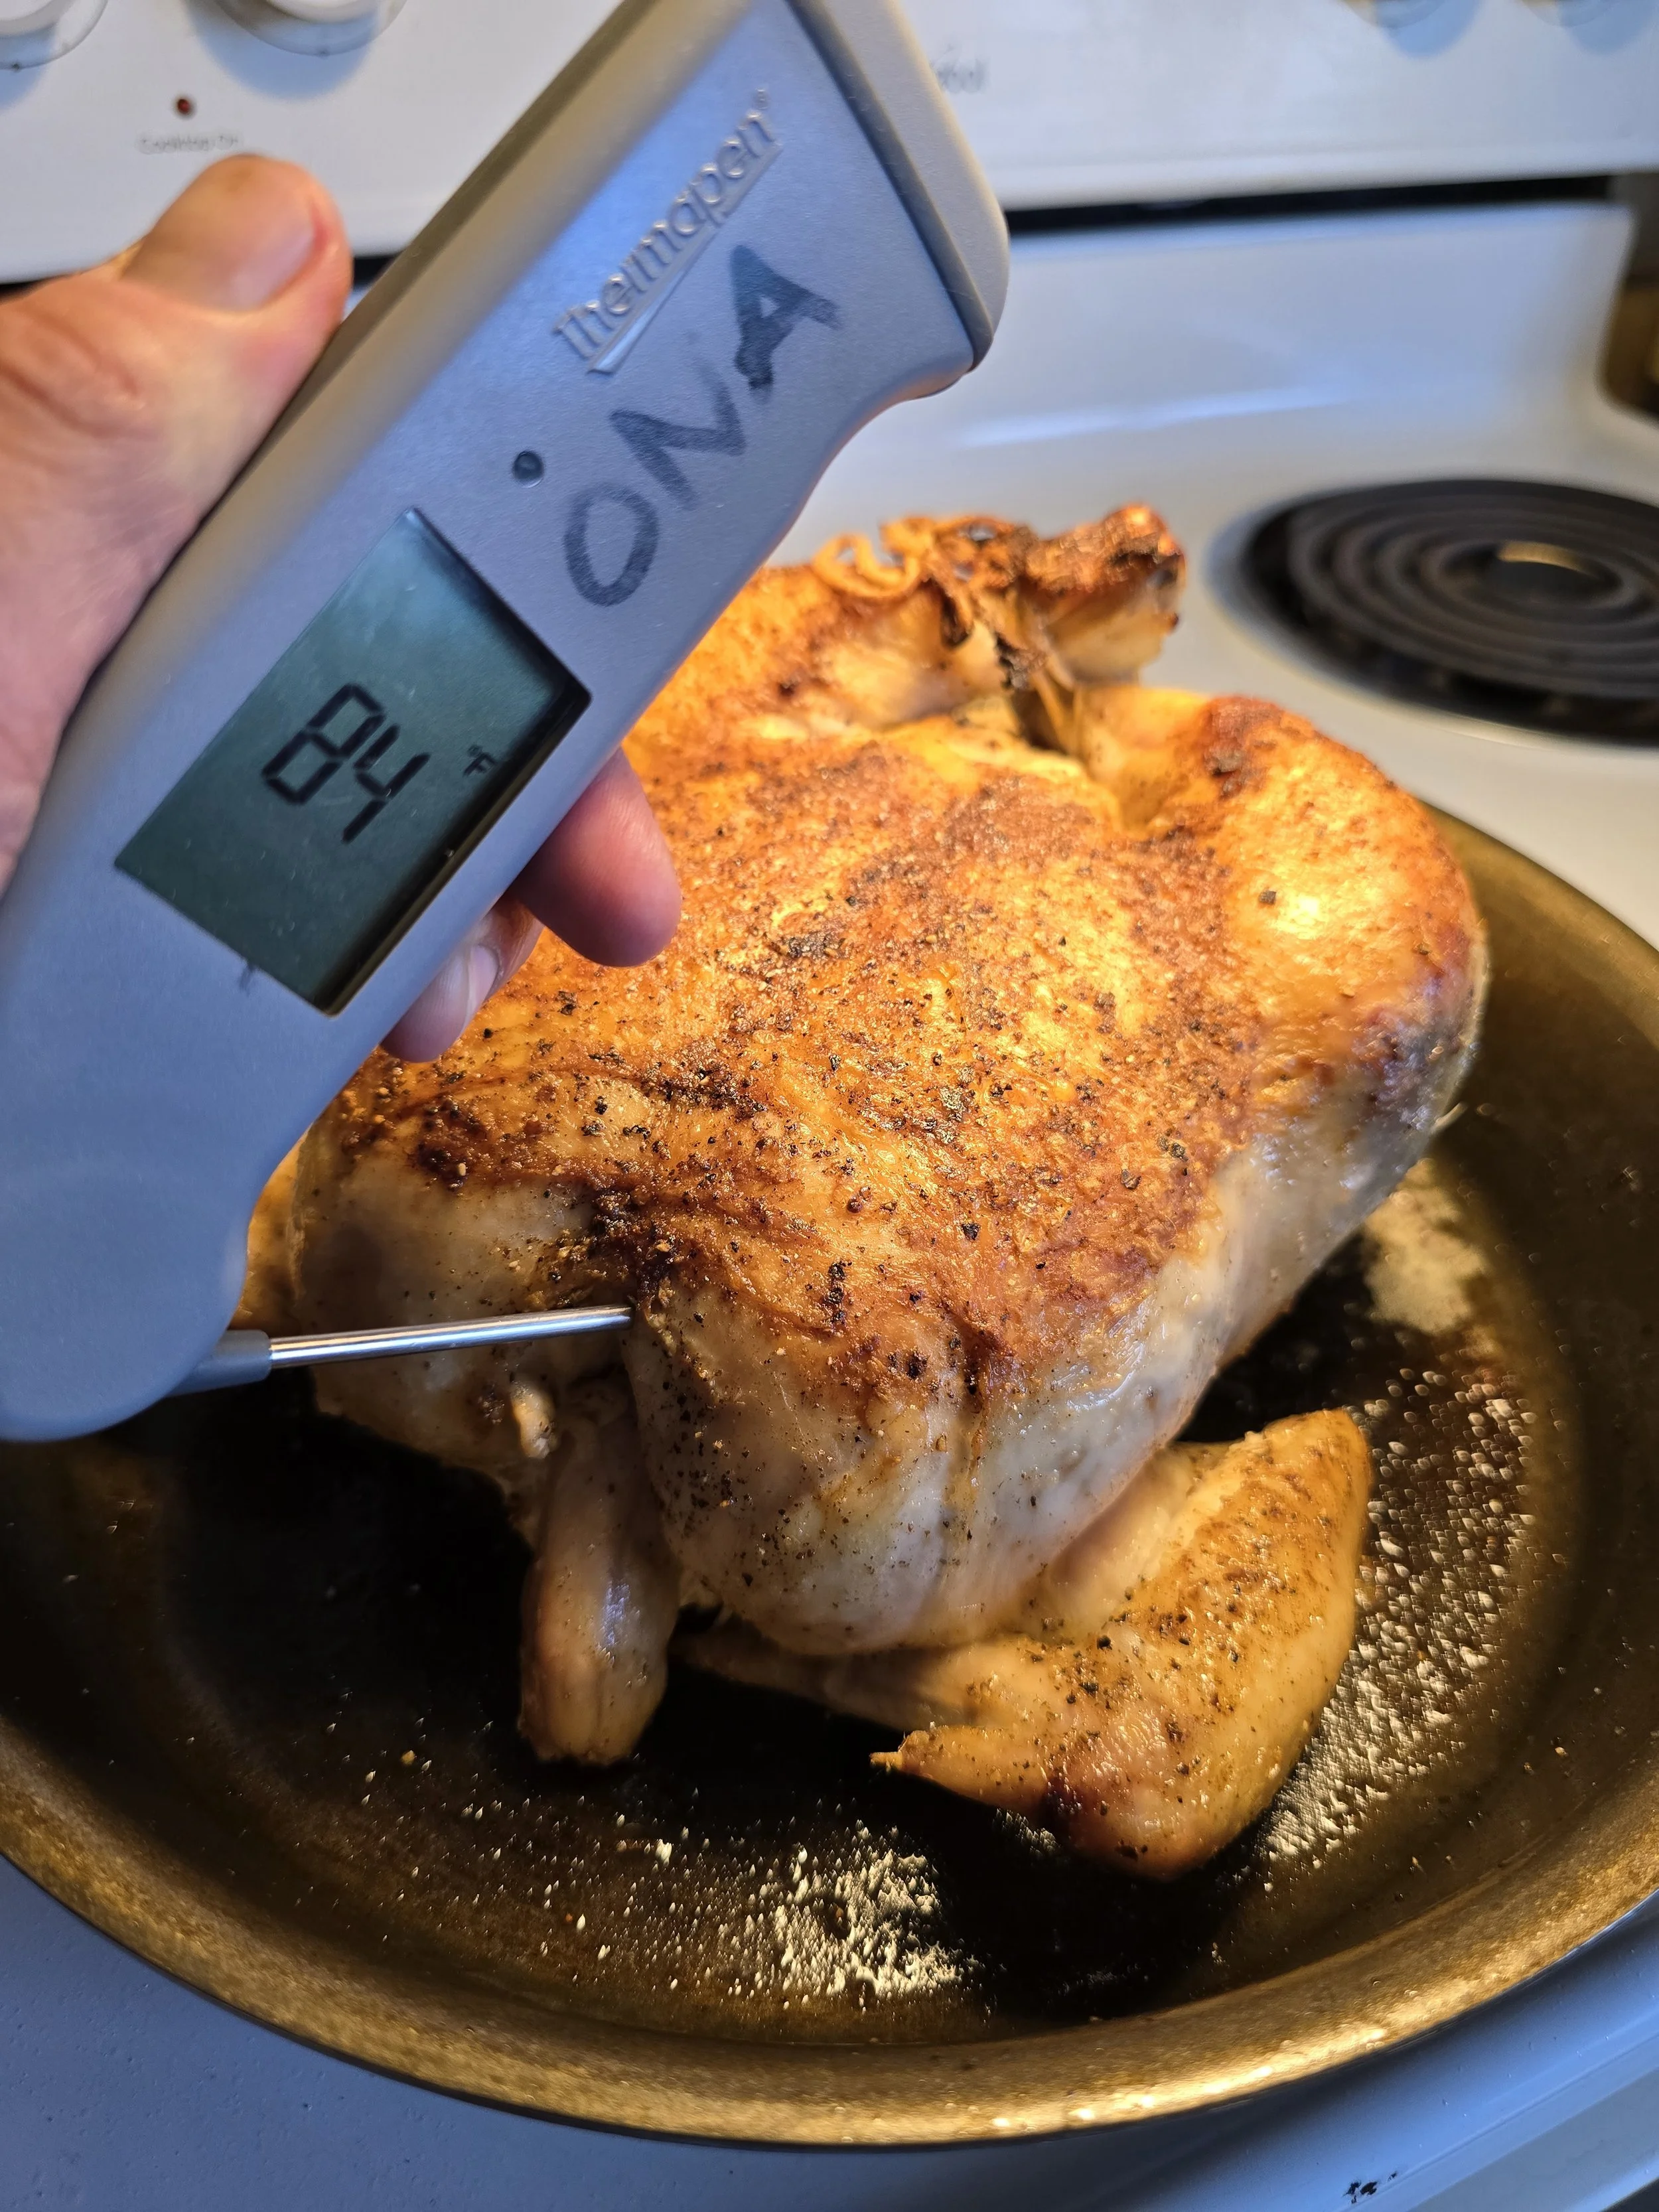
7. Baste again, then check the temperature in the thickest part of the chicken, I temp the breast and thigh, to see where you’re at. Reduce the oven temperature to 375°F, and roast for another 15 minutes. Try to reinsert your thermometer into the same spots throughout the cooking process to avoid creating too many leak points for the internal juices.
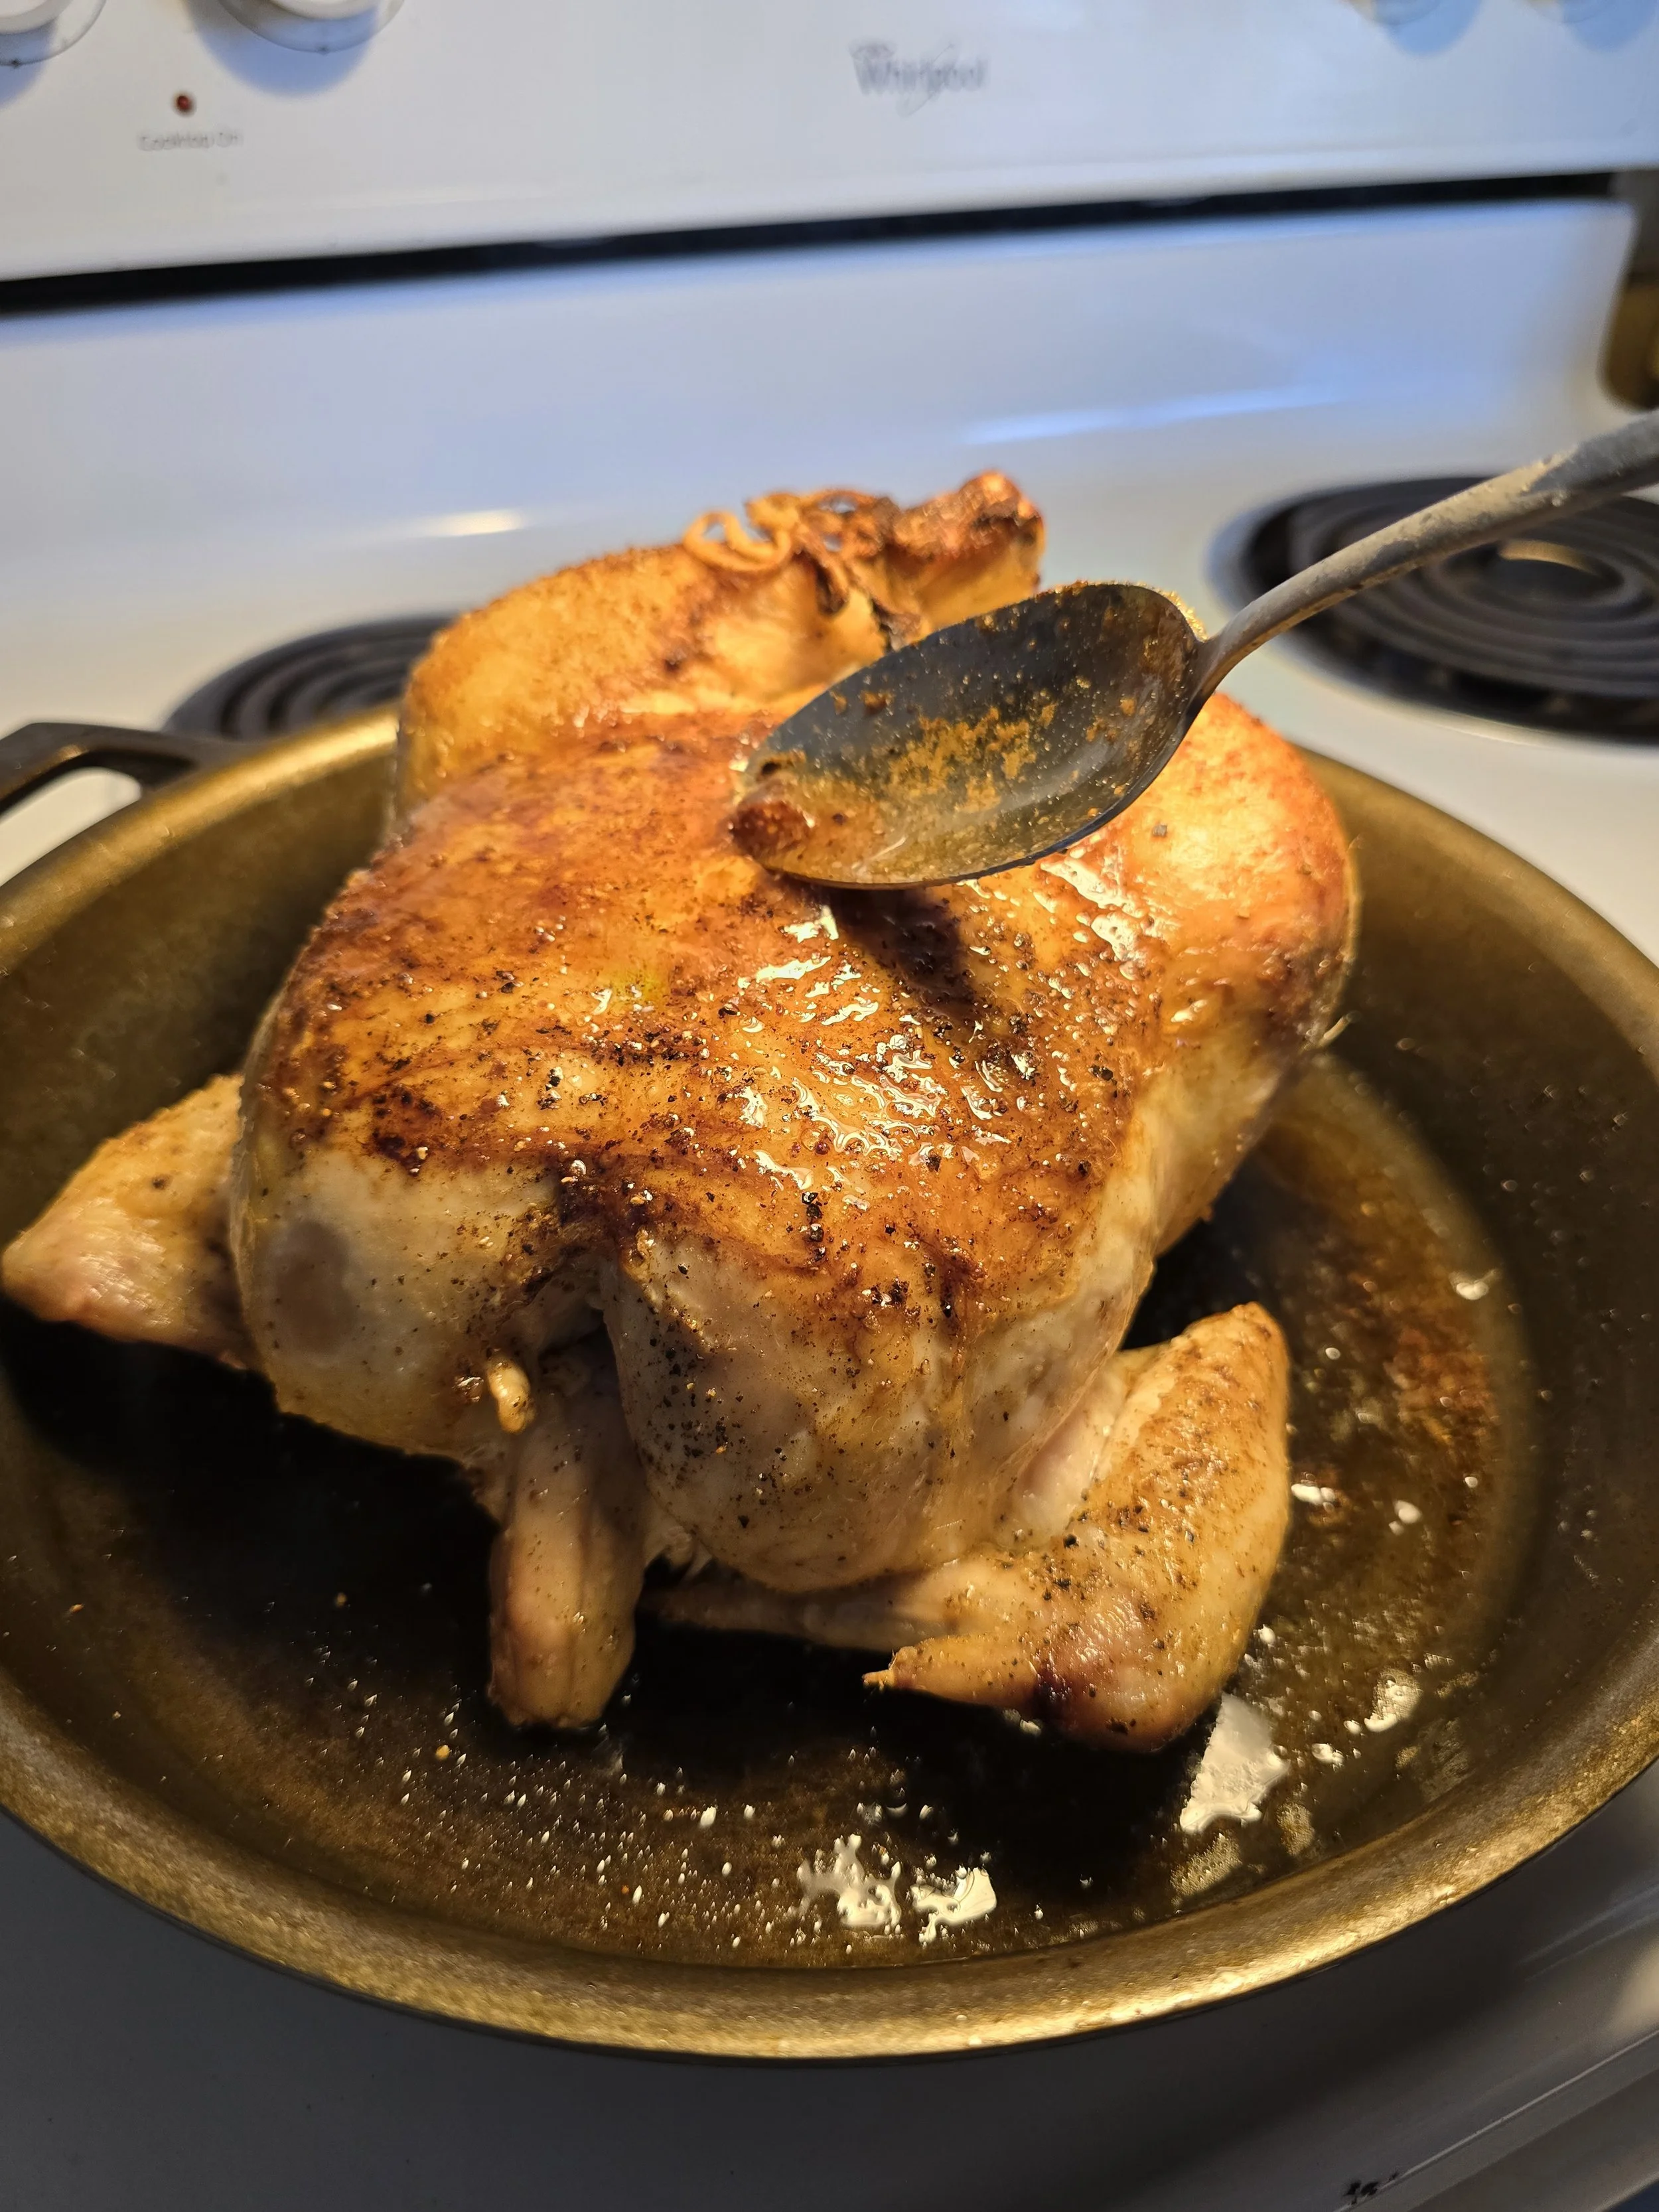
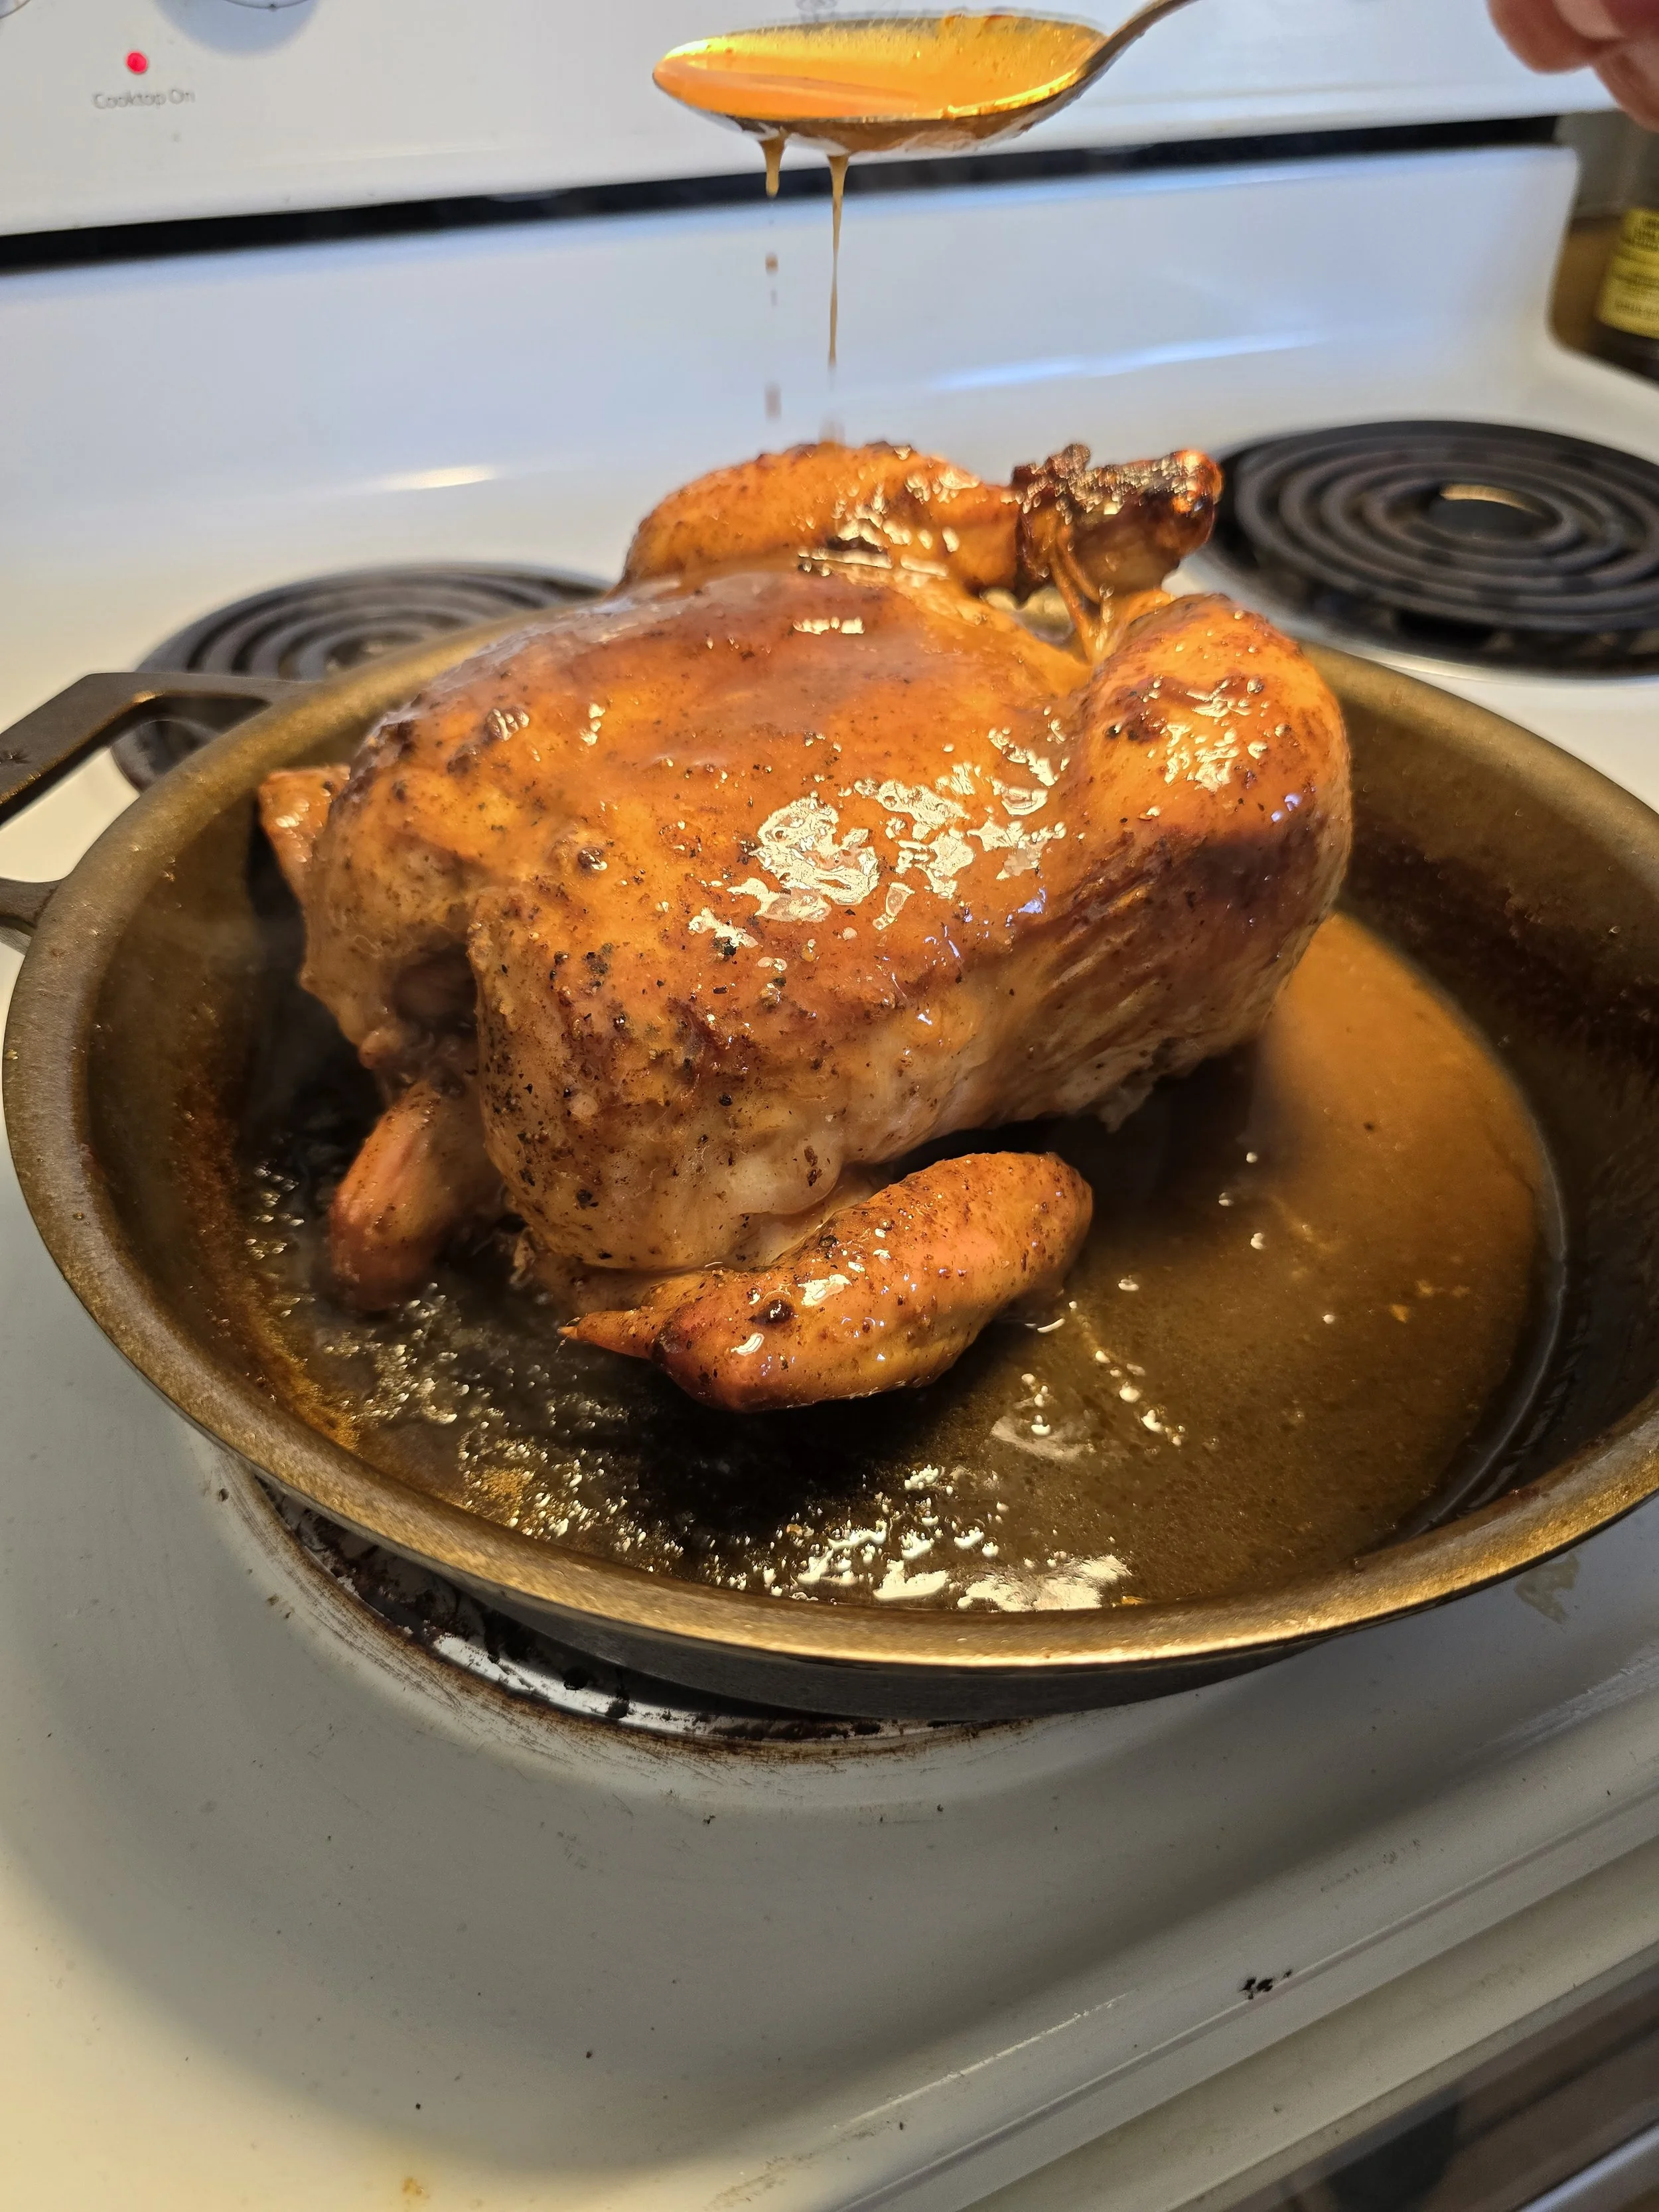
8. Remove the chicken from the oven. Baste again and check the temperature.
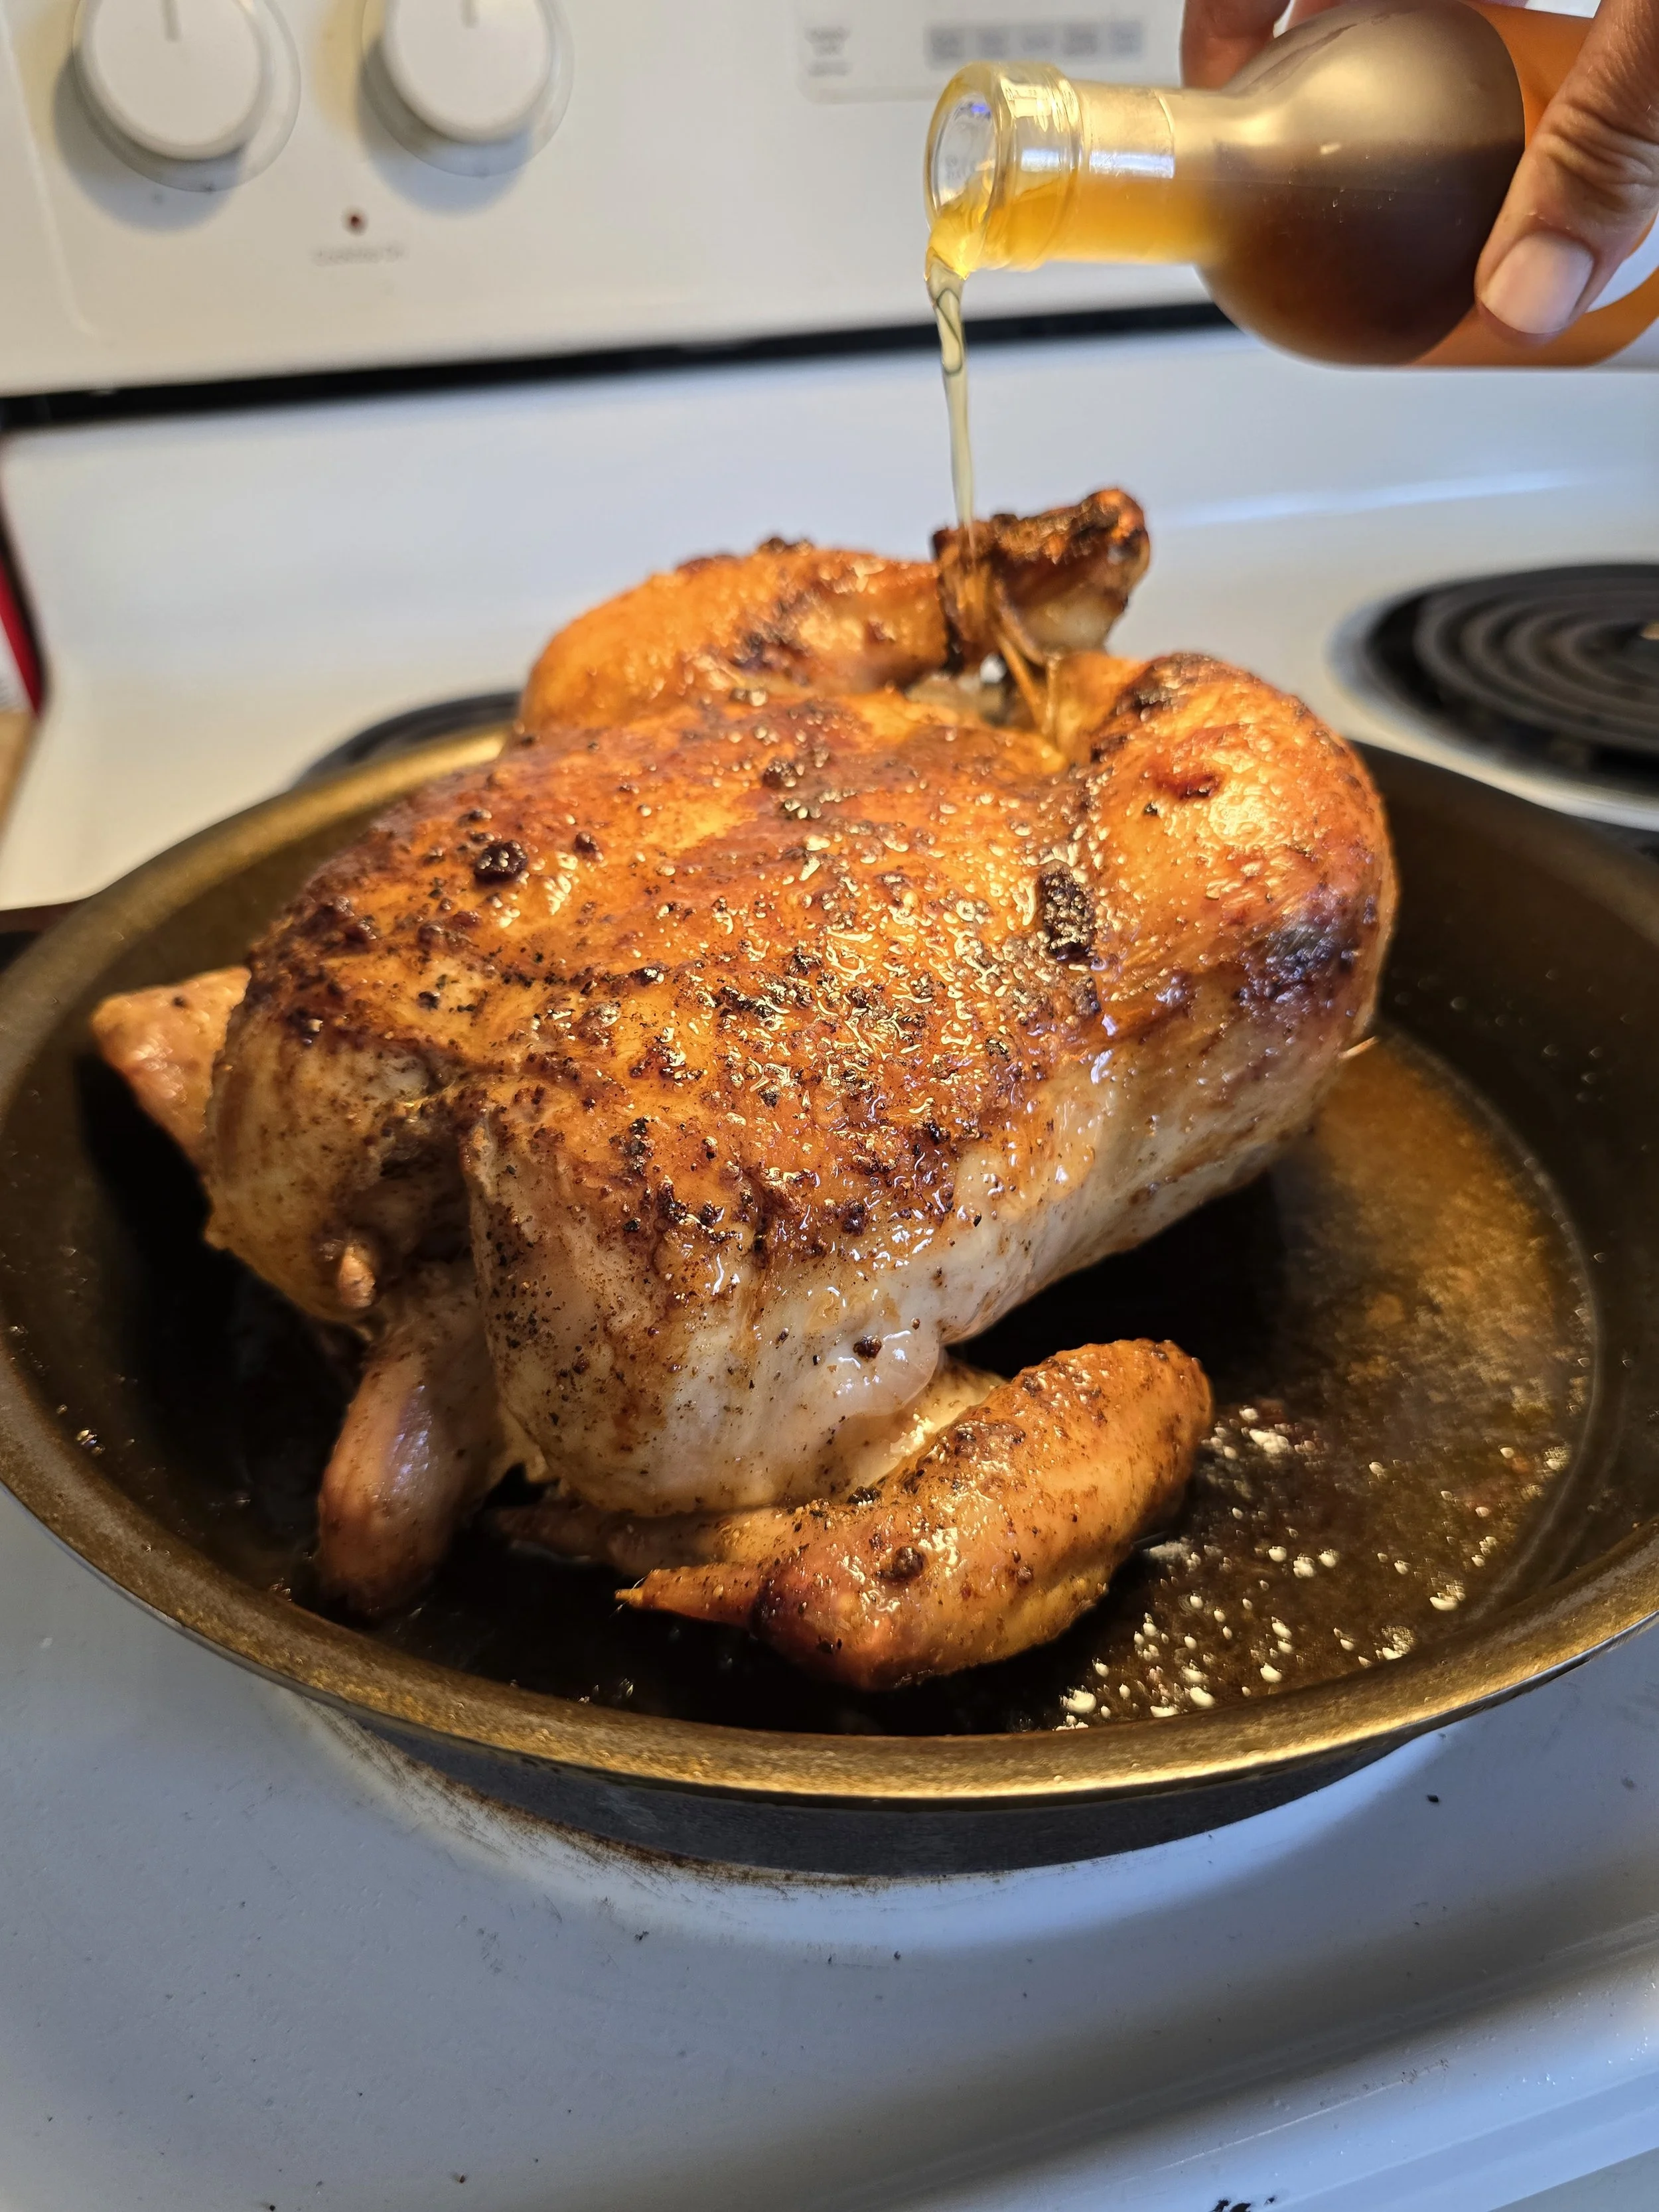
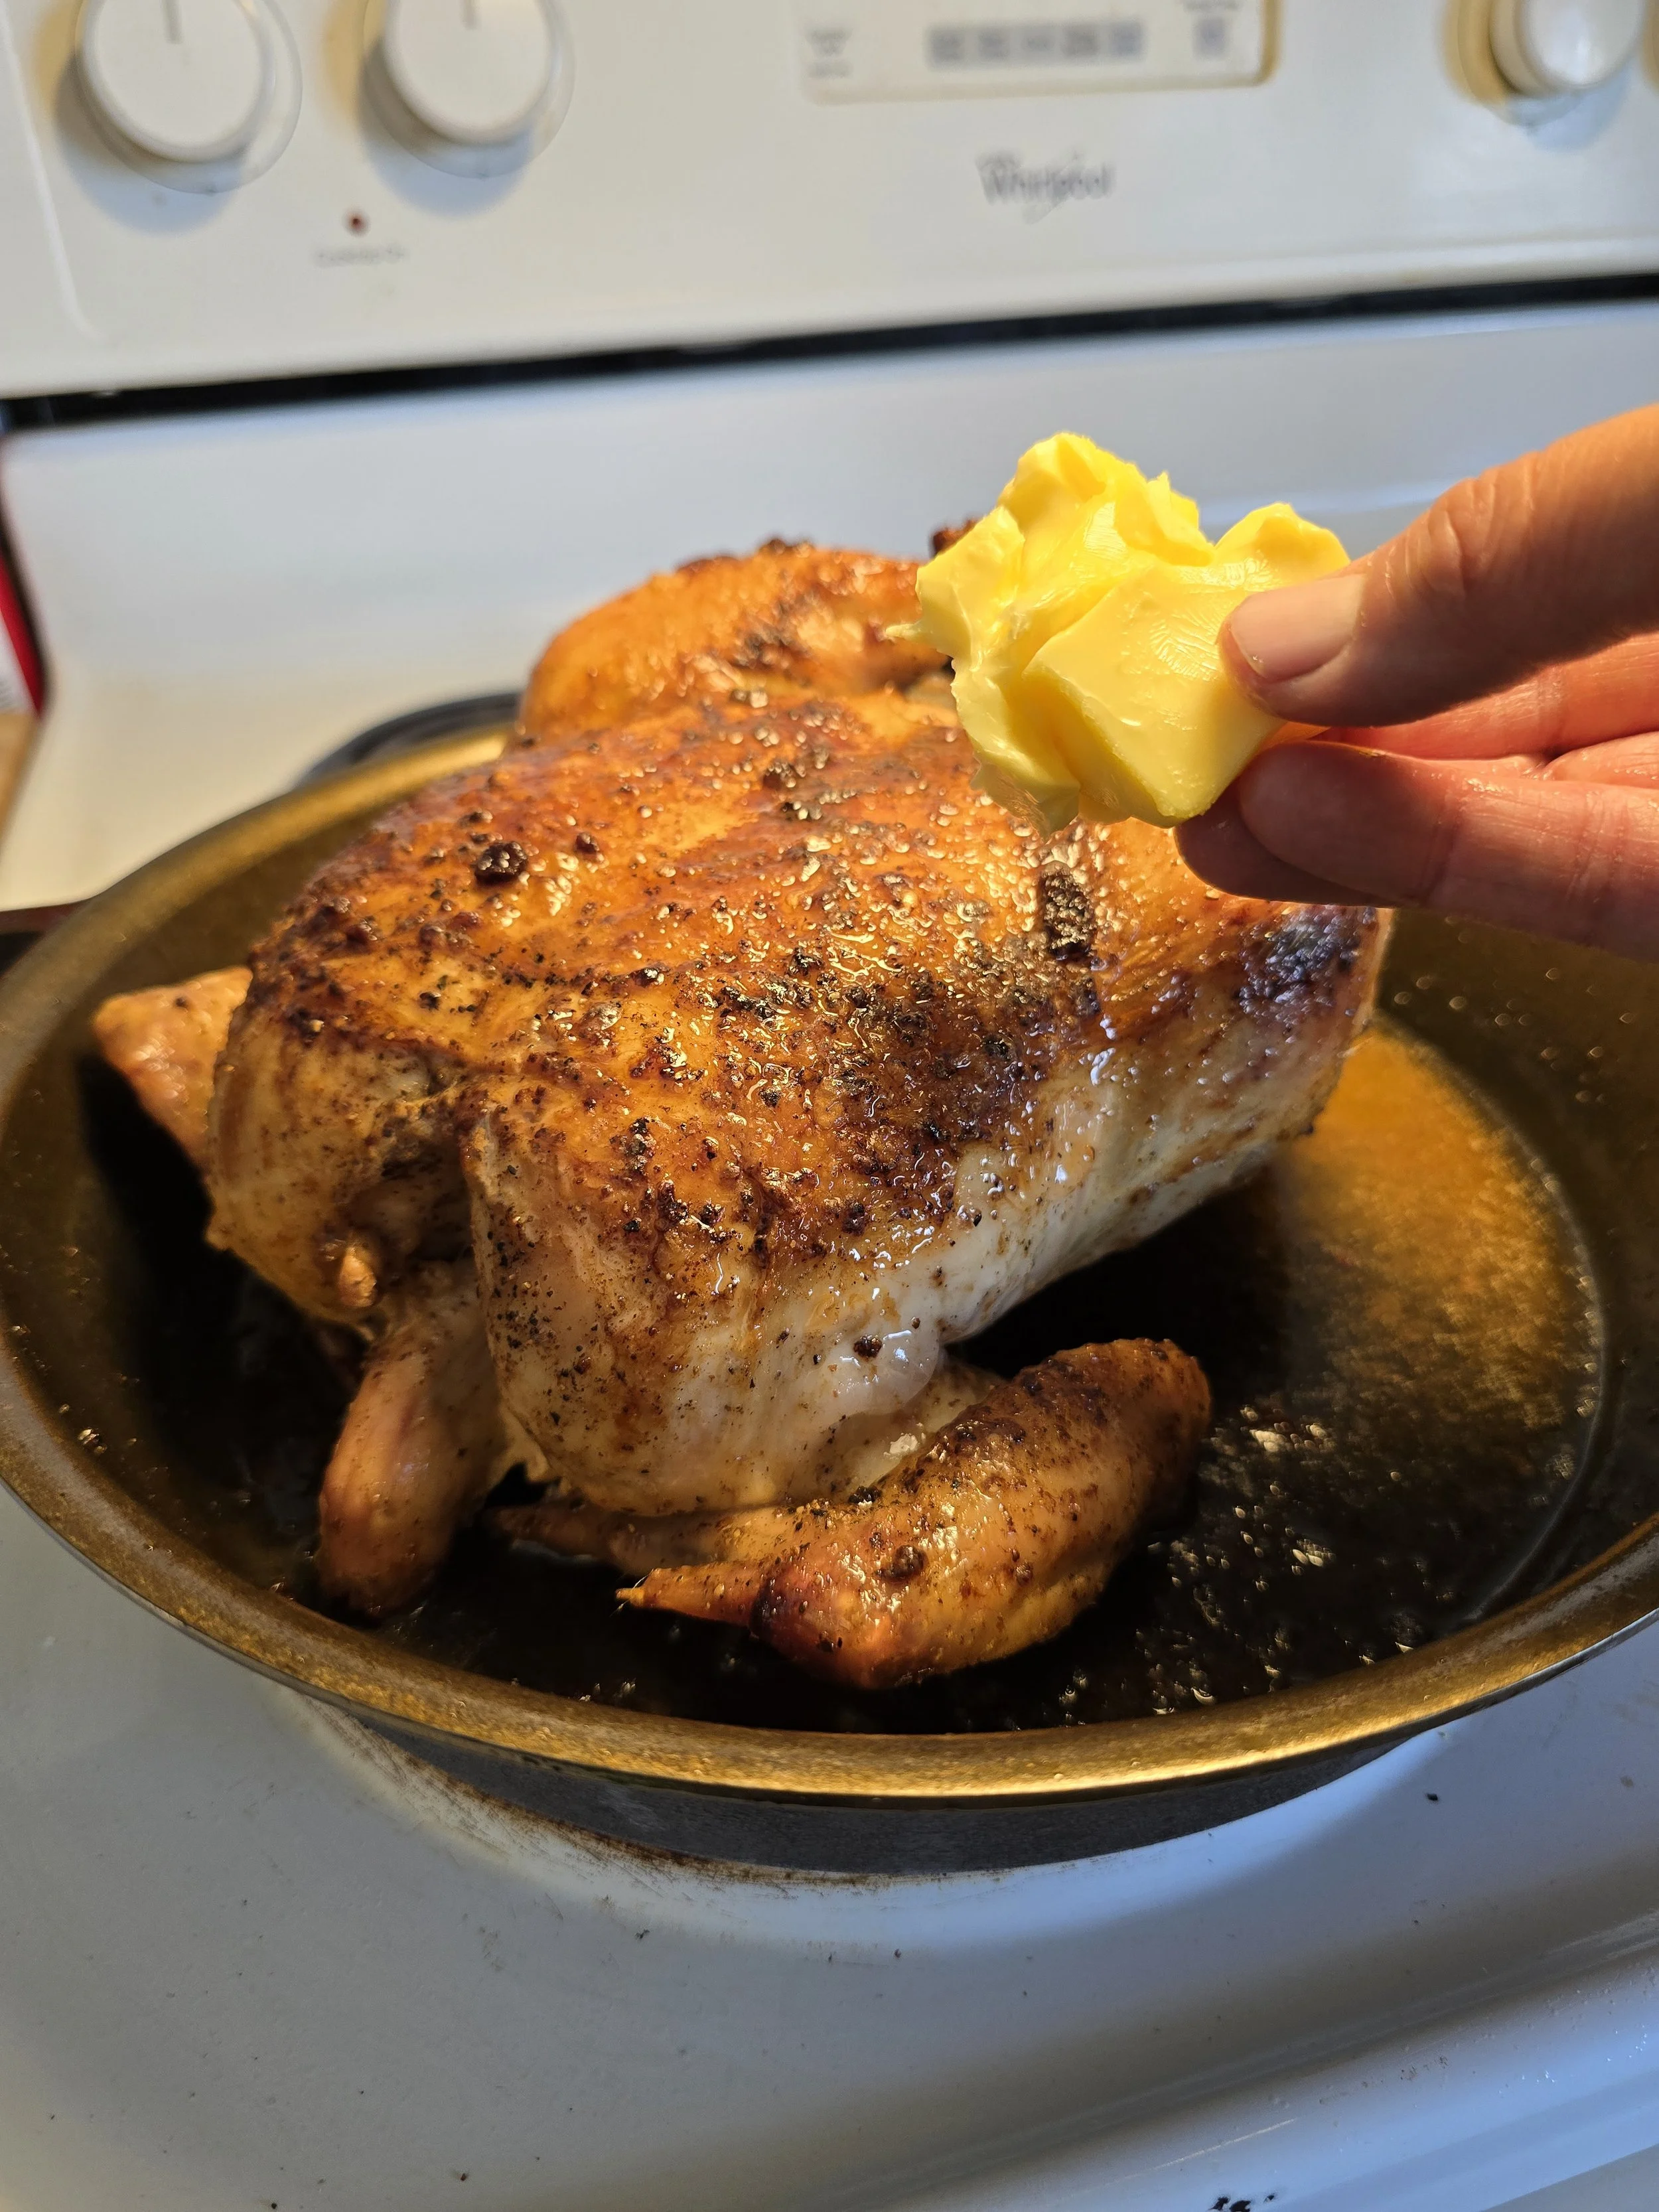
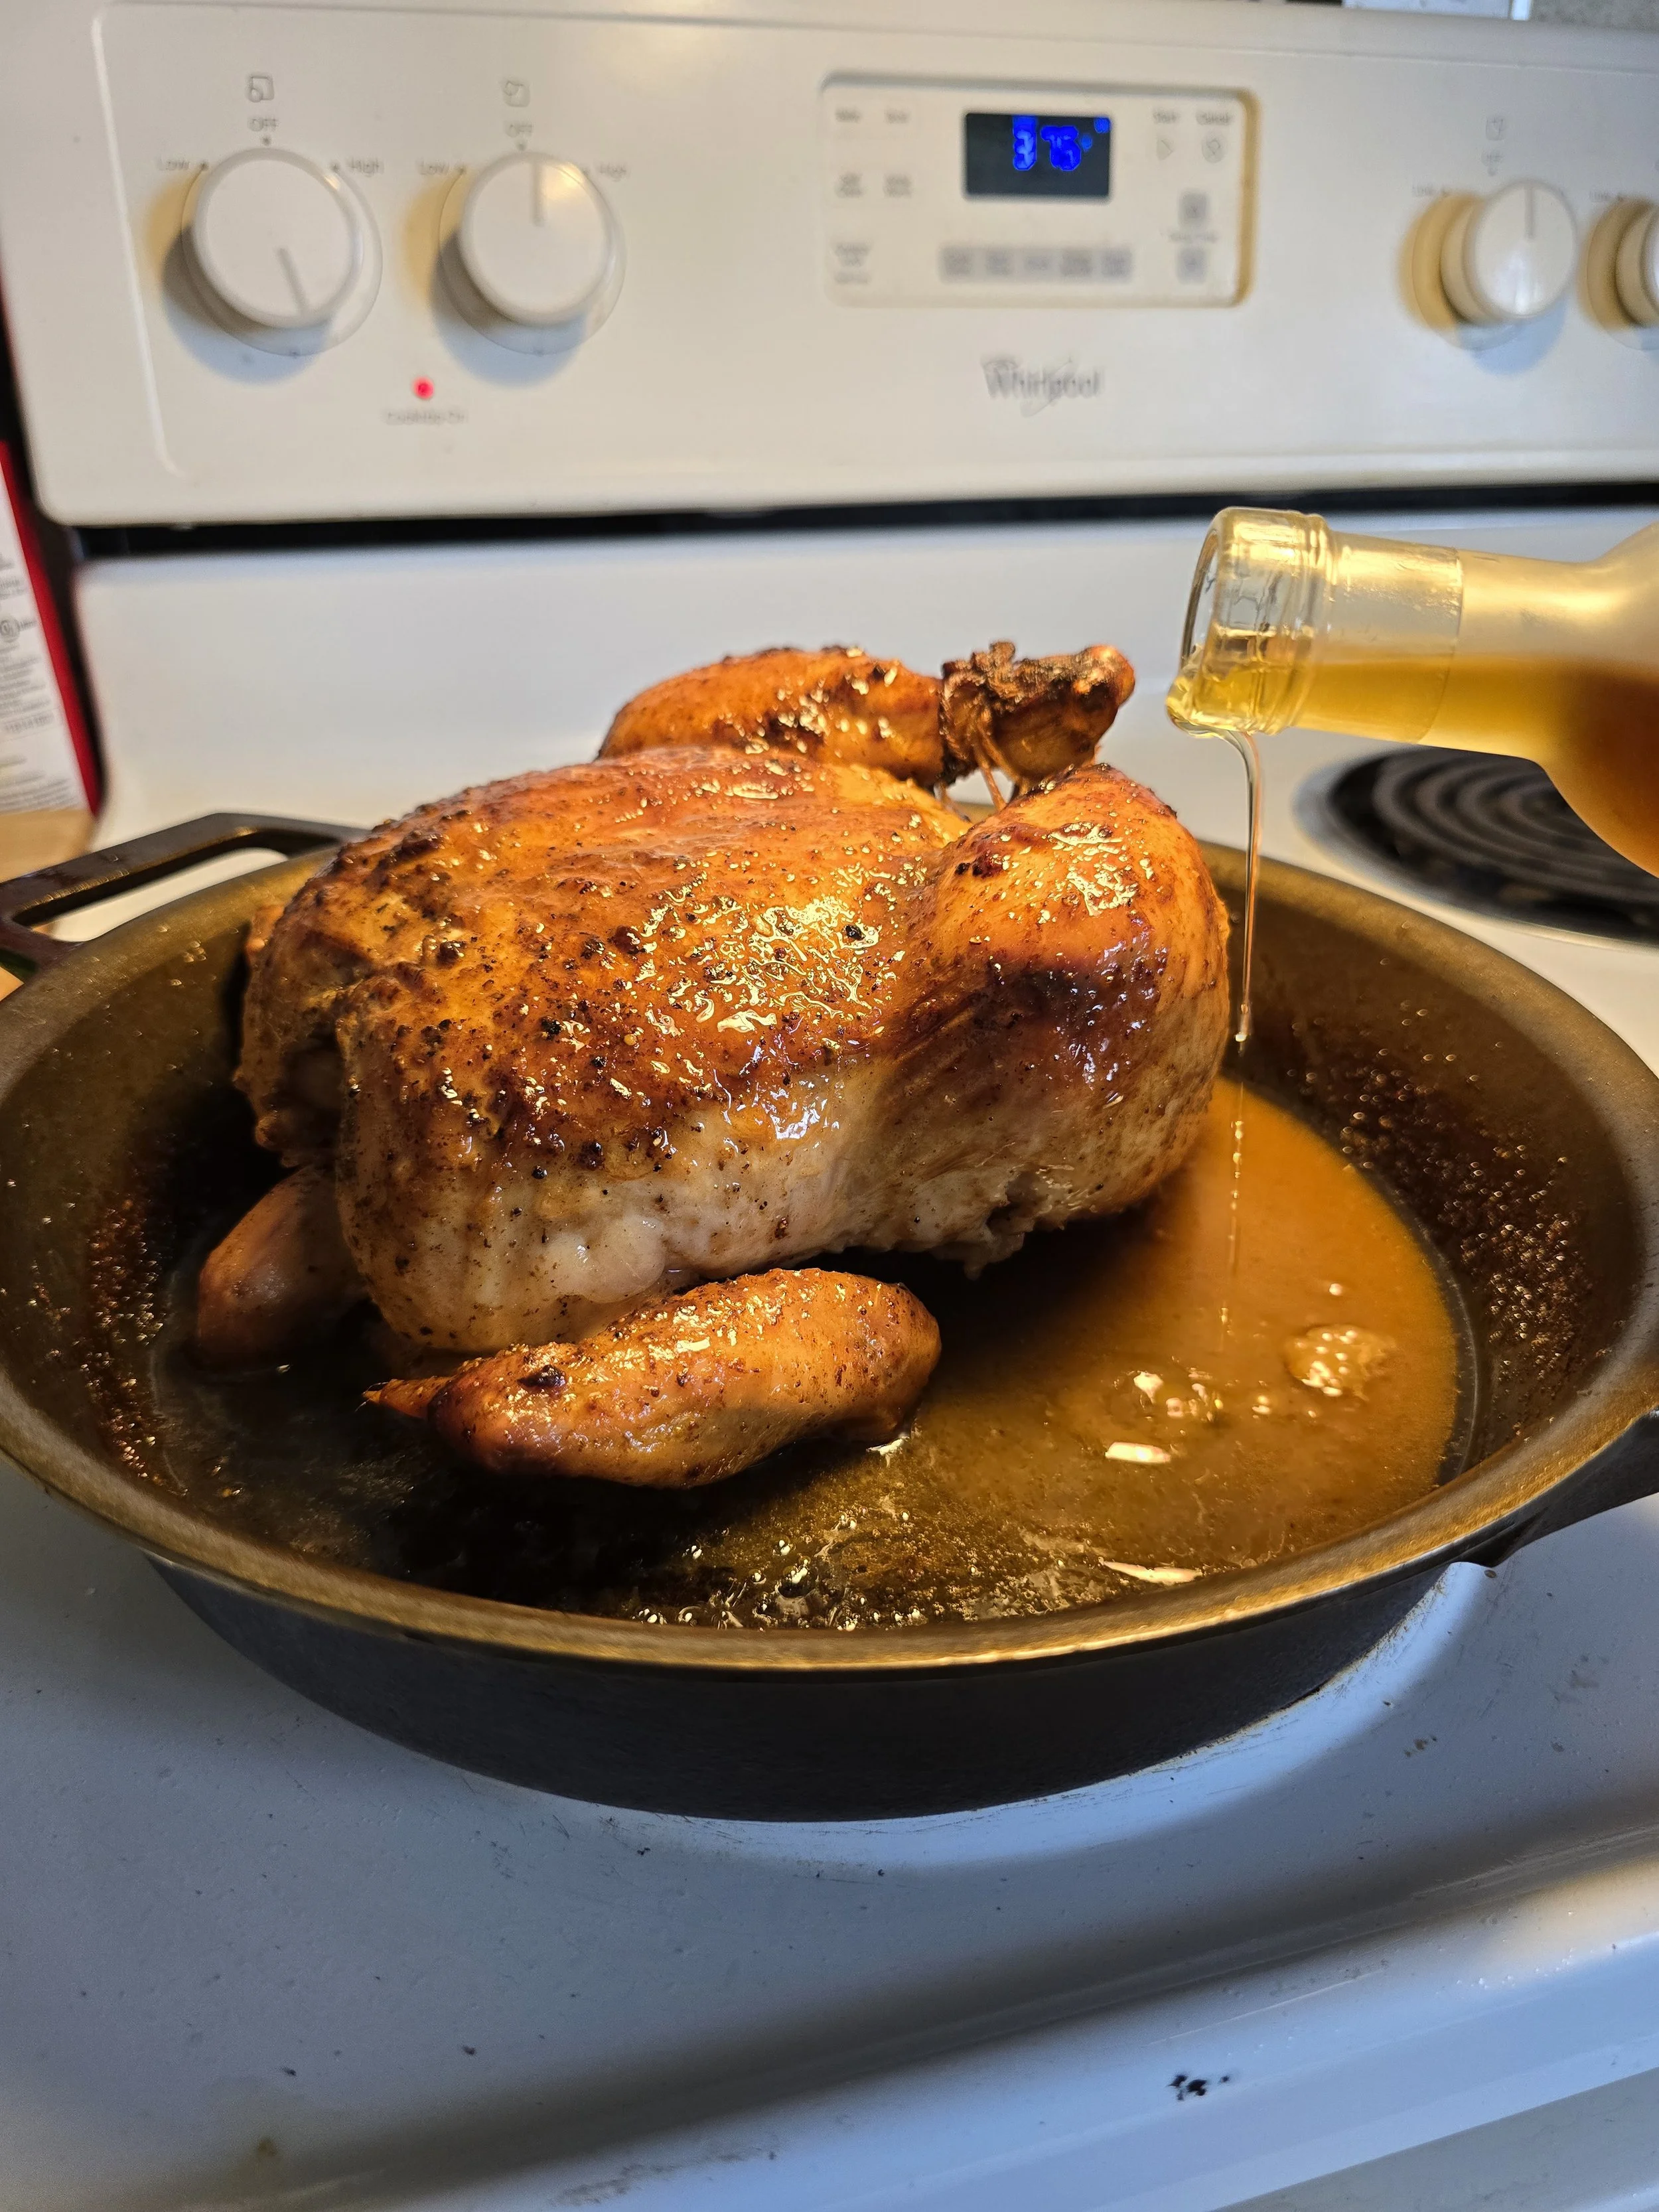
If it has reached 150°F, add a large splash of chicken broth (about 4 oz), 1–2 oz of butter, and 2–3 tablespoons of fine sherry vinegar. Baste well and return to the oven for 10 minutes at 375°F.
If it’s not yet at 150°F, continue roasting in 5–10 minute increments until it is, then proceed with building the sauce.
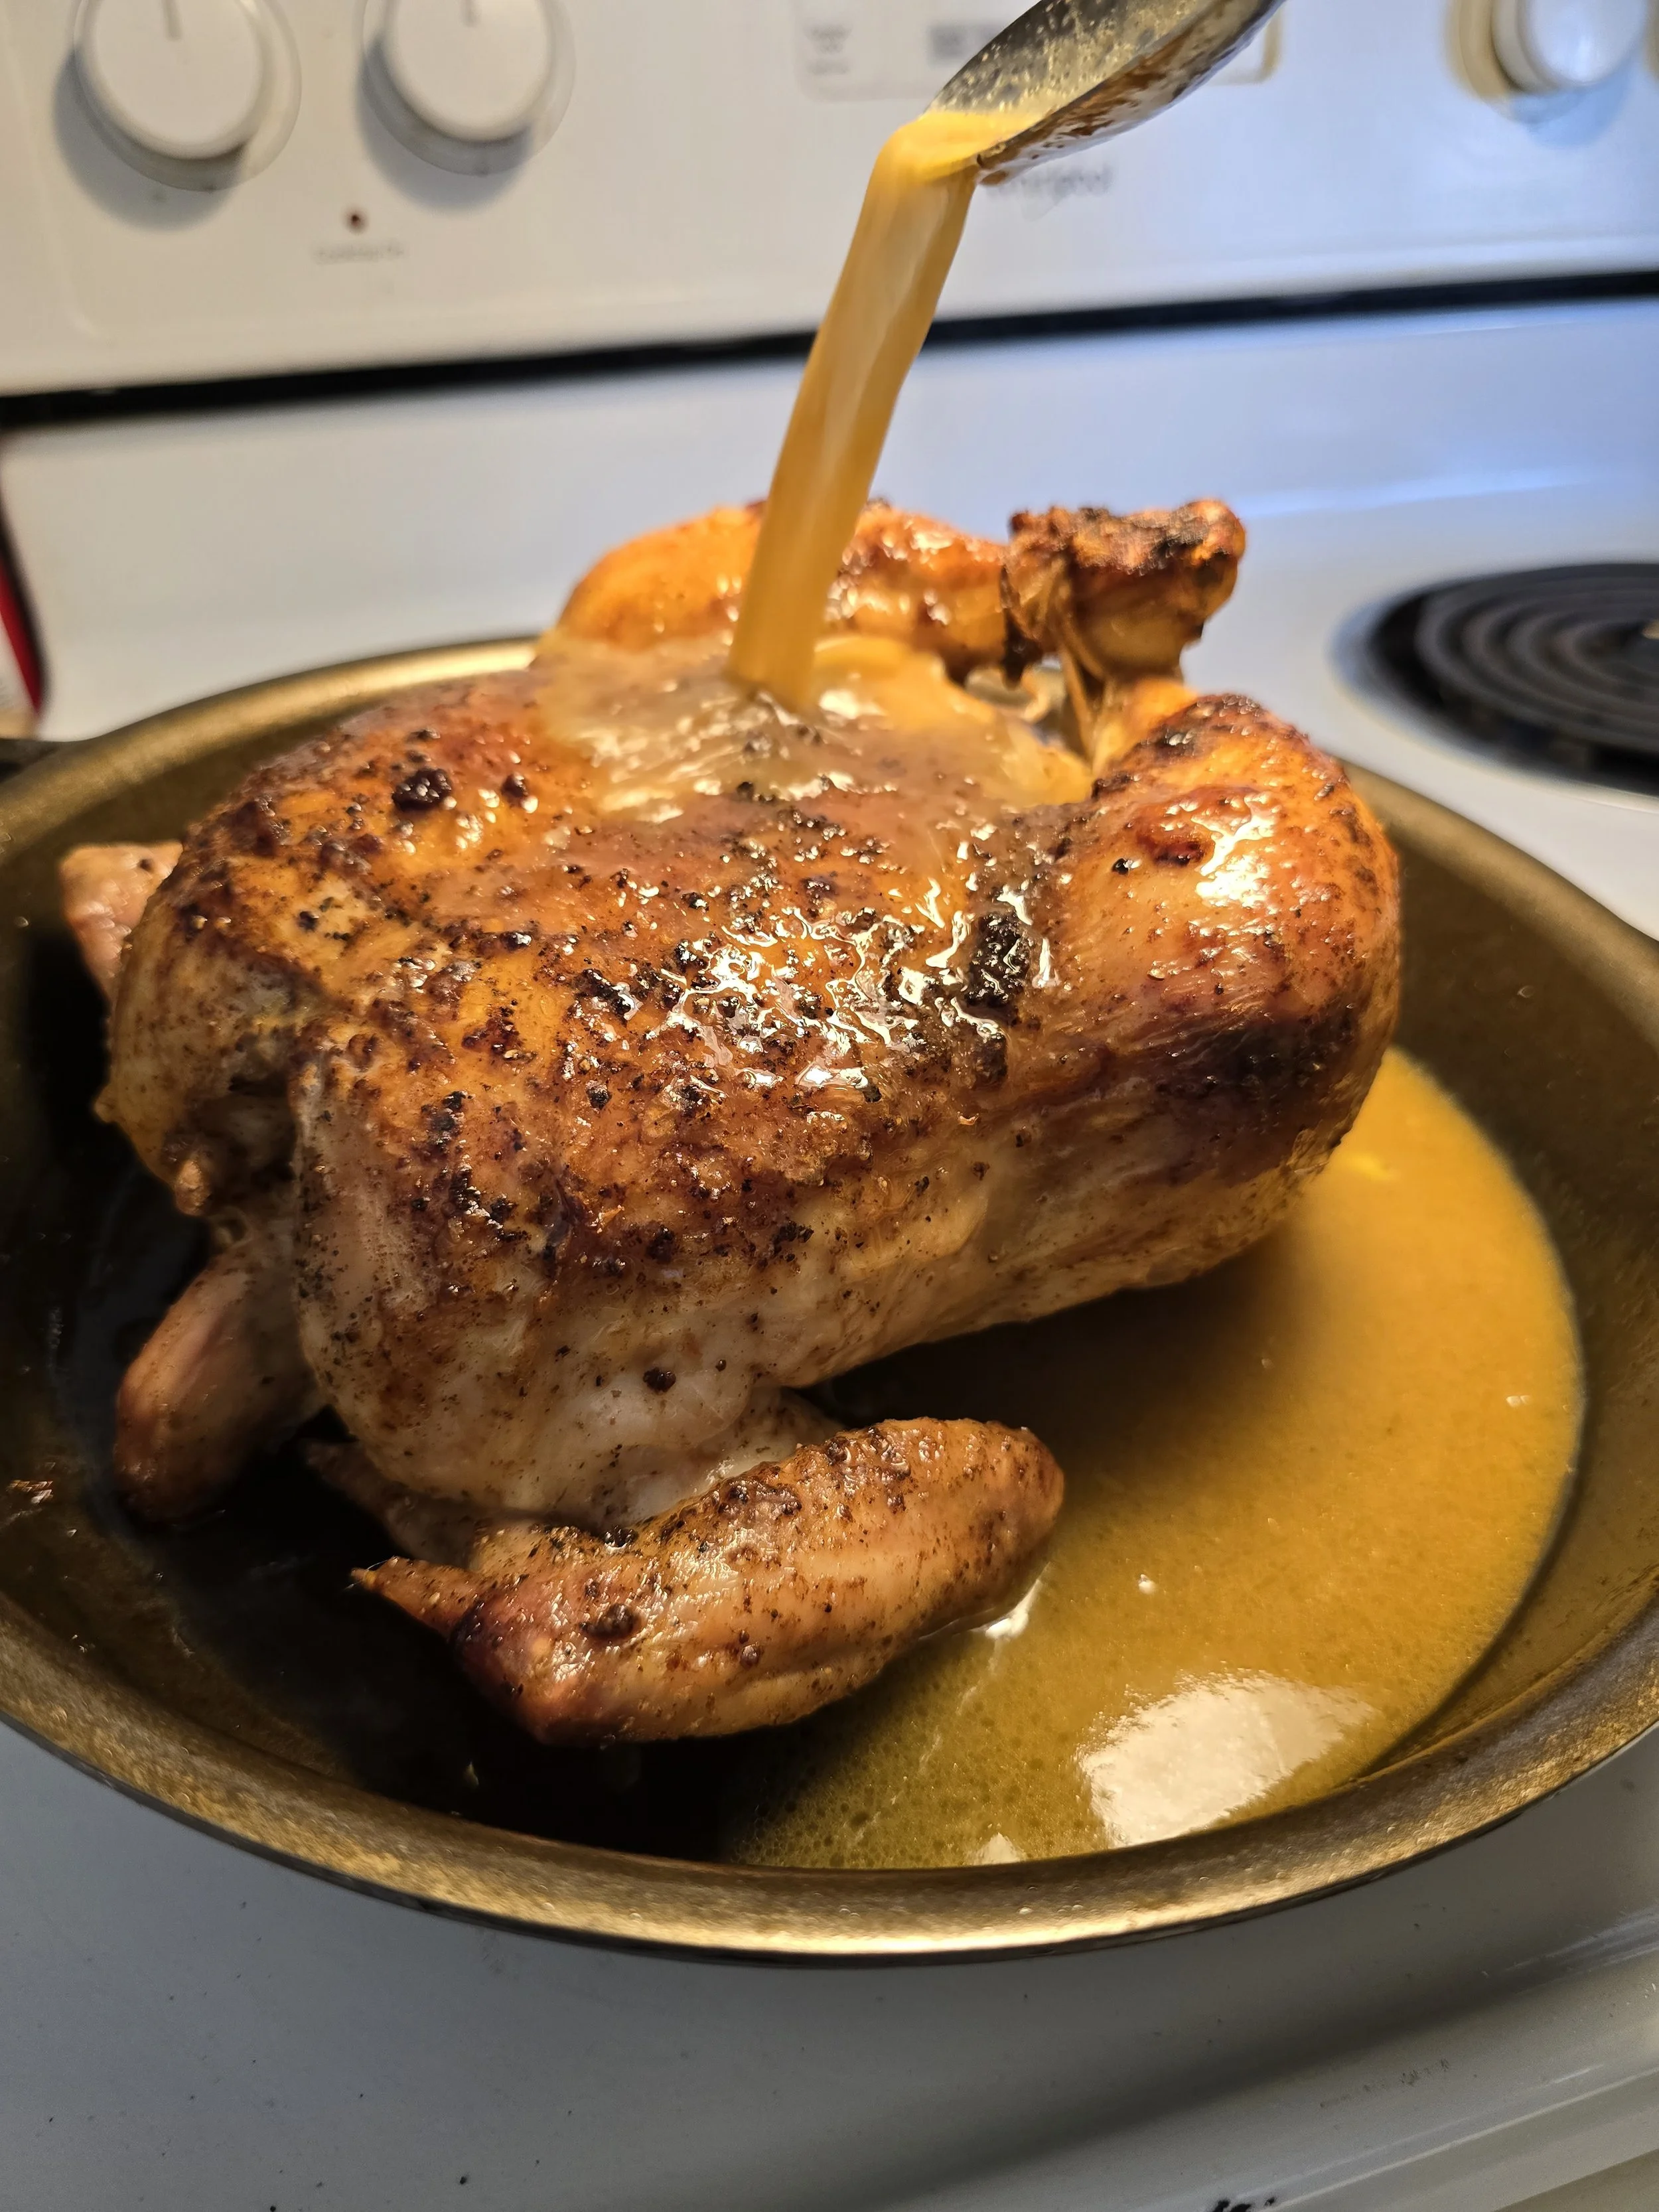
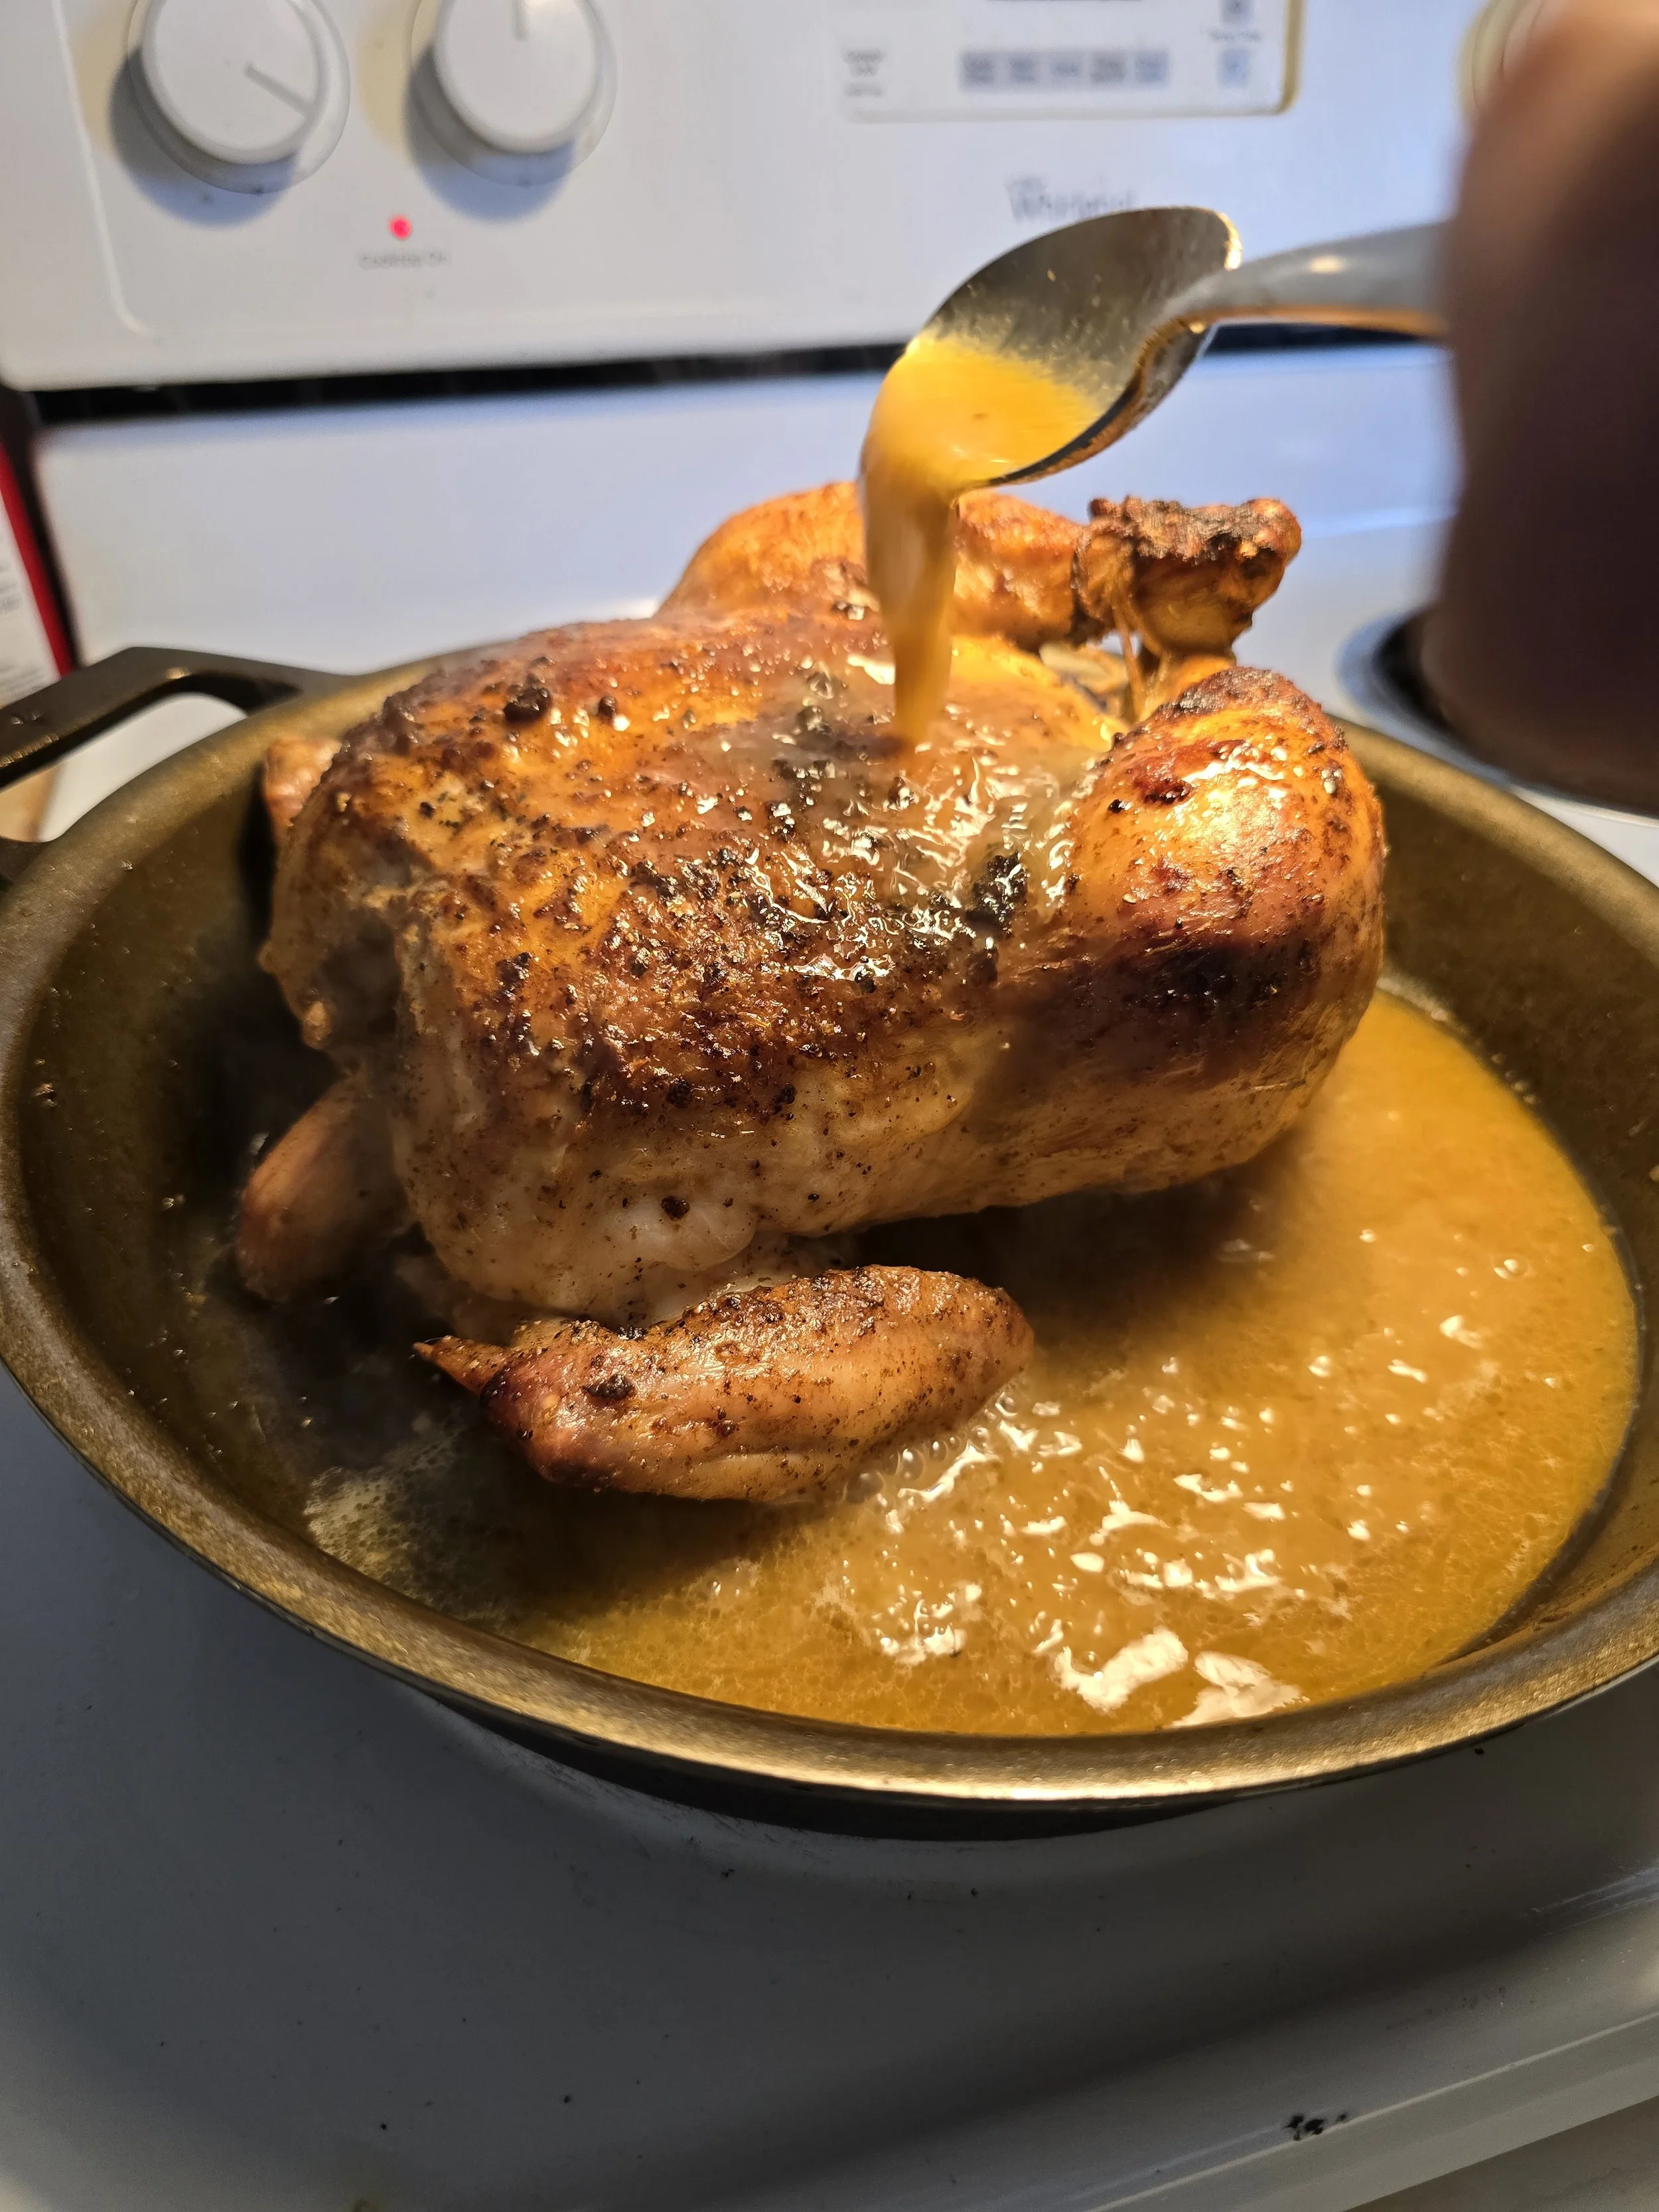
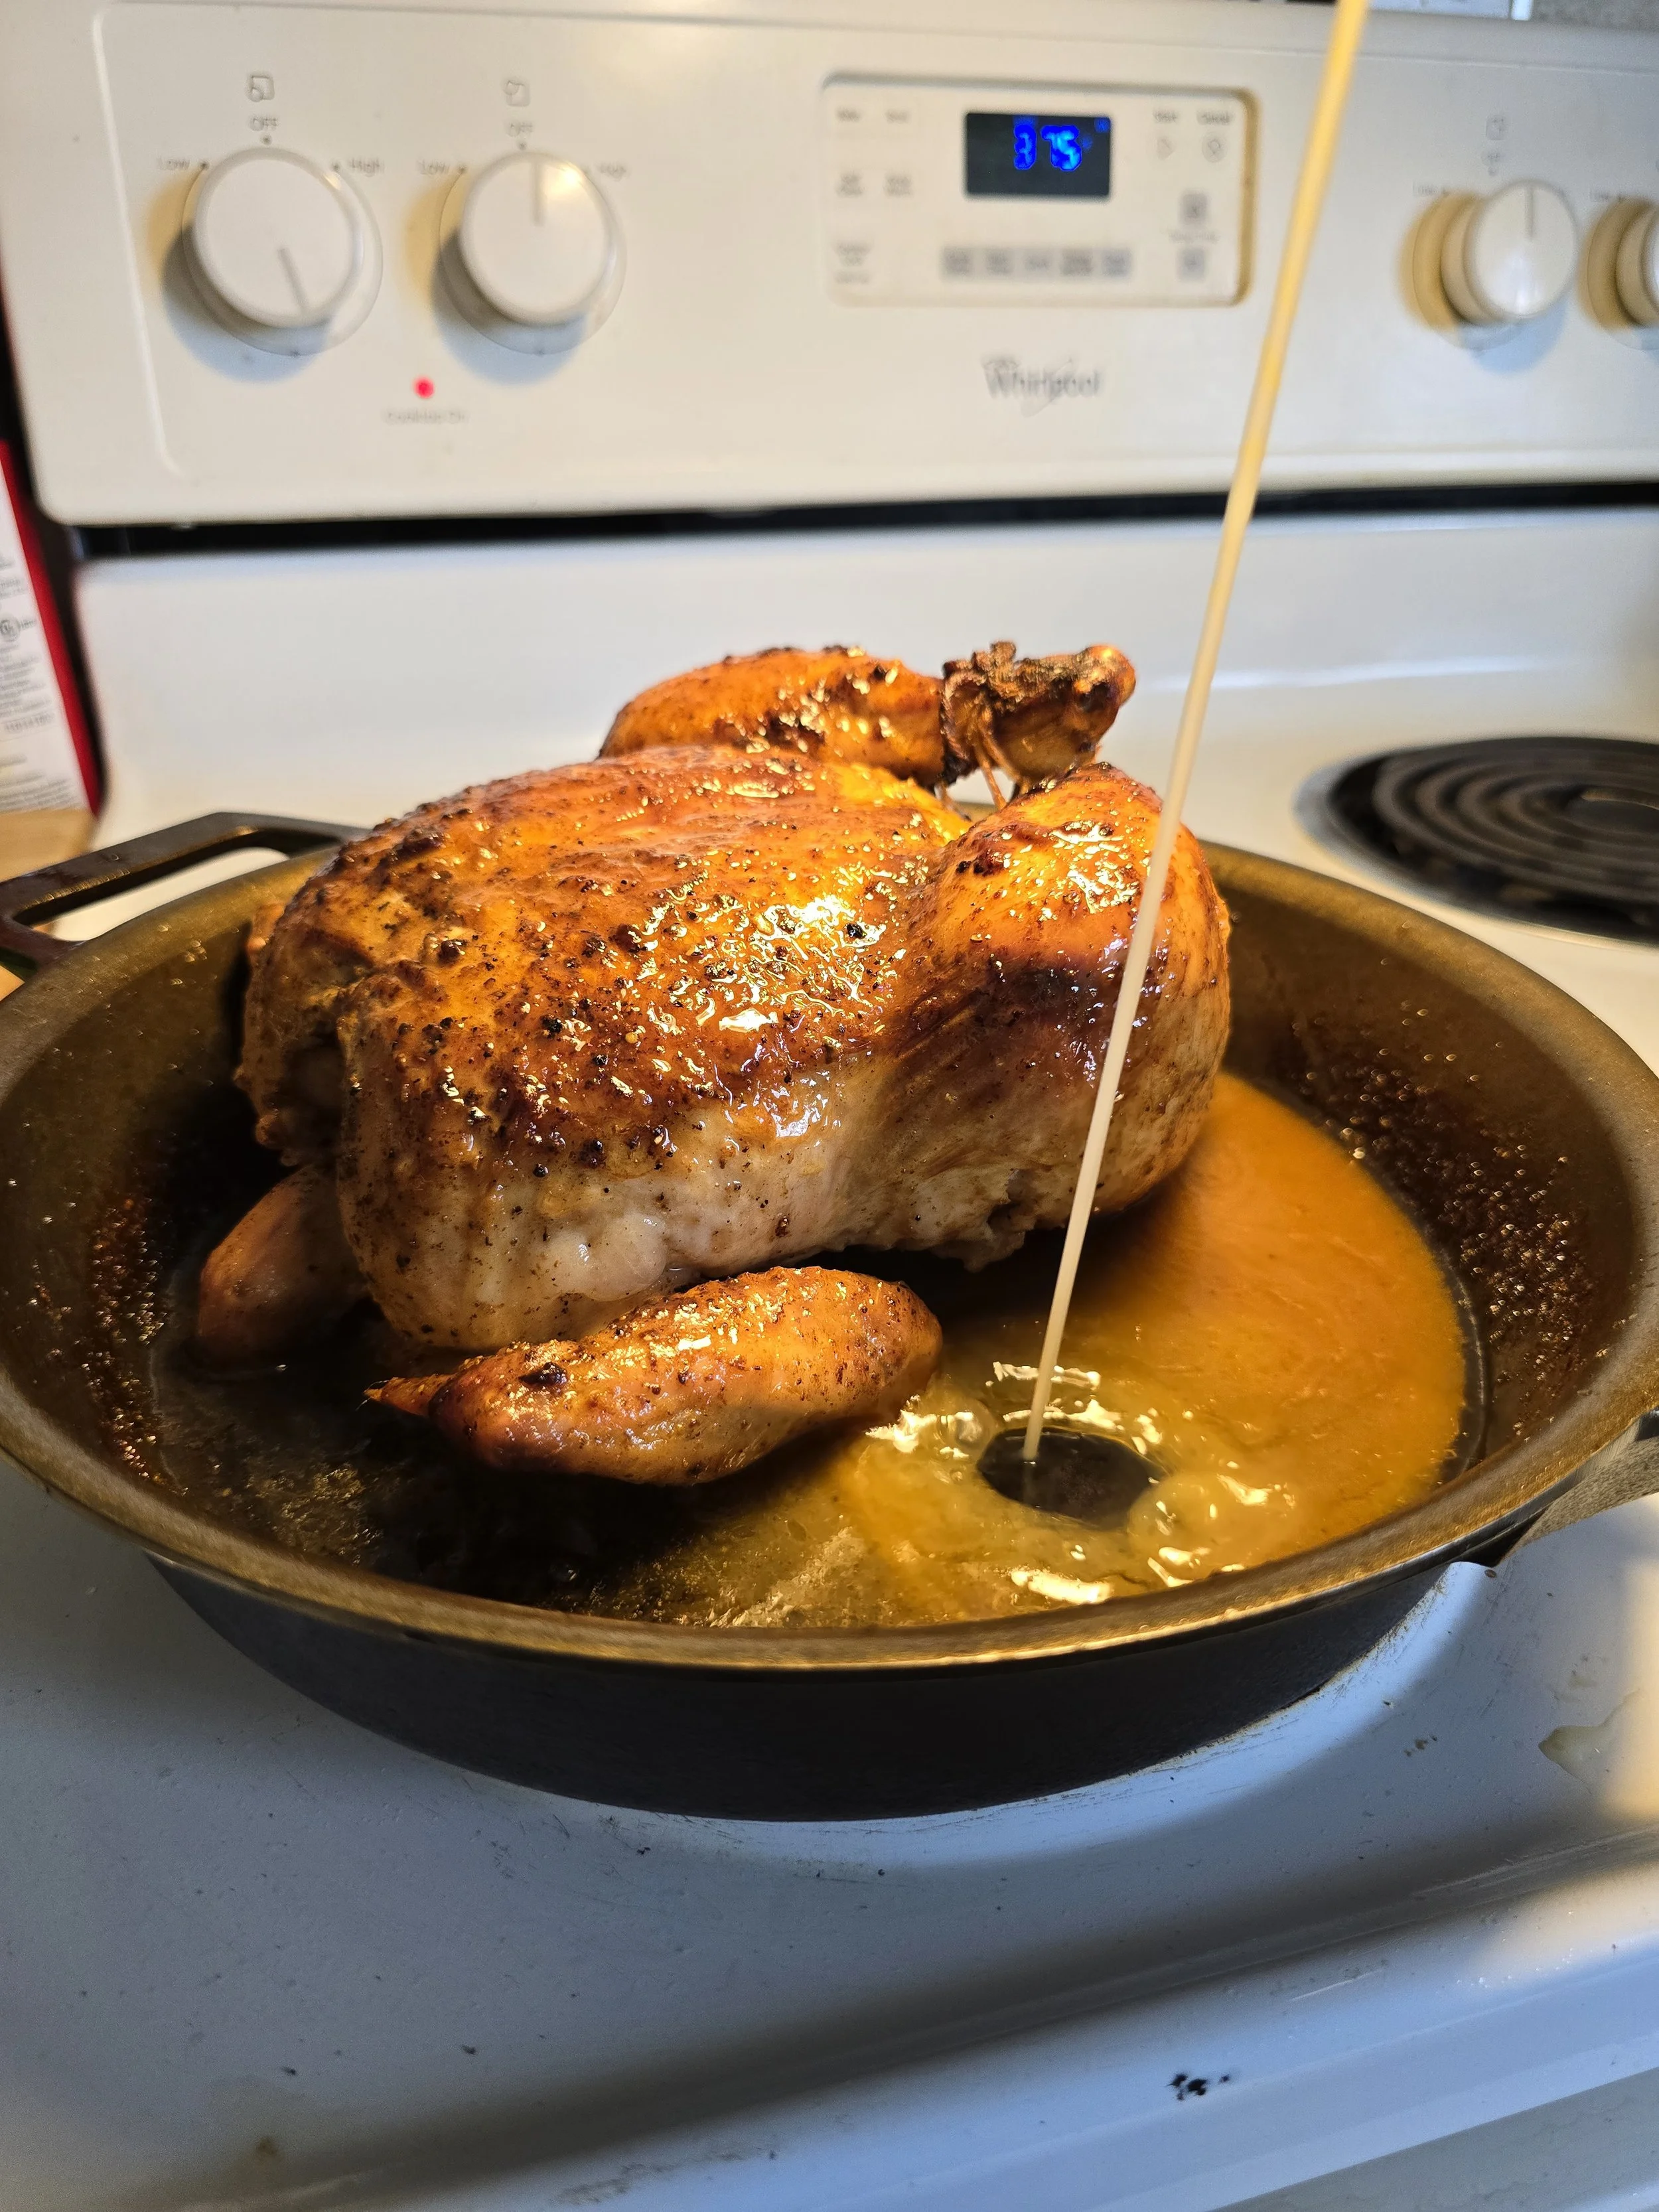
9. After the 10-minute roast with the sauce, transfer the skillet to a medium or medium-high burner. Reduce the sauce as needed, basting continuously.
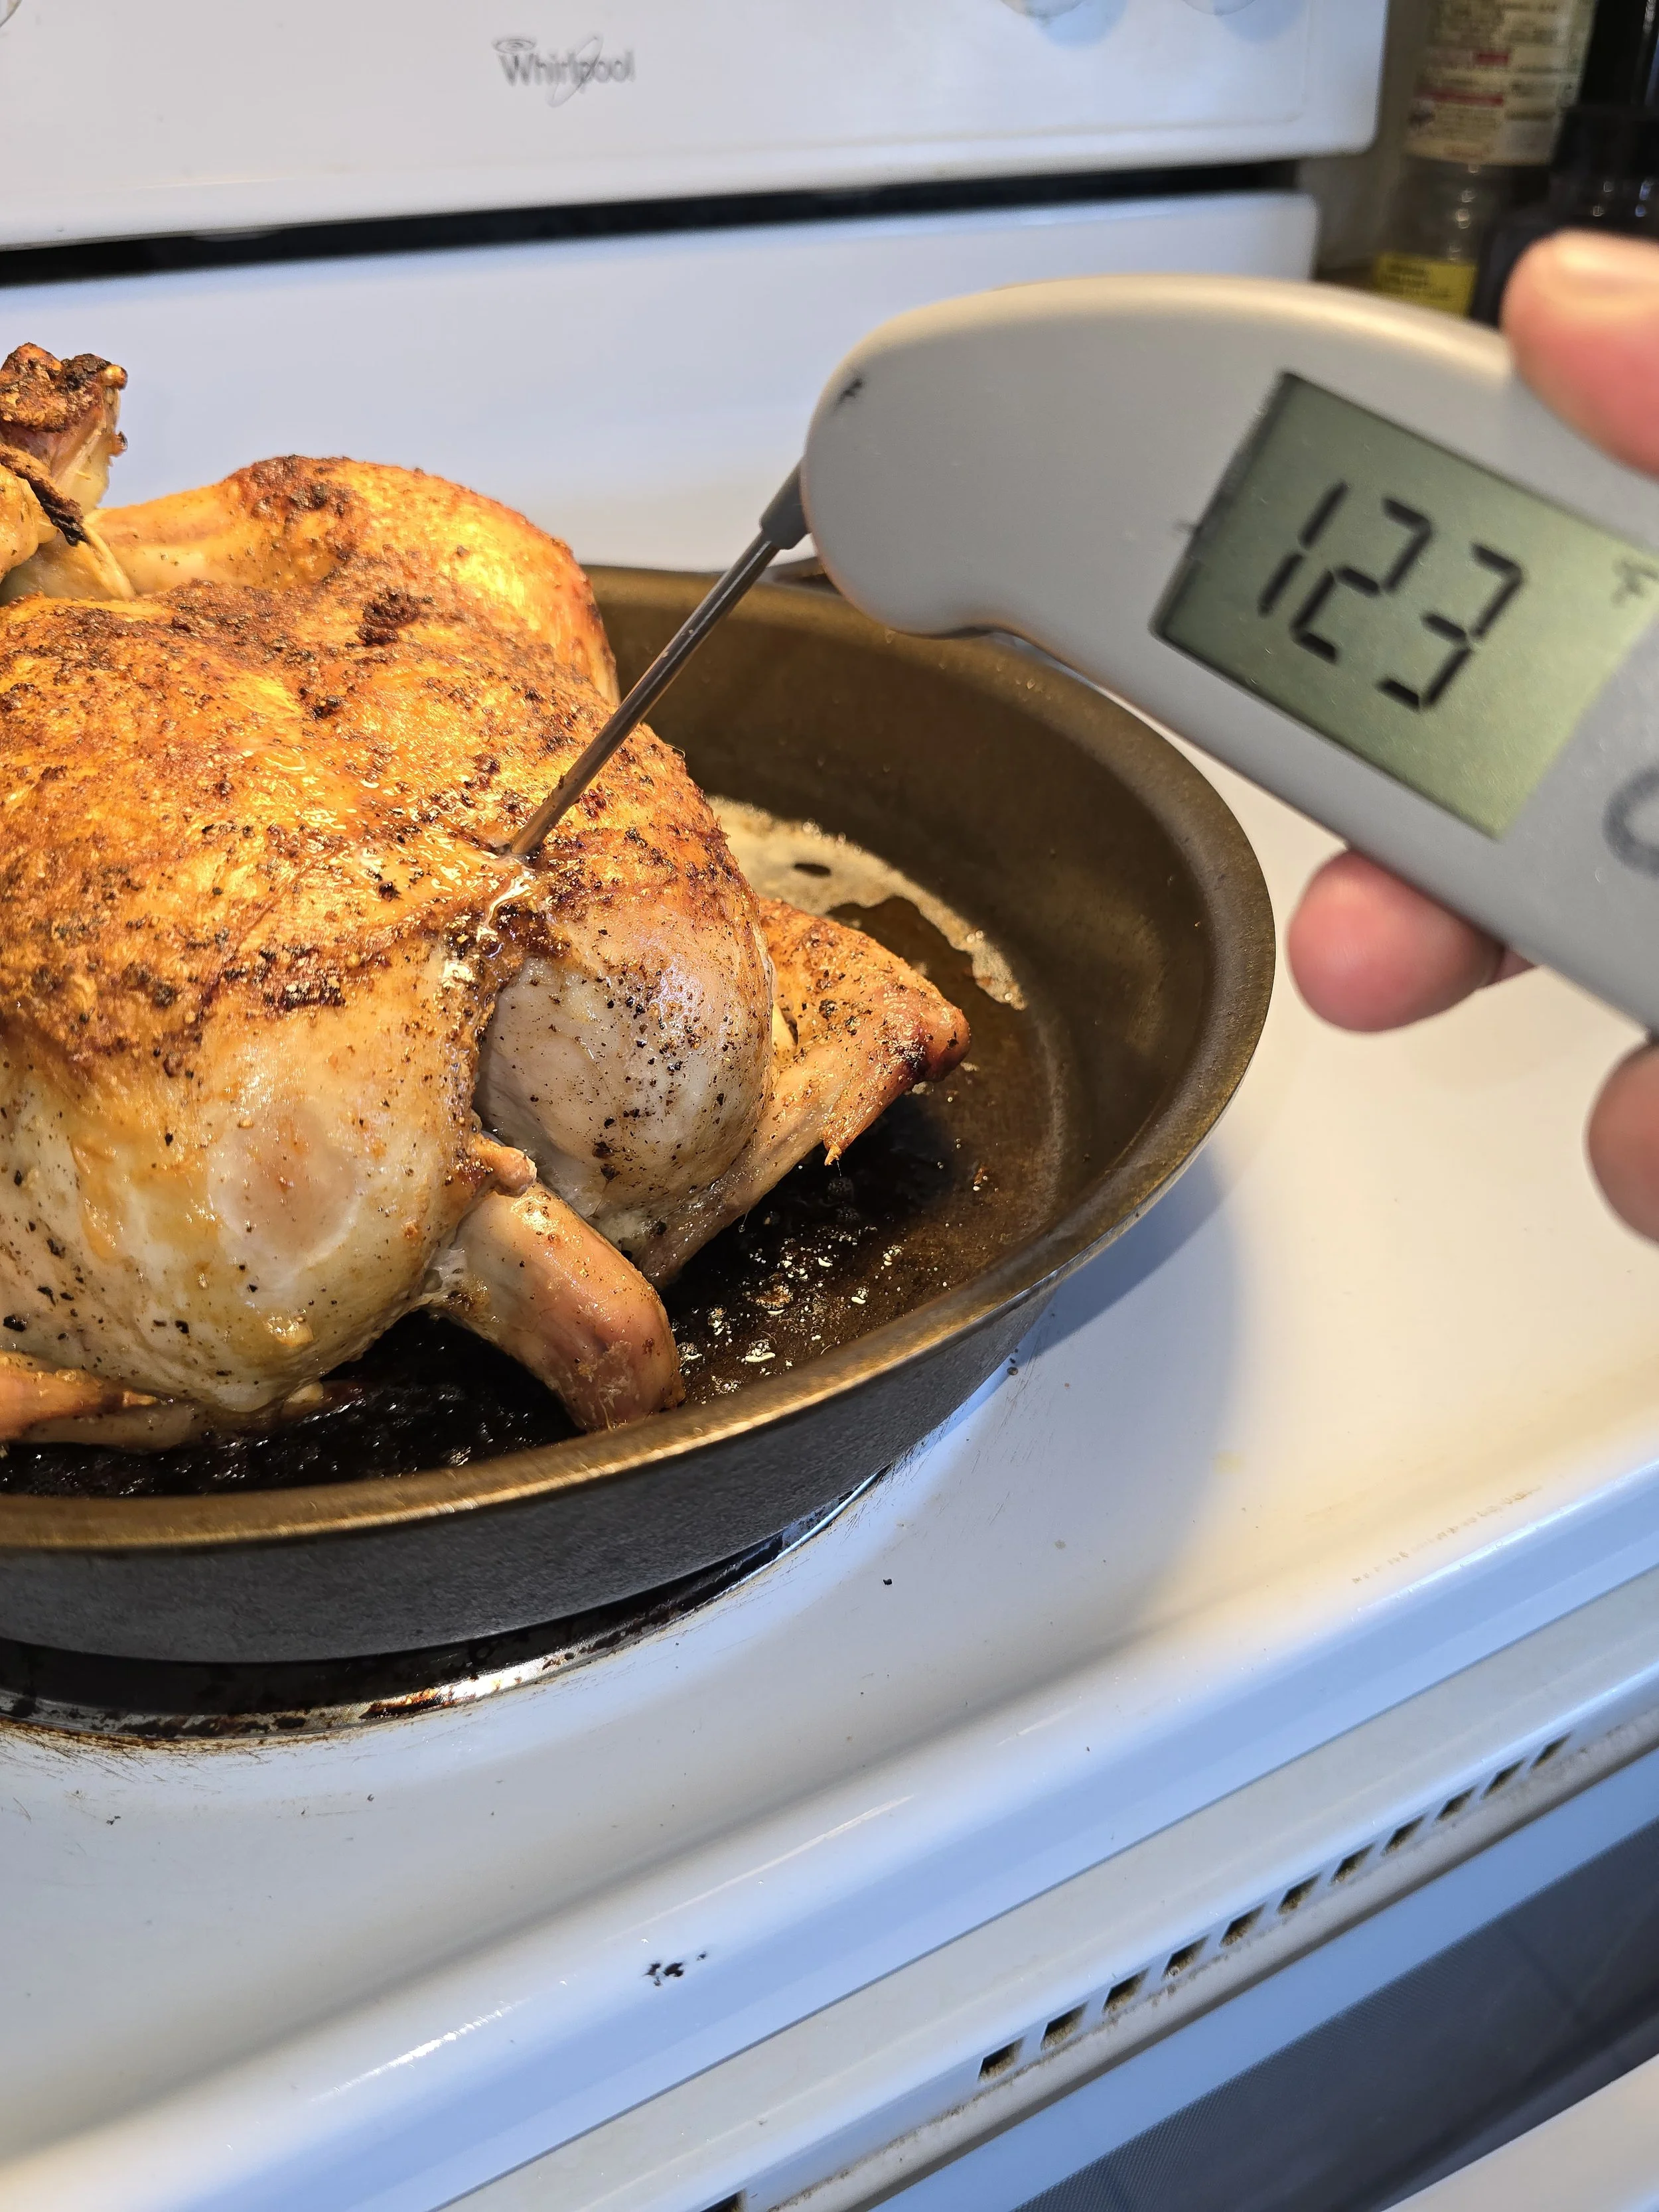
If the chicken has not yet reached 165°F in the thickest part of the breast and 170–175°F in the thighs, return it to the oven in 5-minute increments, basting and checking the temperature each time.
If the sauce breaks (looks greasy or separated instead of glossy), add a splash more broth and vinegar to re-emulsify.
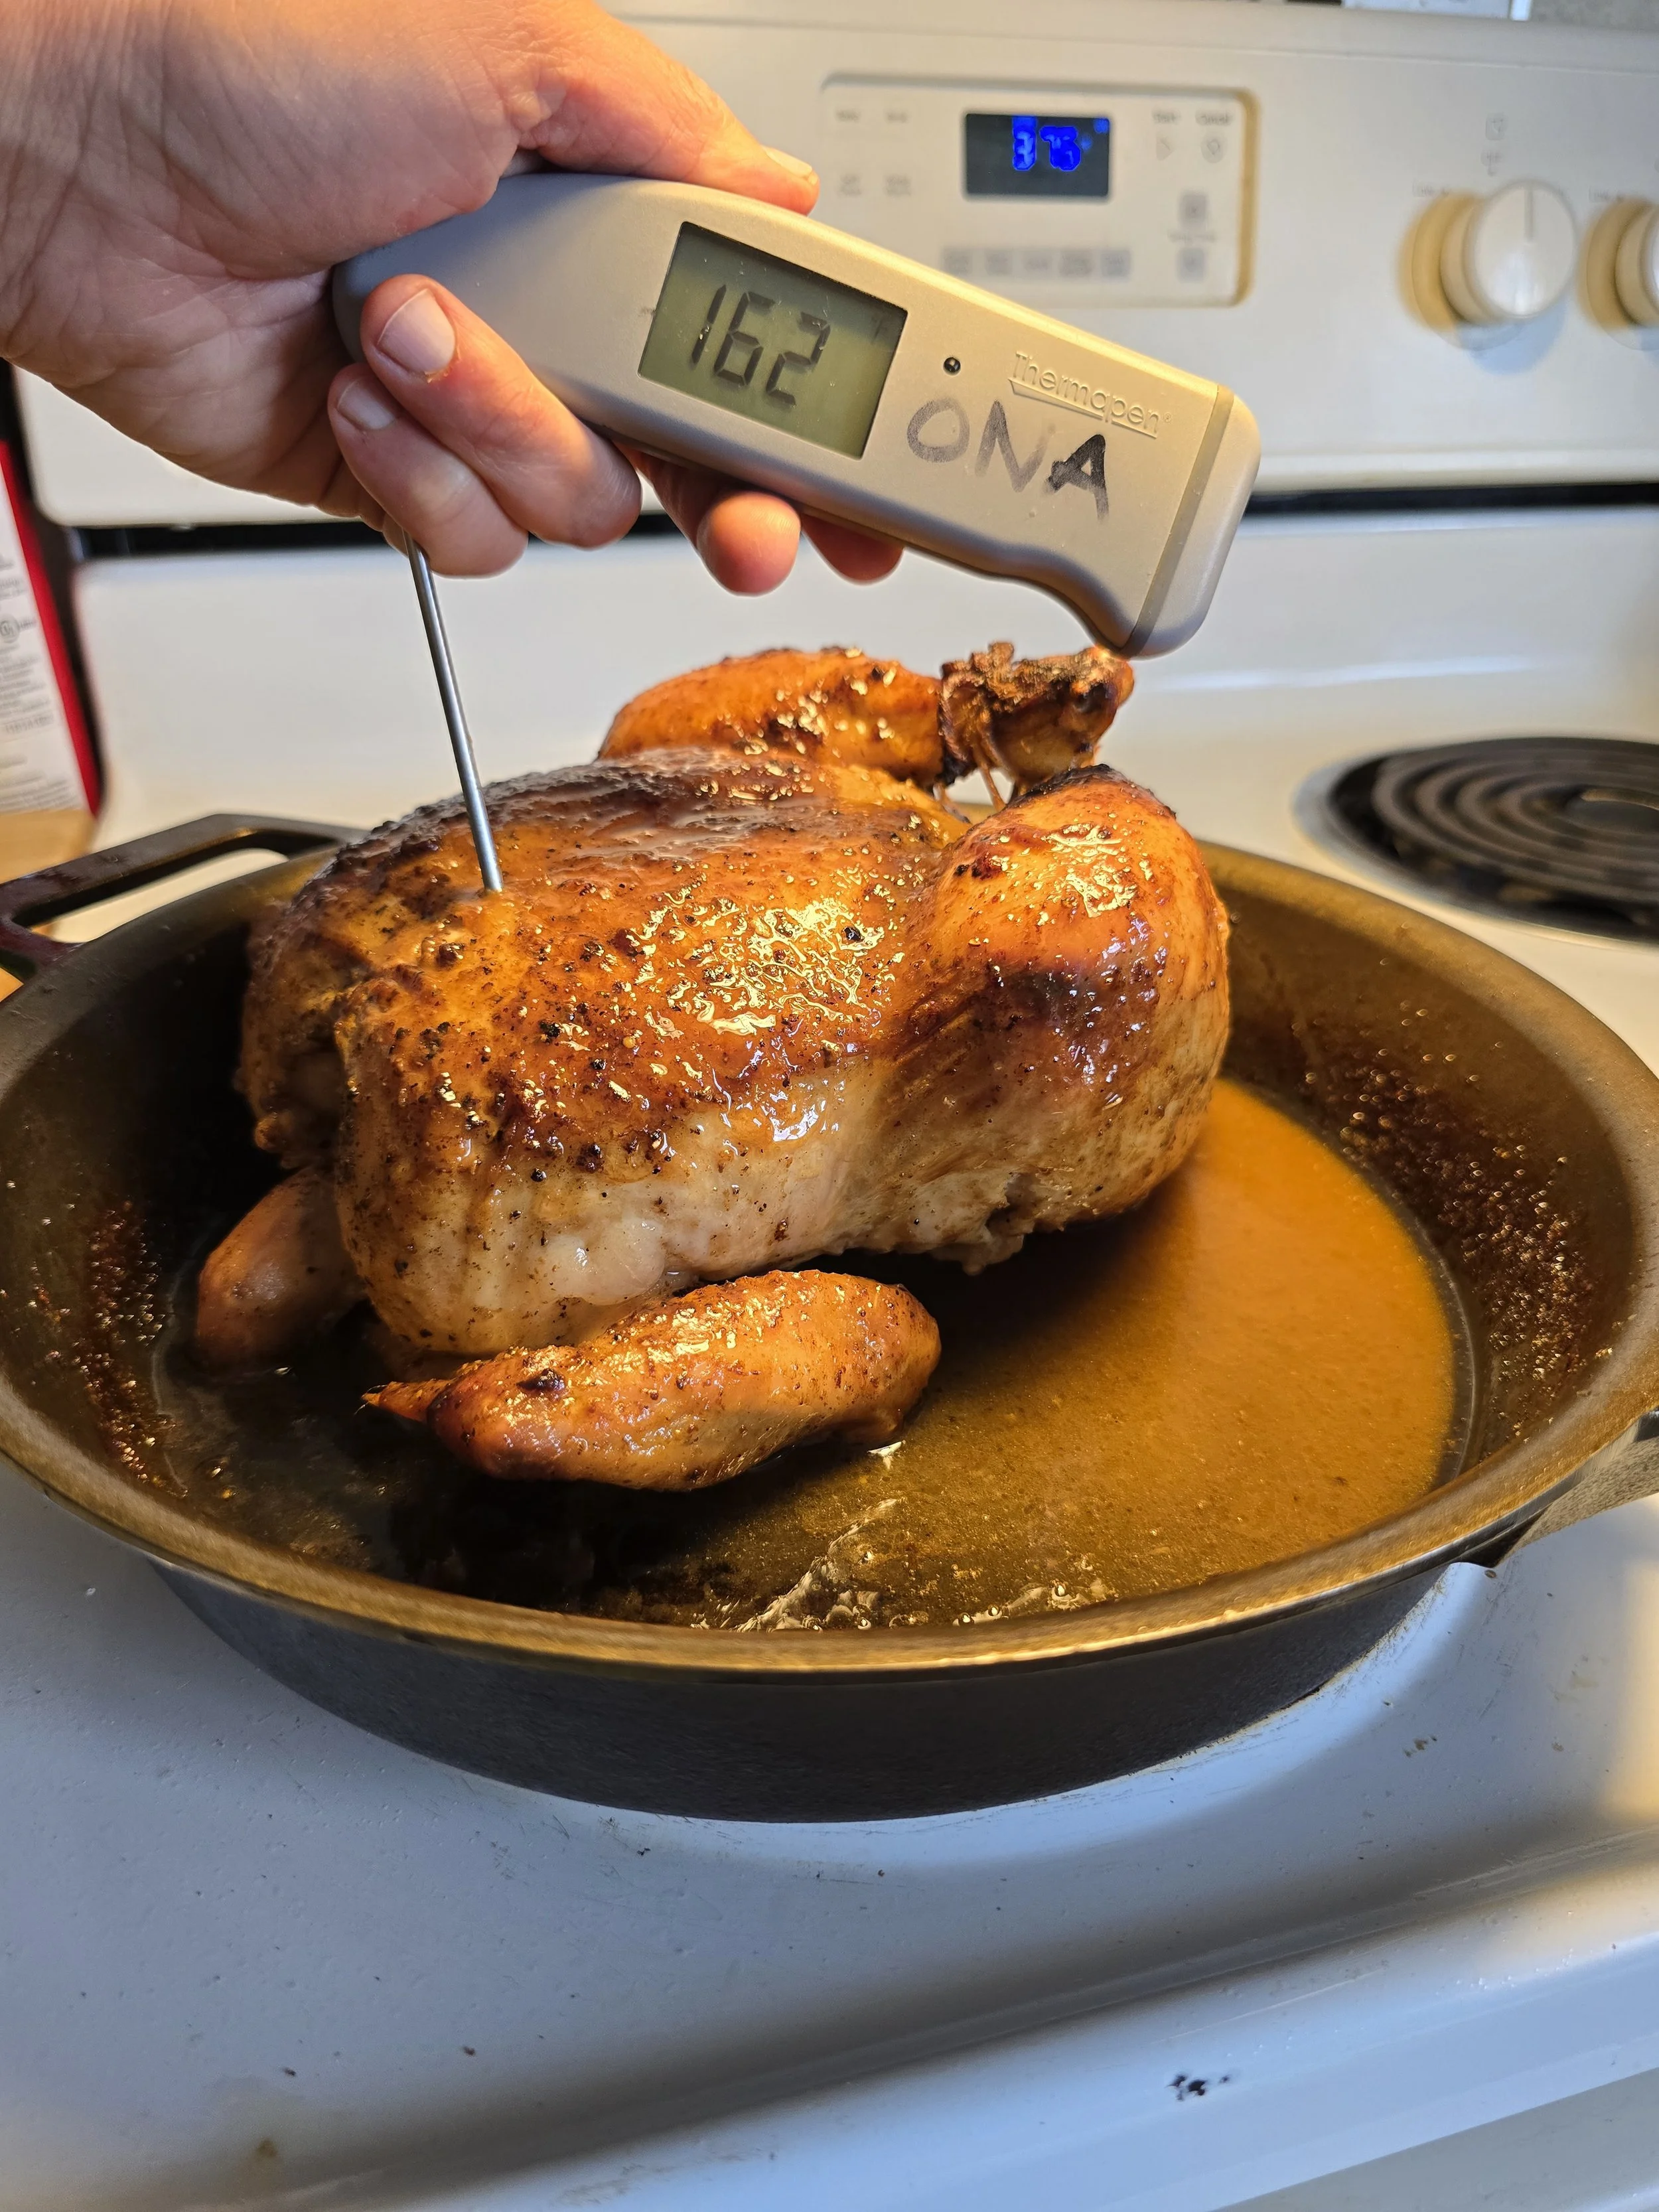
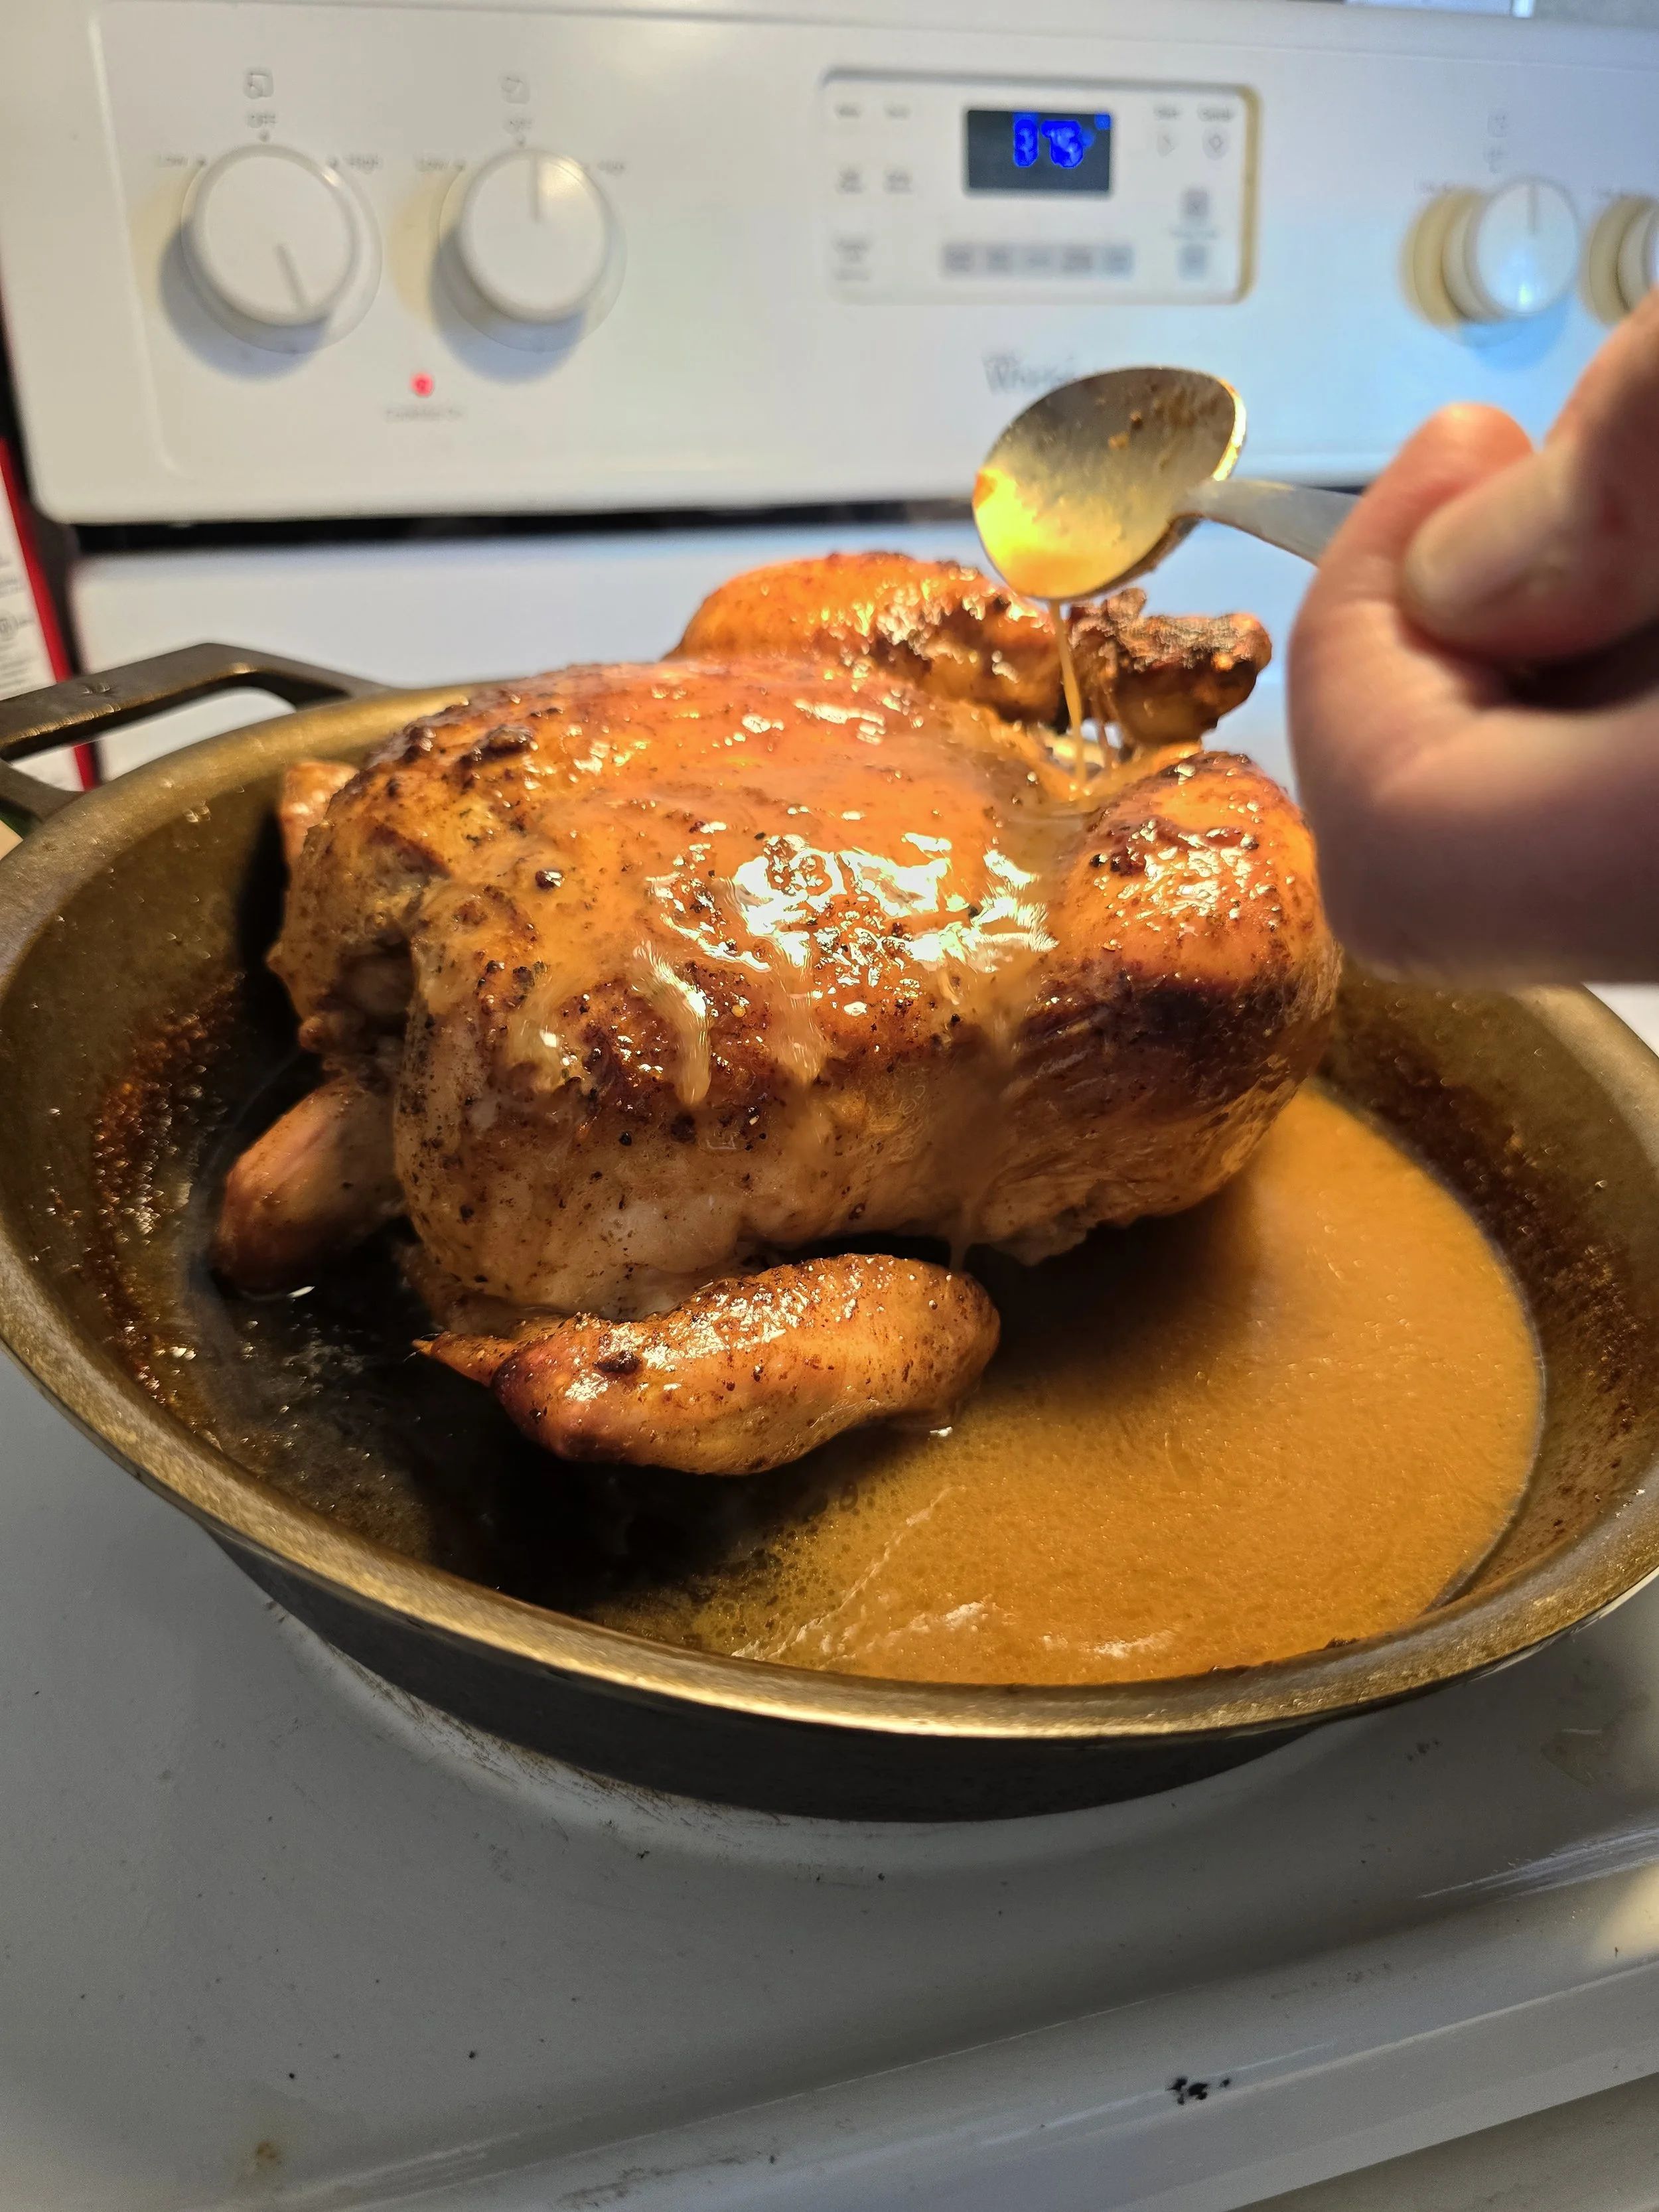
10. Once the chicken reaches the target temperatures (165°F in the breast, 170–175°F in the thighs — do not exceed 180°F in any part), remove it from the oven and let it rest for at least 10 minutes.
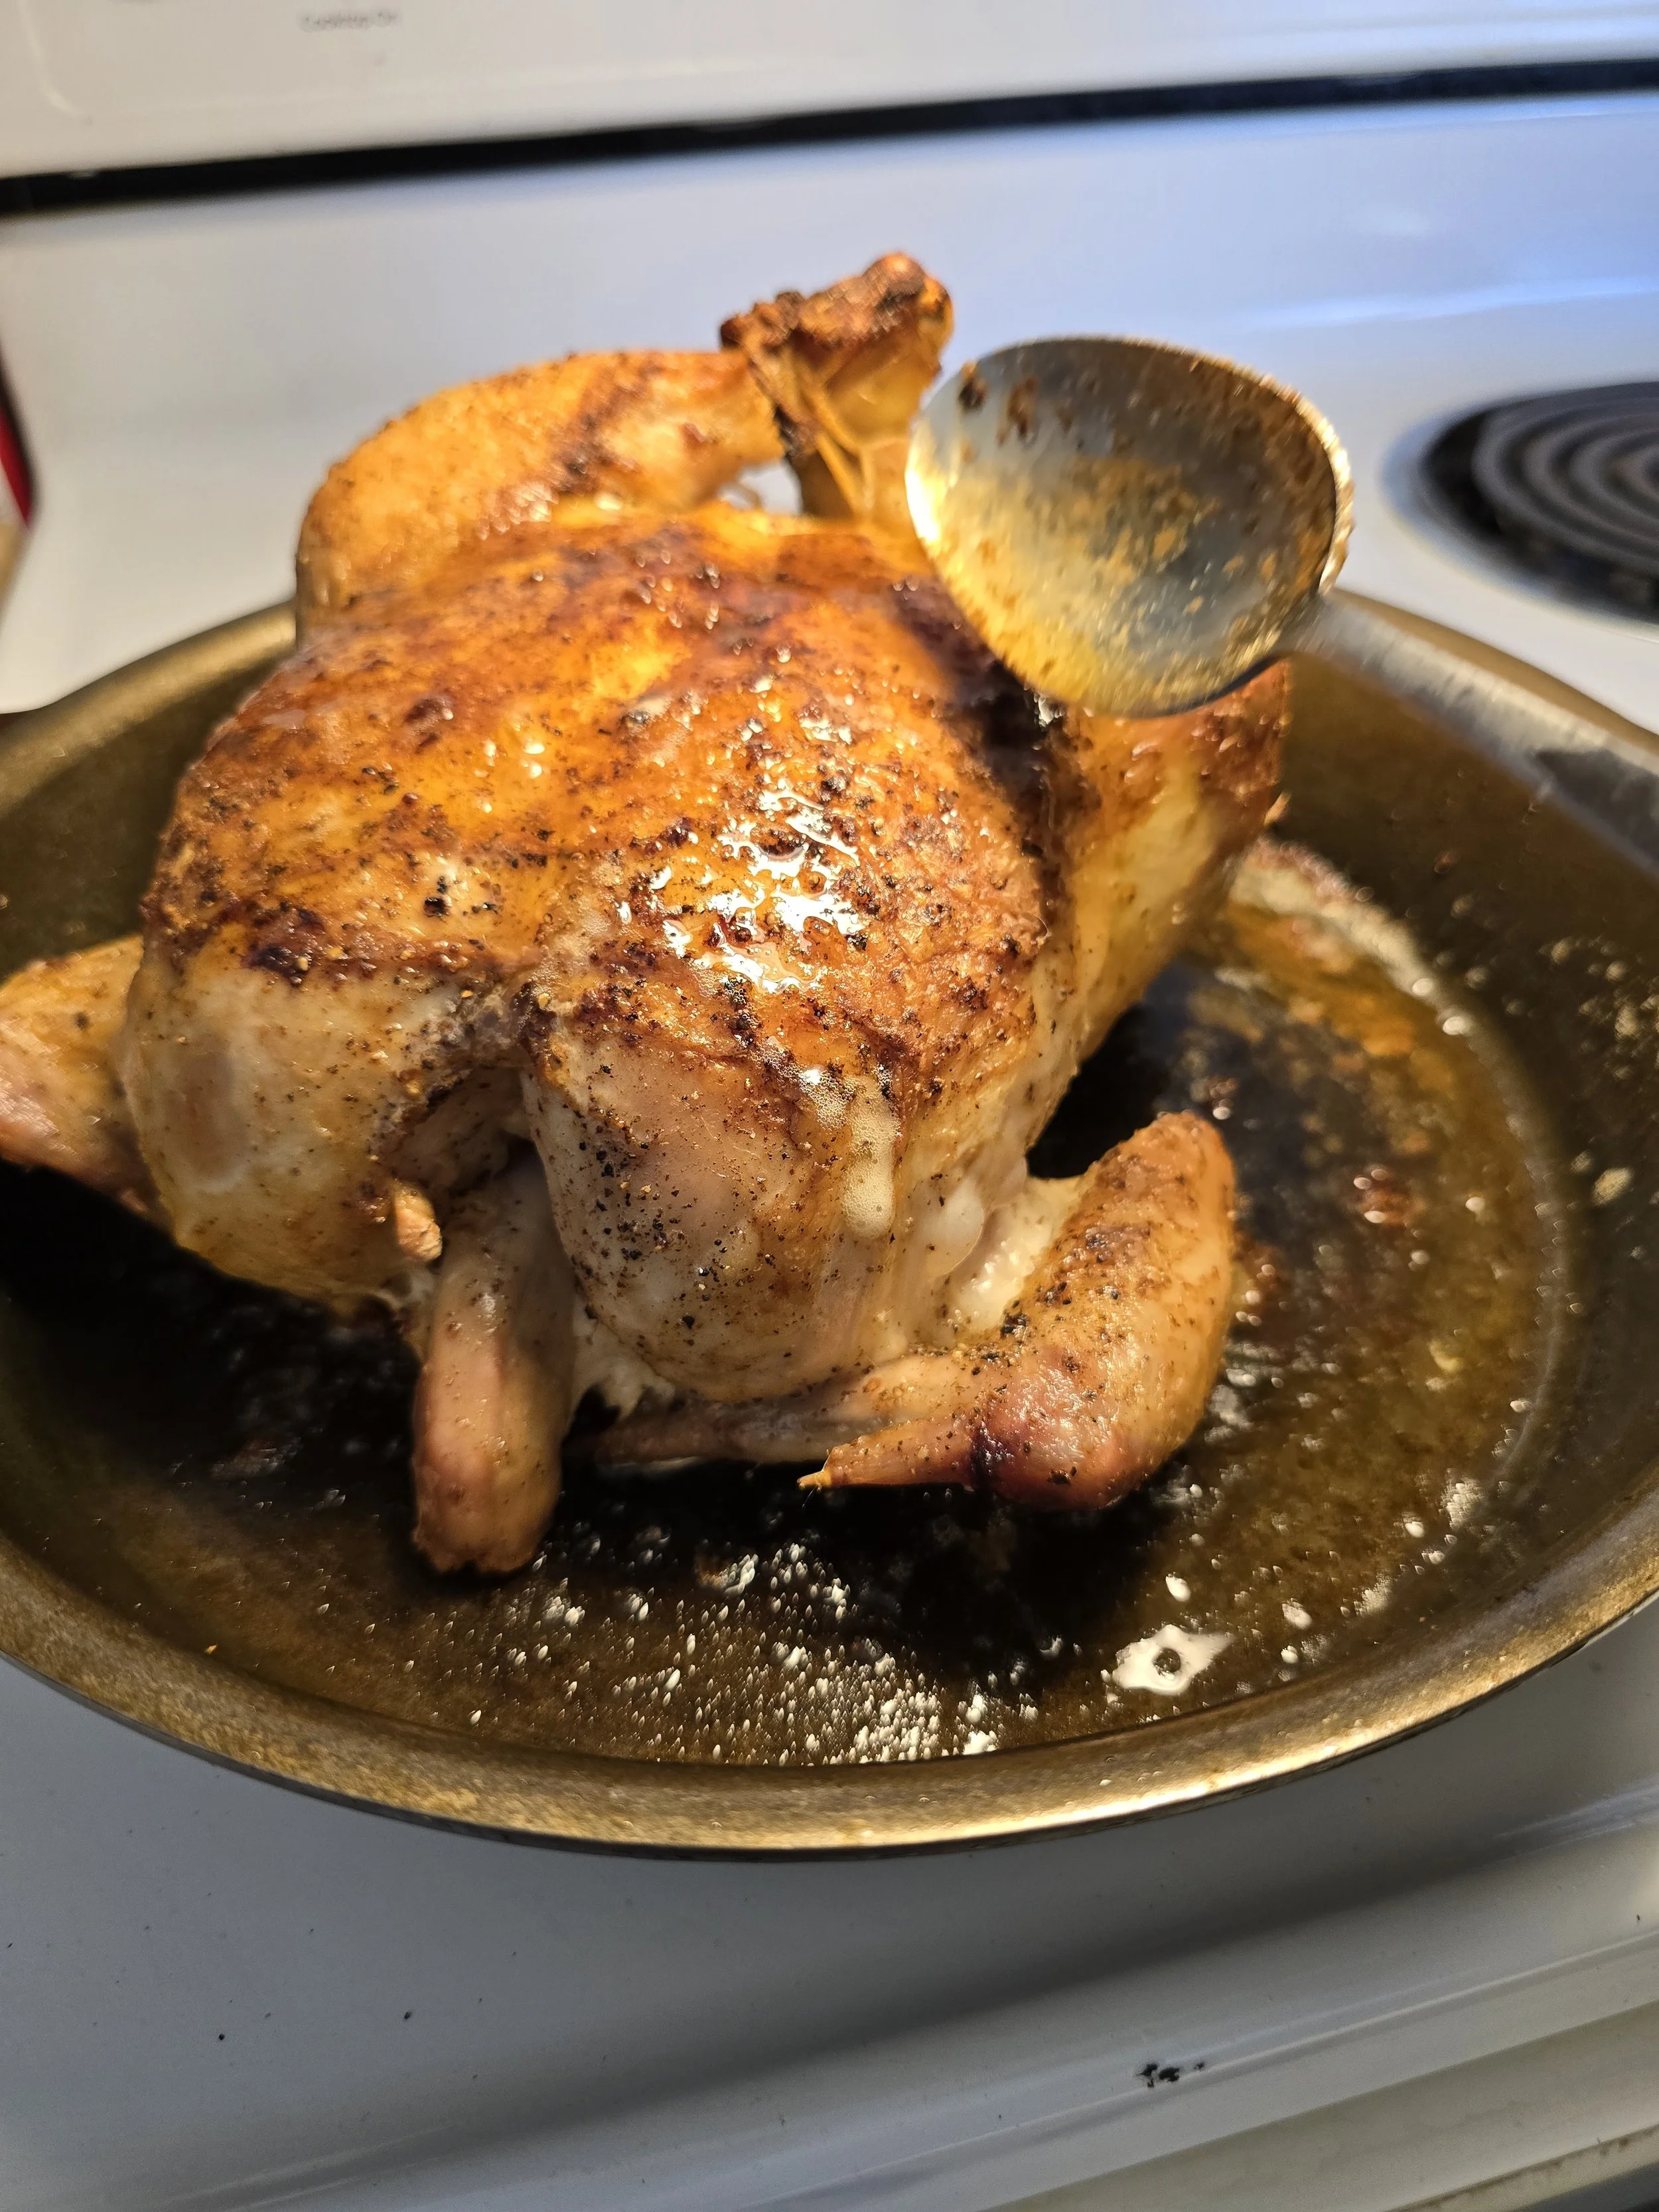
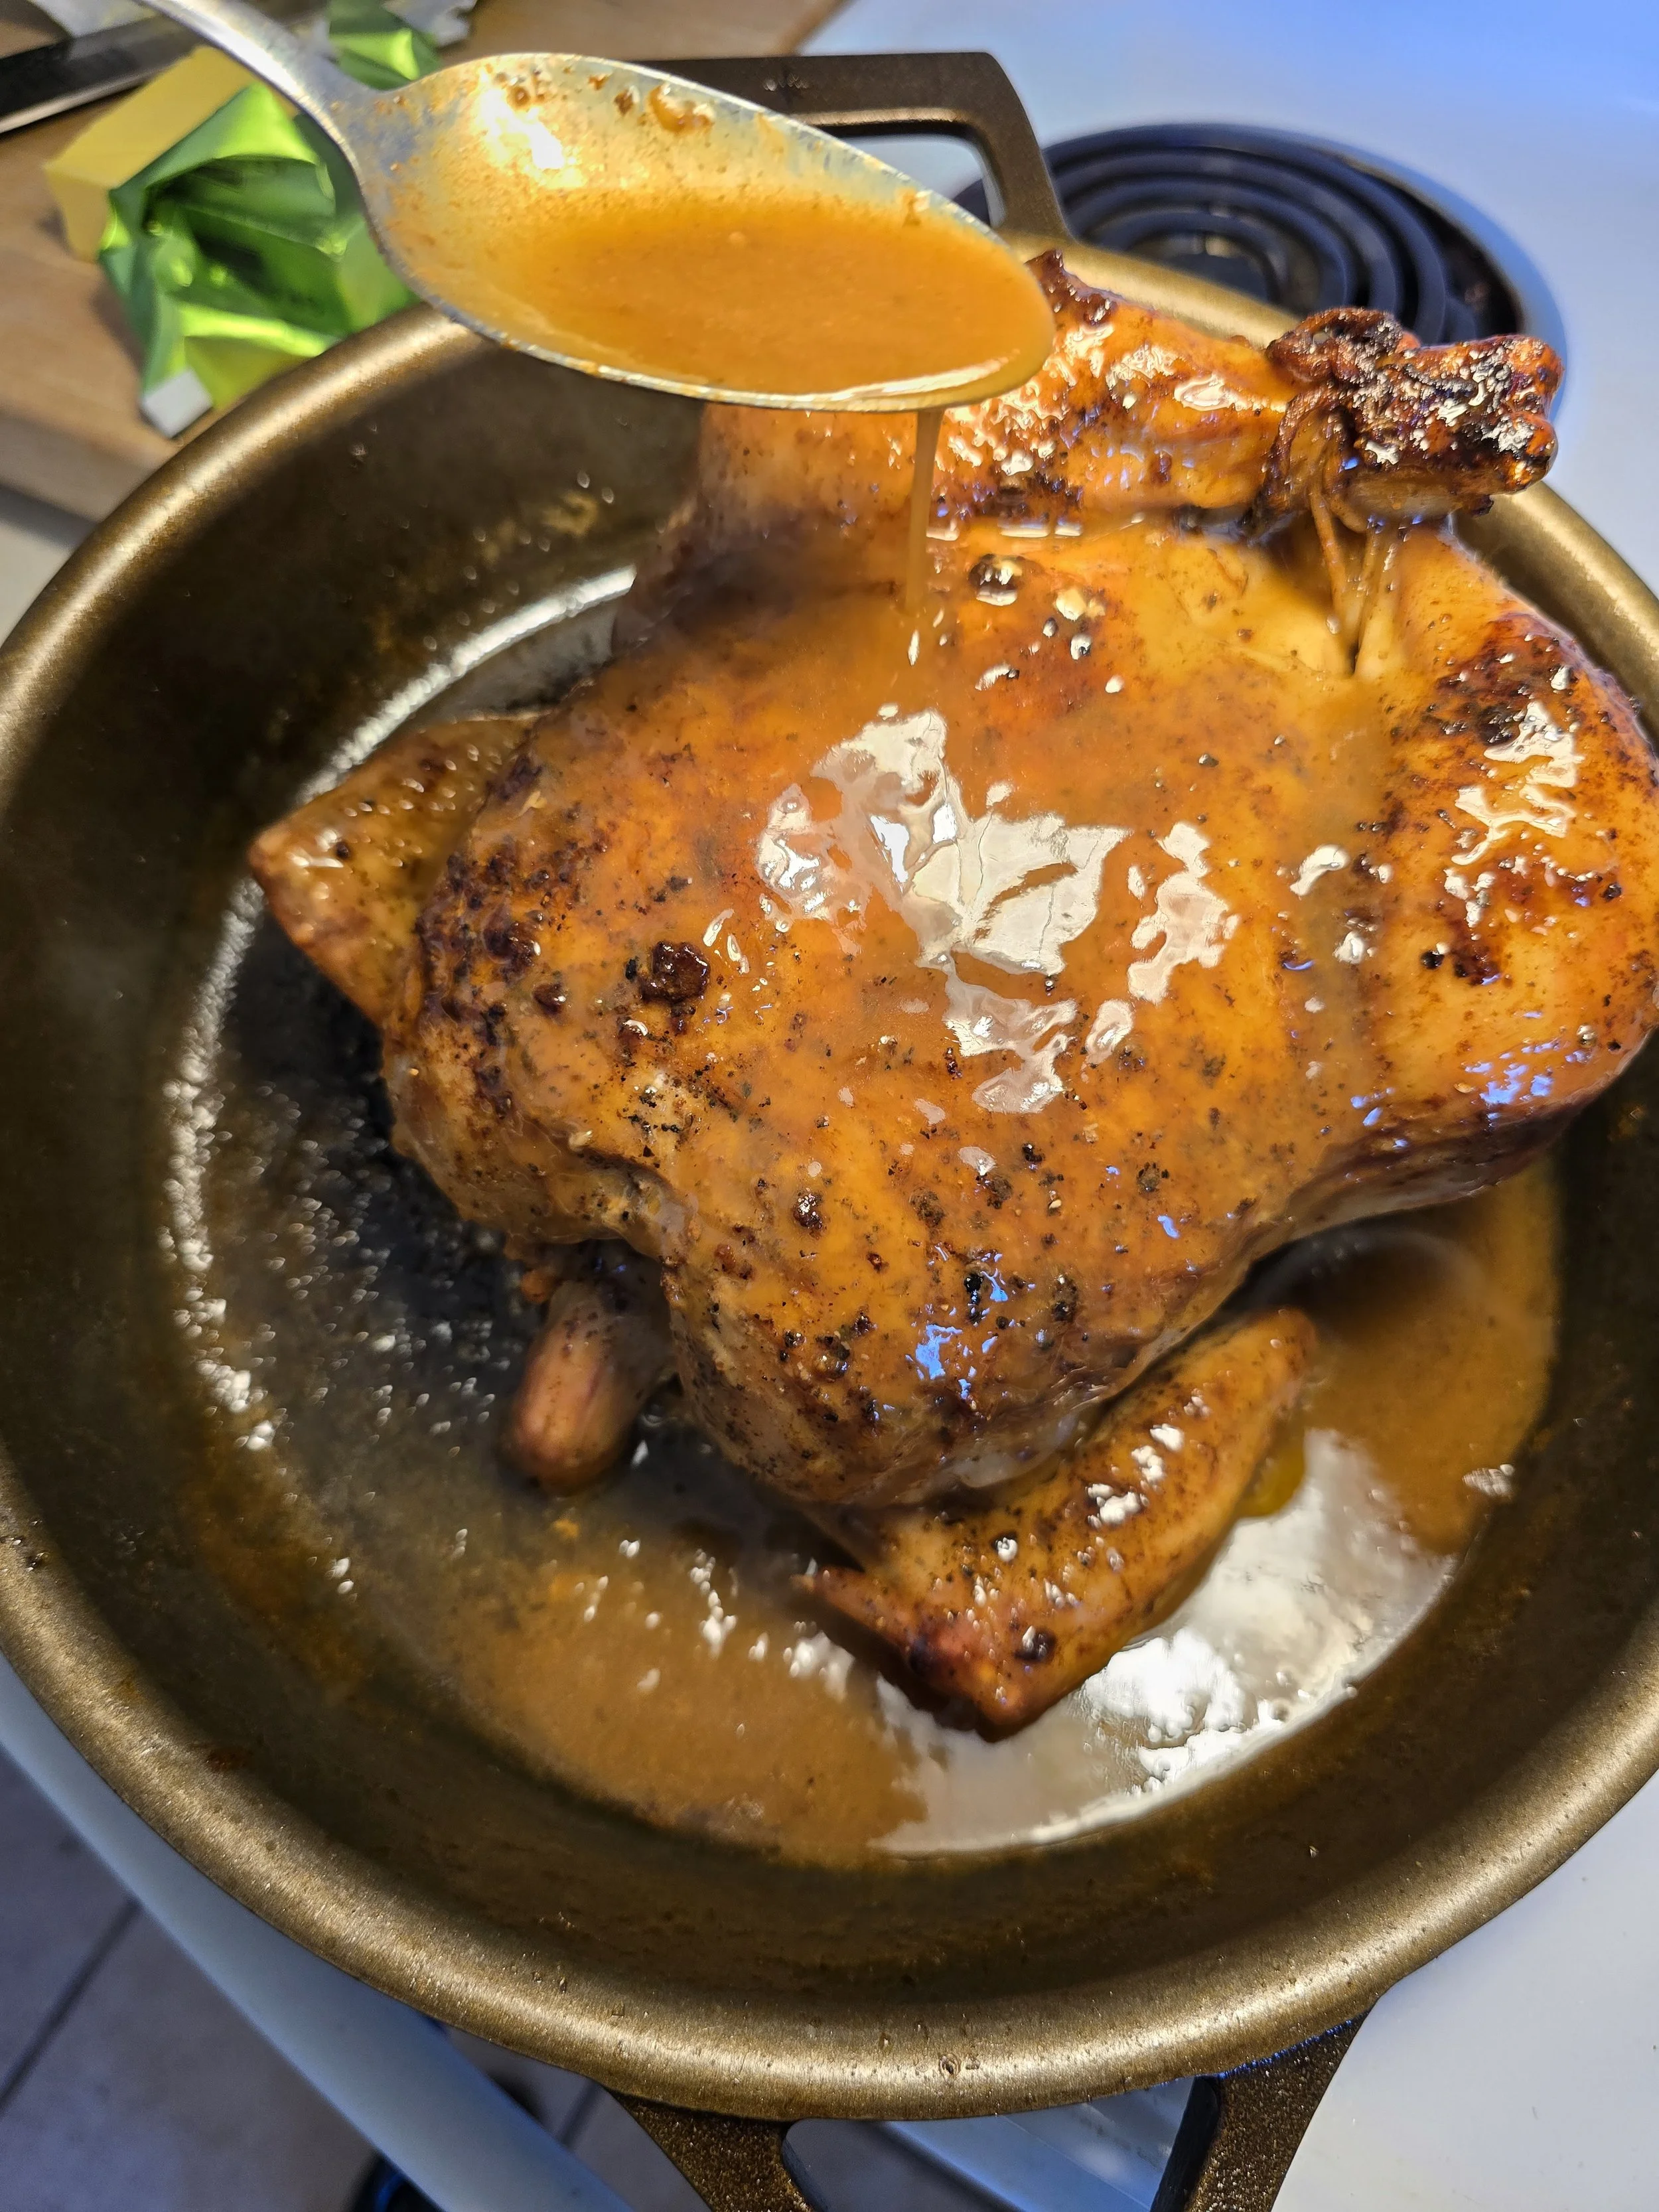
During the rest, adjust your pan sauce to taste: mellow it with more chicken stock, brighten it with vinegar, or season with additional salt. Baste during the rest and again just before carving. Spoon sauce over each portion to serve.
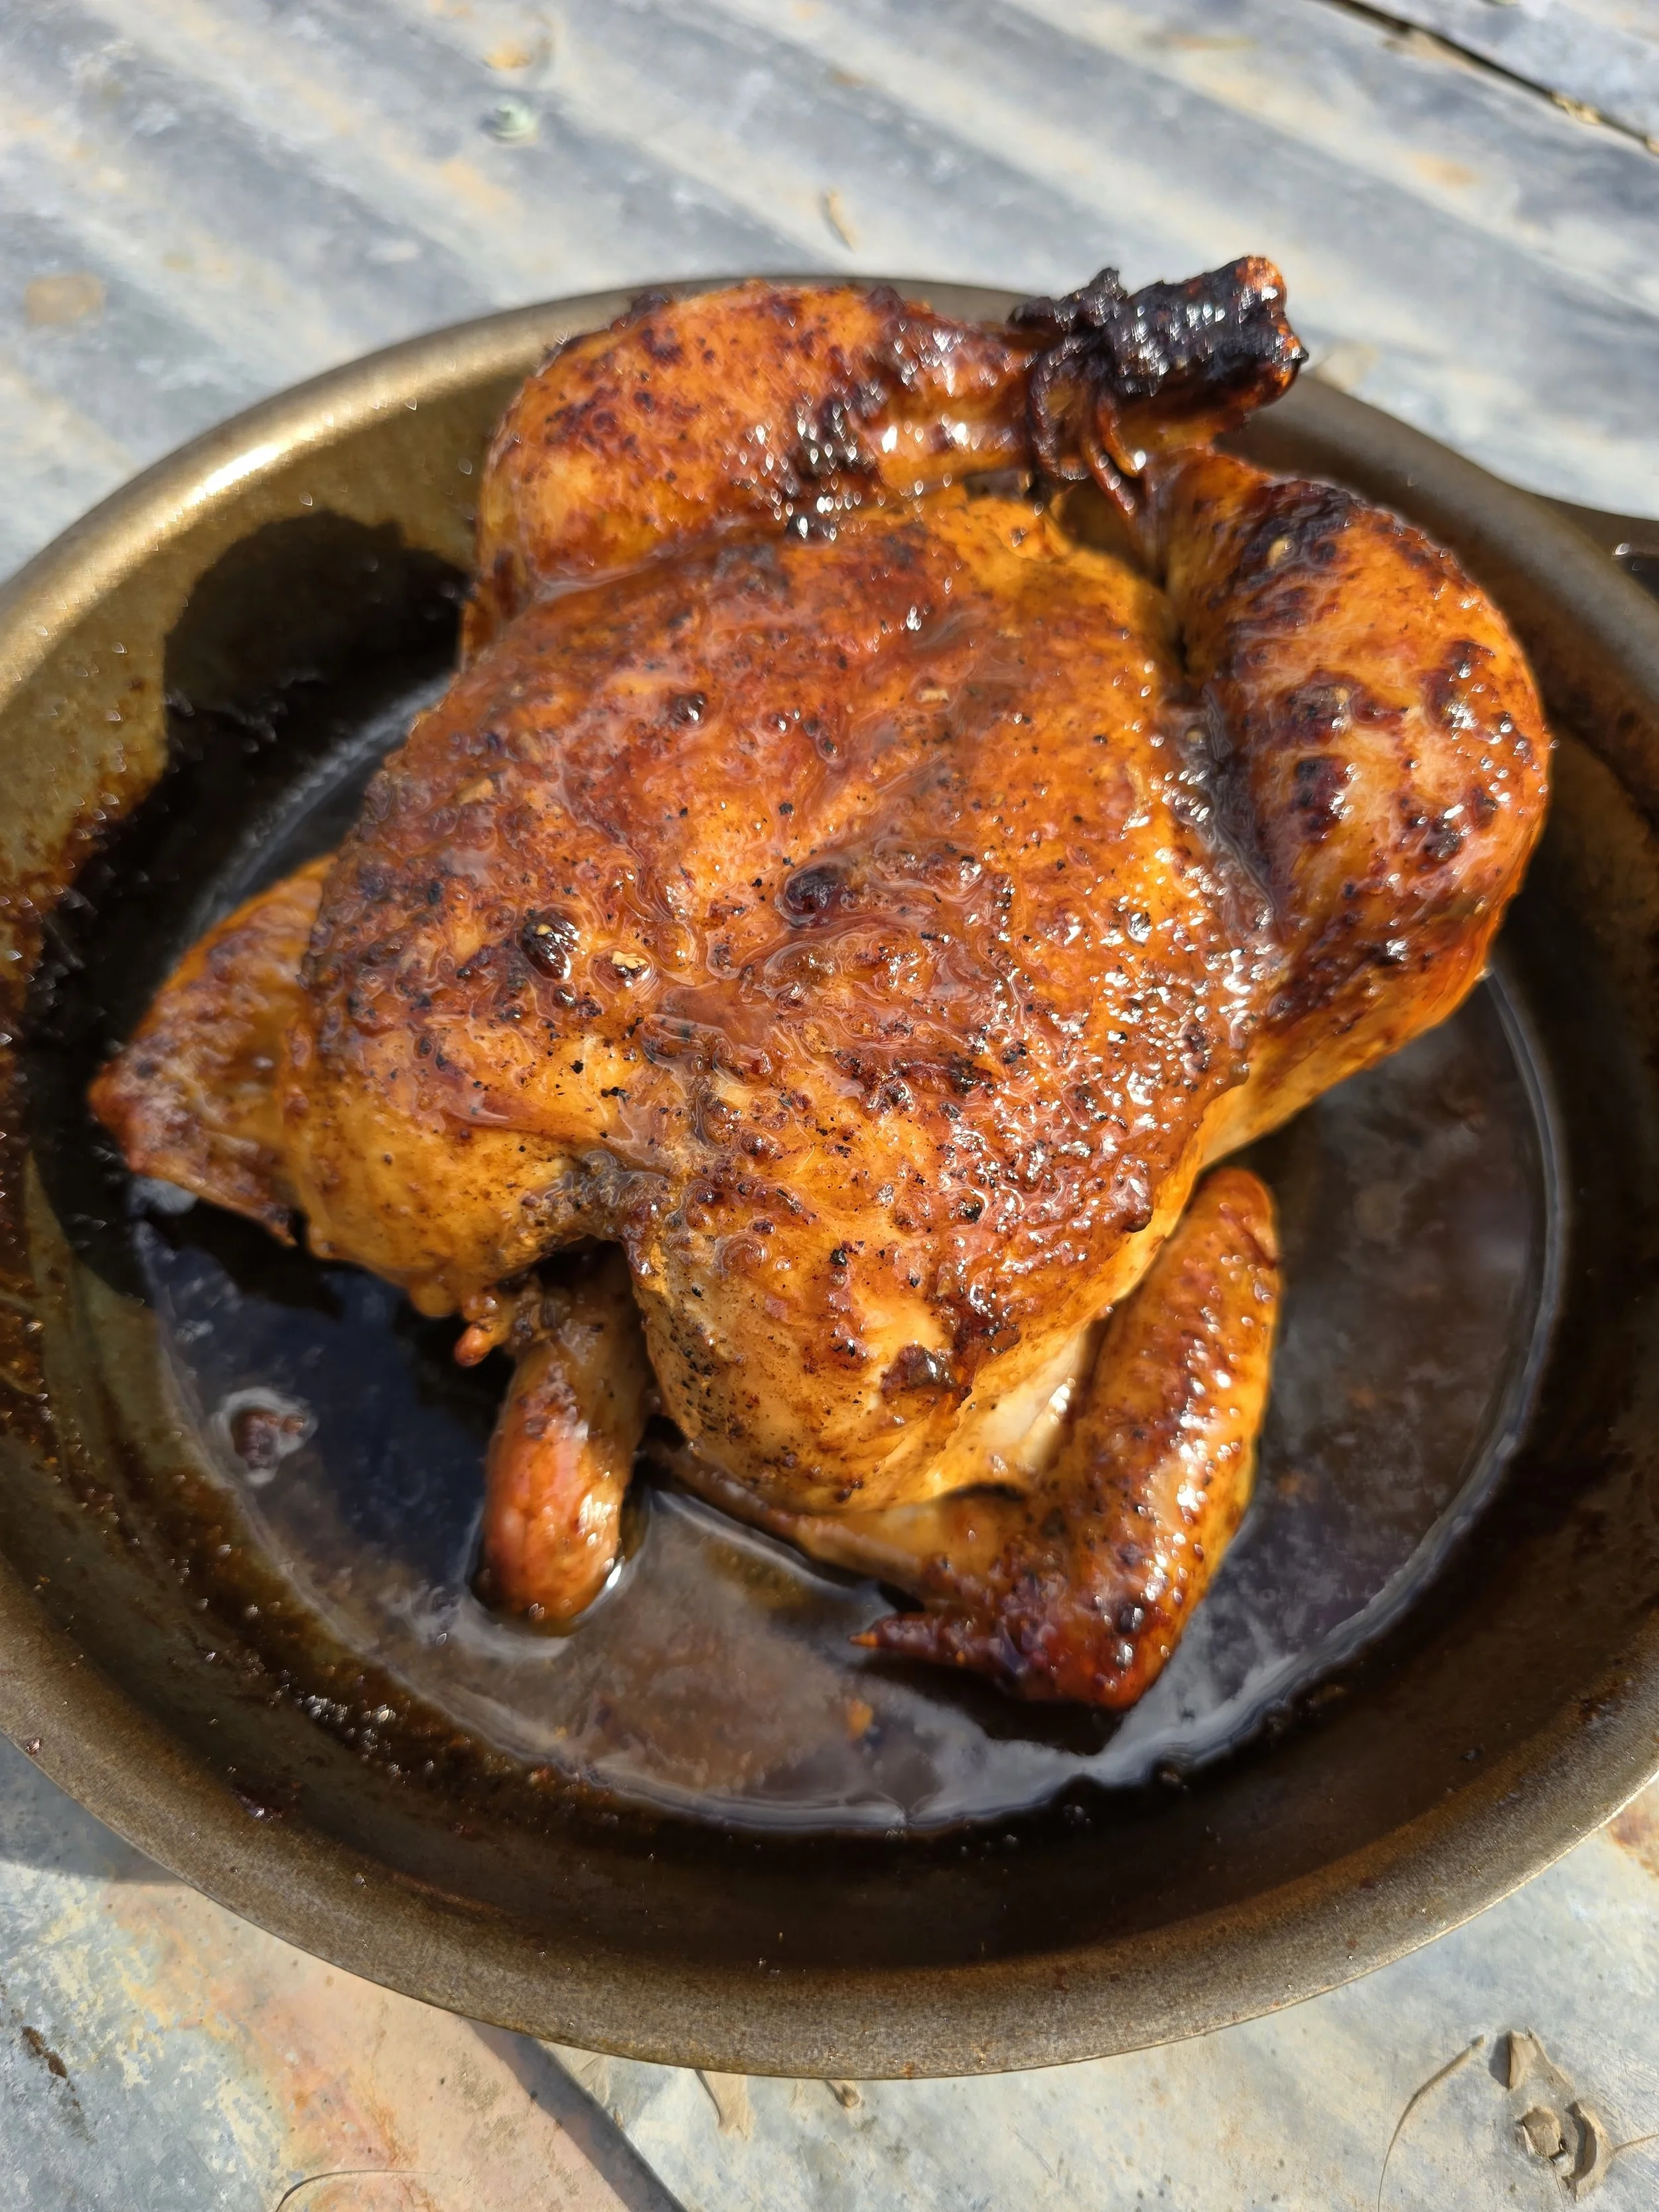
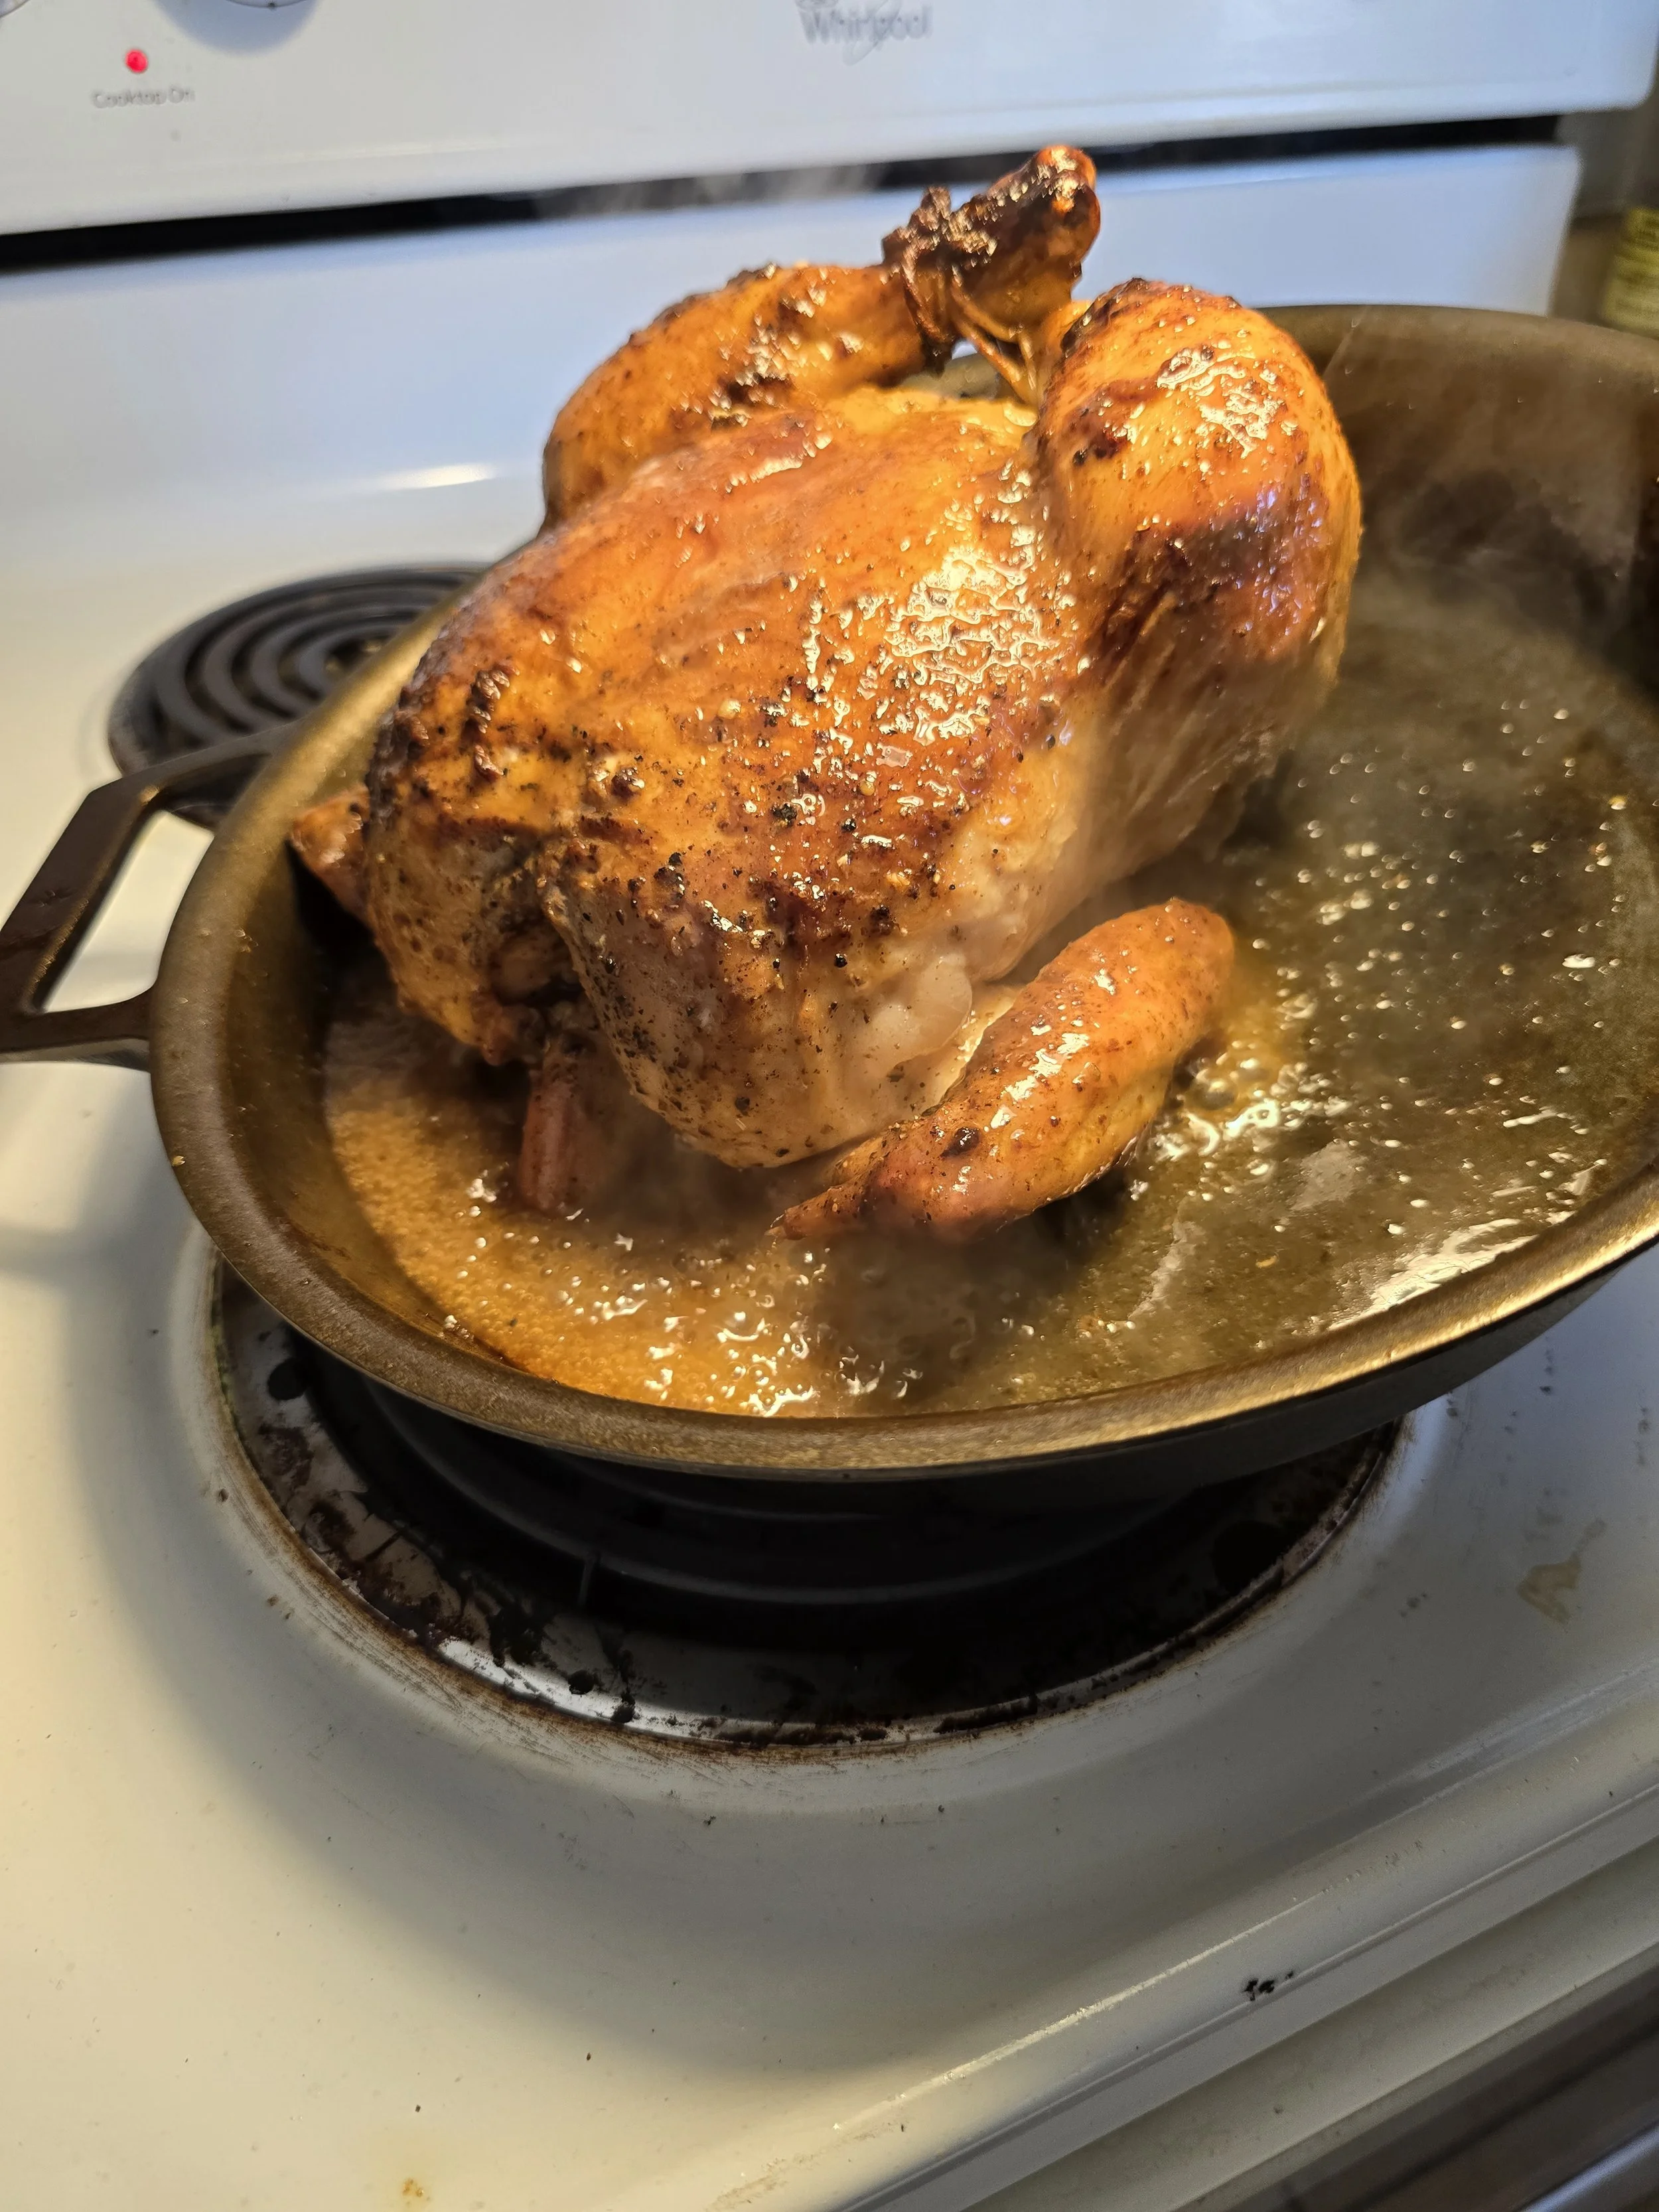
Finished chicken in all her glory.
RECIPE BELOW!

Skillet-Roasted Chicken with a Sherry Pan Sauce
Ingredients
- 1 whole chicken (5–6 pounds)
- Kosher salt (for dry brining and seasoning)
- Freshly ground black pepper (to taste)
- 2–4 tablespoons butter, softened (for under the skin)
- Optional: finishing salt, such as Maldon or San Juan Sea Salt
- 1–2 oz butter
- 4 oz (½ cup) chicken broth, plus more as needed
- 2–3 tablespoons fine sherry vinegar, plus more to taste
- ¼ sheet pan and rack (for fridge drying)
- 10-12 inch Cast iron skillet
- Butcher’s twine (for trussing)
- Instant-read meat thermometer (essential)
- One large spoon (for basting)
Instructions
- Unwrap the chicken, pat it dry, salt it generously, and leave it uncovered in the fridge overnight so the skin can dry out. Make sure it's contained to prevent drips — I prefer a ¼ sheet pan because it’s compact and has a rim to catch any juices. A rack insert helps air circulate fully around the bird. If you don’t have time to start this the night before, unwrap, dry, and salt it for as many hours as you can before cooking. Drying the skin helps it brown, and pre-salting seasons the meat deeply.
- Preheat the oven to 400°F. Add a bit of finishing seasoning to the chicken — I enjoy a large flake salt for this, like Maldon or San Juan Sea Salt — and freshly cracked black pepper.
- Preheat a skillet over medium-low heat. Stuff softened butter under the skin of the breasts and thighs.
- Fold the wings behind the back and tie the legs together.
- Sear the chicken, breast-side down, in the preheated skillet with a tablespoon or so of high heat safe grease or oil, I use tallow, until the skin is a saturated golden brown. Be careful not to burn it.
- Flip the chicken breast-side up. Baste with any juices or melted butter in the skillet, then roast in the skillet at 400°F for 25 minutes.
- After 25 minutes, baste again and continue roasting at 400°F for another 15–20 minutes.
- Baste again, then check the temperature in the thickest part of the chicken, I temp the breast and thigh, and to see where you’re at. Reduce the oven temperature to 375°F, and roast for another 15 minutes. Try to reinsert your thermometer into the same spots throughout the cooking process to avoid creating too many leak points for the internal juices.
- Remove the chicken from the oven. Baste again and check the temperature. If it has reached 150°F, add a large splash of chicken broth (about 4 oz), 1–2 oz of butter, and 2–3 tablespoons of fine sherry vinegar. Baste well and return to the oven for 10 minutes at 375°F. If it’s not yet at 150°F, continue roasting in 5–10 minute increments until it is, then proceed with building the sauce.
- After the 10-minute roast with the sauce, transfer the skillet to a medium or medium-high burner. Reduce the sauce as needed, basting continuously. If the chicken has not yet reached 165°F in the thickest part of the breast and 170–175°F in the thighs, return it to the oven in 5-minute increments, basting and checking the temperature each time. If the sauce breaks (looks greasy or separated instead of glossy), add a splash more broth and vinegar to re-emulsify.
- Once the chicken reaches the target temperatures (165°F in the breast, 170–175°F in the thighs — do not exceed 180°F in any part), remove it from the oven and let it rest for at least 10 minutes. During the rest, adjust your pan sauce to taste: mellow it with more chicken stock, brighten it with vinegar, or season with additional salt. Baste during the rest and again just before carving. Spoon sauce over each portion to serve.