
Gelatenous foot stock
Chicken, Pork, or Beef
A Deeply Nourishing, Zero Waste Kitchen Staple
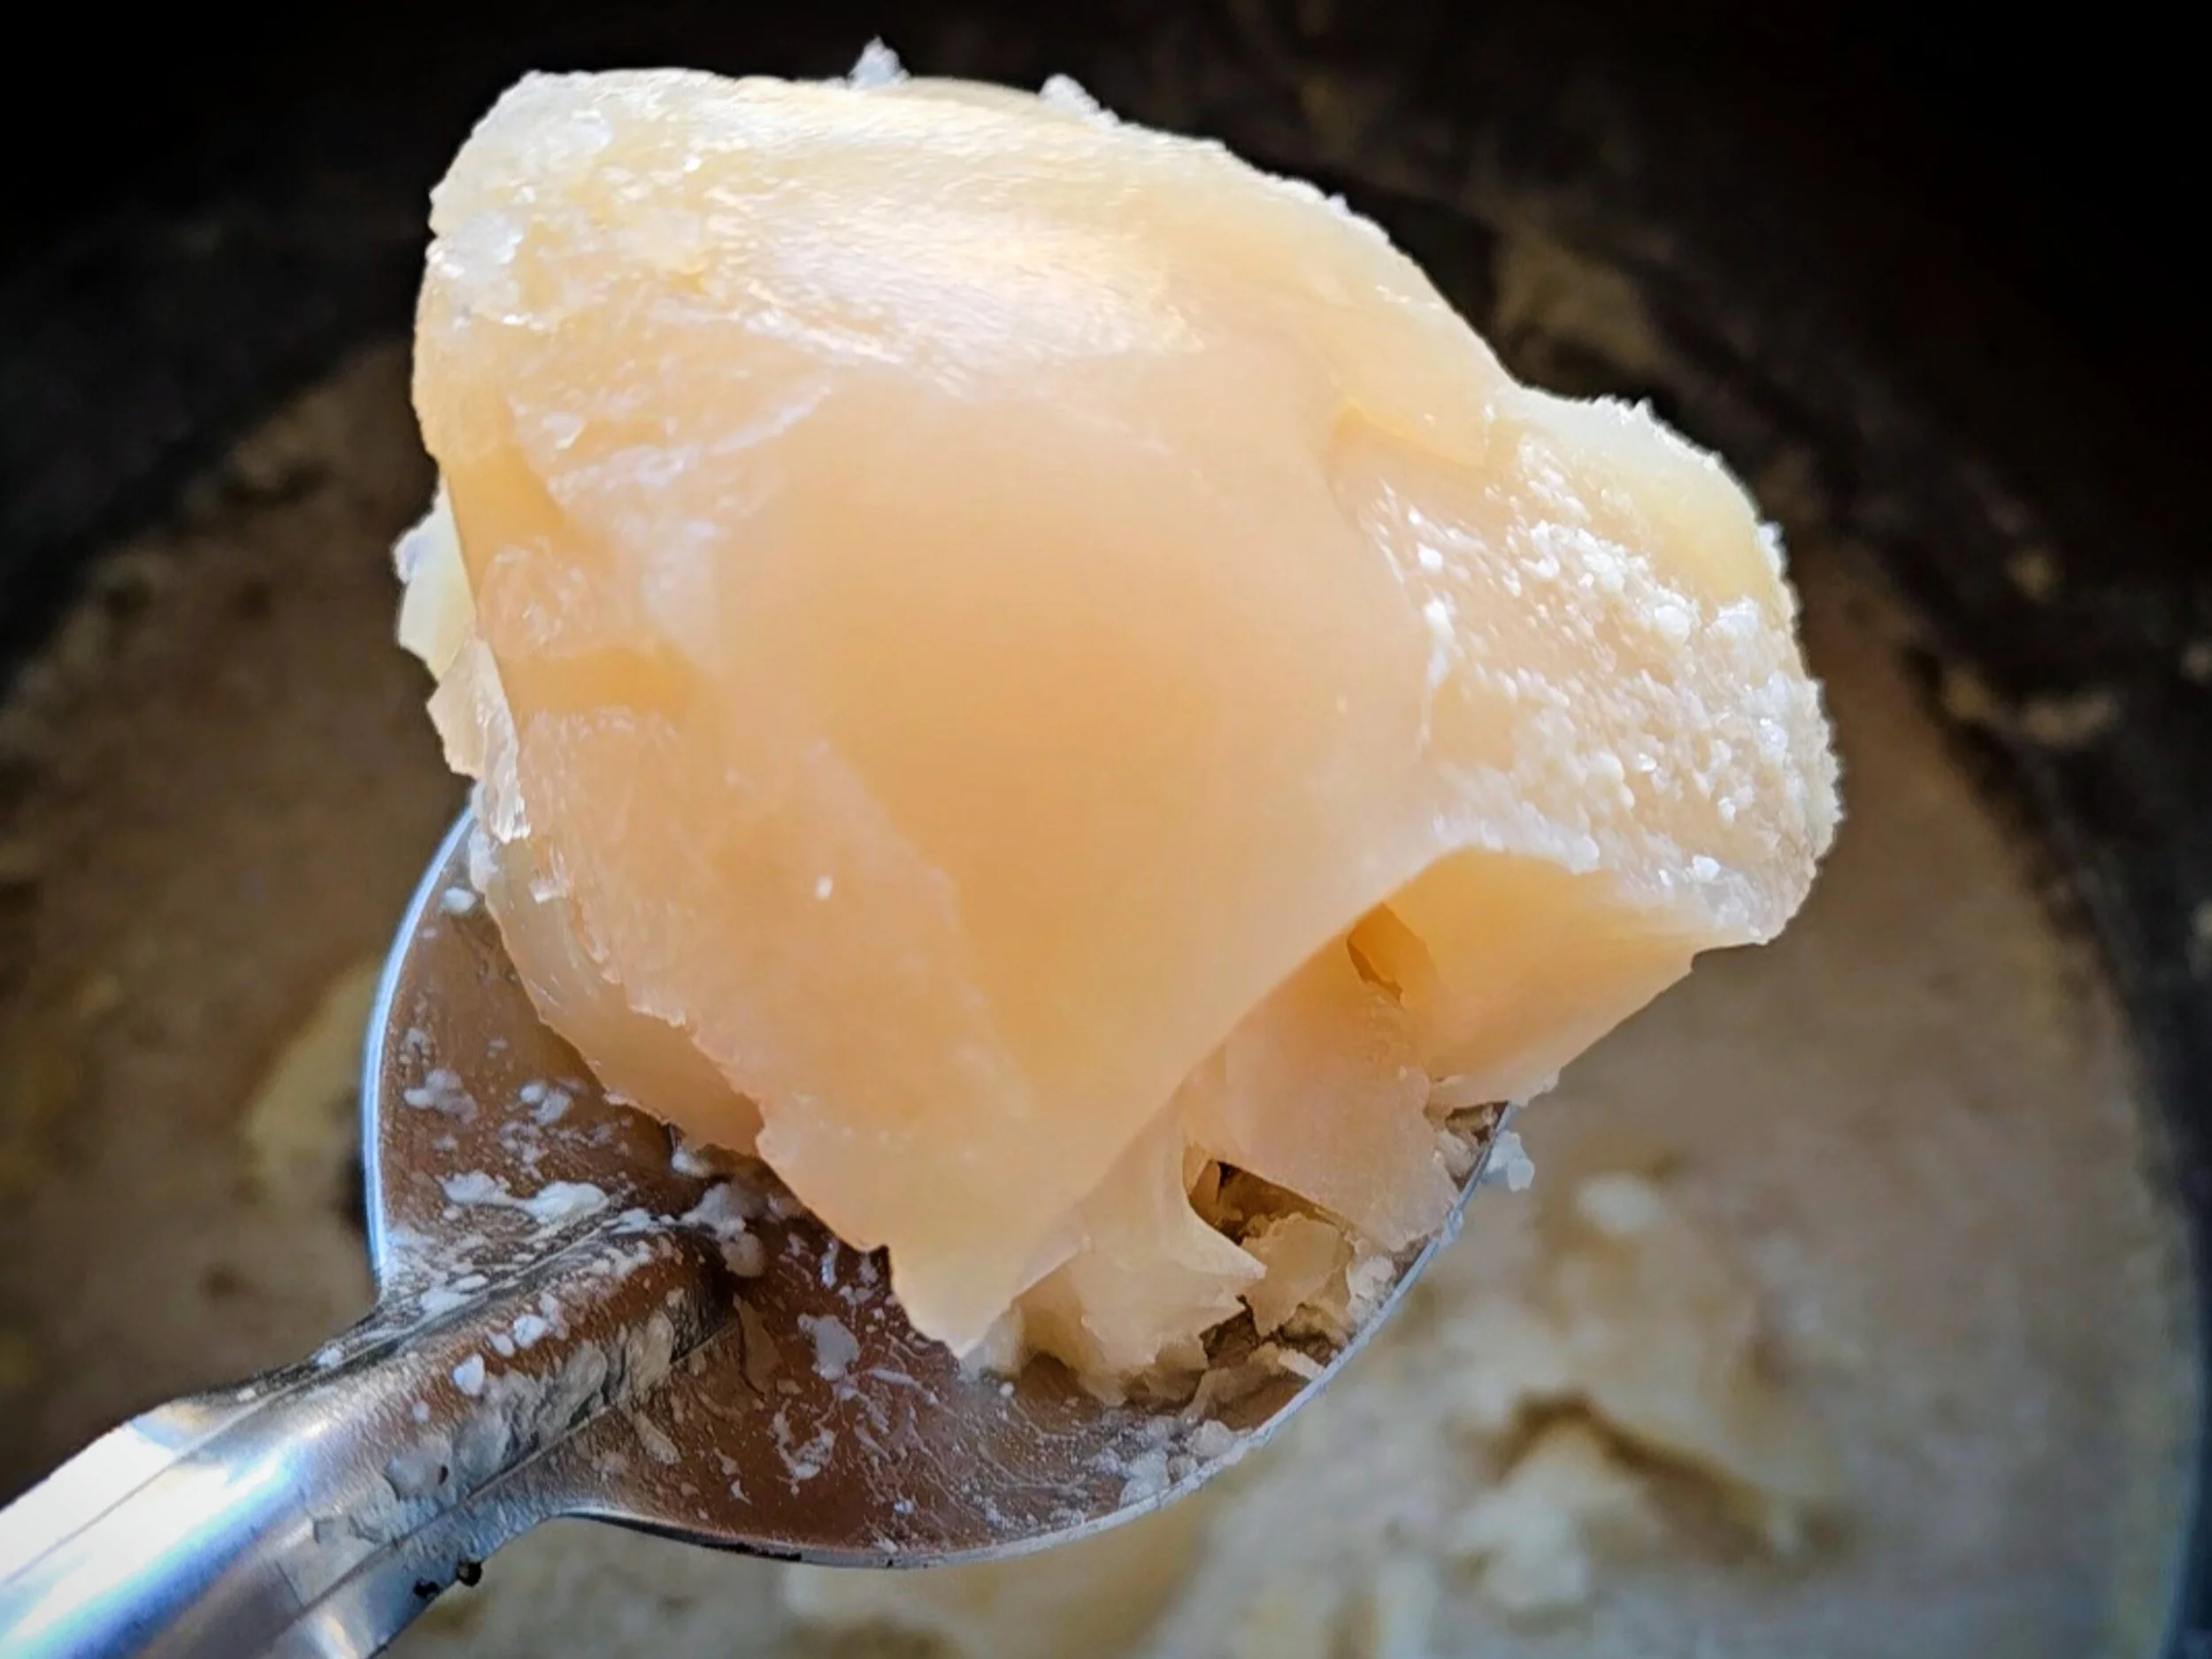
The gelled stock, finished and ready to portion.
If you have only ever seen animal feet as something to discard, let me gently suggest otherwise.
Chicken feet, pork feet, and beef feet are some of the most collagen rich parts of the animal. When simmered low and slow, they transform into a clear, concentrated gelatin that sets firmly in the fridge and melts into silk when warmed.
This is not trendy powdered collagen. This is whole food gelatin. Made from the parts we often overlook.
And here is the part no one talks about.
With a little preparation ahead of time, you can get all the benefits of a long simmered stock in minutes. A spoonful of this melted into a pot gives you the body and richness of stock that simmered for a day, without actually simmering for a day.
For pennies on the dollar compared to shelf stable “bone broth” packets.
Think of it as homemade bouillon, but for body.
A spoon or two adds richness, structure, and true gelatin to soups, sauces, braises, grains, and broth. It gives food that restaurant level silk without packets, powders, or marketing.
If you raise birds or livestock, this is gold. If you buy whole animals, ask your butcher to save the feet.
This is food from the foot up.
Ingredients
Chicken feet, pork feet, or beef feet
Cold water
That is it.
There is no strict quantity here. You can make as much or as little as you want.
The only measure that matters is this:
The water should come one to two inches above the top of the feet in your pot.
You can make a small batch with 2 to 4 pounds.
Or you can go big.
I recently used 15 pounds of chicken feet in one go.
Large batches save an enormous amount of time and energy in the long run. You simmer once and stock your freezer for months. But you can absolutely make smaller batches more frequently if that fits your kitchen better.
This is flexible. The pot size and your freezer space are the only real limits.
How to Make Foot Jelly
1. Rinse Thoroughly
Rinse the prepared feet well under cold water to remove any surface debris.
If you process your own chickens, make sure the feet were properly scalded and the outer yellow skin has been peeled off. Remove the nail caps before cooking.
The small cartilage nub underneath the nail is completely fine and does not need to be removed.
For pork or beef feet, ensure they are clean and trimmed as needed.
2. Blanch to Remove Impurities
Bring a large pot of water to a boil. Add the feet and blanch for 5 to 10 minutes.
This step draws out impurities and helps produce a cleaner final jelly.
Drain completely and rinse thoroughly again under cold water.
3. Start Cold
Transfer the cleaned feet to a large heavy pot.
Cover with cold water so the water level sits a few inches above the feet.
Starting cold allows for slow, steady collagen extraction.
4. Bring Up Slowly
Slowly bring the pot up to temperature over medium heat.
As soon as it reaches a gentle simmer, immediately reduce the heat.
You want the faintest movement in the pot. A lazy simmer. Not a rolling boil.
Boiling will agitate the proteins, weaken gelatin structure, and give you a cloudy stock.
Low and slow is the key.
5. Simmer Low and Slow
Chicken feet: 12 to 36 hours
Pork feet: 18 to 36 hours
Beef feet: 24 to 48 hours
The longer it simmers, the more concentrated and gelatin rich it becomes.
I usually go long. Around 36 hours for chicken or pork. Closer to 48 for beef if I want a very firm set.
Add small amounts of hot water if needed to keep everything submerged.
A note on flavor:
I keep this gelatin stock completely unseasoned and unflavored so it can be used in the widest range of applications. Neutral gelatin is incredibly versatile.
If you would like to add aromatics, you can add onion, garlic, bay, peppercorns, herbs, or other flavorings during the last 3 to 4 hours of cooking. Adding them late prevents bitterness and keeps the flavor clean.
6. Strain Carefully
When finished, remove from heat.
Strain through a coarse strainer first to remove solids.
Then strain again two more times through increasingly fine strainers or cheesecloth.
I strain three times total for a very clean final product.
7. Chill Completely
Transfer the strained stock to the refrigerator and chill until completely cold.
It should set firm, like soft meat jelly.
Beef will often set the firmest.
8. Skim the Fat
Once fully chilled, scrape off and discard any hardened fat from the top.
If needed, chill again and skim a second time for a very clean jelly.
9. Portion and Freeze
Gently melt the jelly over low heat until just pourable.
Portion into jars, silicone molds, or freezer containers. I like 2 ounce to 8 ounce portions for easy use.
If freezing in glass jars, leave adequate headspace to account for expansion as it freezes. About 1 inch for small jars is usually sufficient.
Freeze jars without the lids on to prevent cracking from expansion. Once fully frozen, add the lids and label.
Freeze until solid.
How to Use It
Think of this as gelatin rich bouillon.
Add a spoon or two to:
Soups
Pan sauces
Rice or grains
Braises
Beans
Stews
Homemade broth that needs more body
It melts into silk.
It gives structure to sauces without flour.
It brings back the kind of mouthfeel traditional kitchens relied on before packets and powders.
Think of it like unseasoned bouillon for body.
Whisk 4 ounces of this gelatin into about 3 cups of hot water and you instantly create the structure of a long-simmered stock. Then season as you like. I usually stir in a spoon or two of bouillon paste to taste and use it just like stock.
A Note on Tradition
Foot jellies and aspics have existed across cultures for centuries.
From peasant kitchens stretching every part of an animal, to classical European aspics and consommés built on collagen rich stocks, this was once ordinary cooking.
This is not a new wellness hack.
It is a return to using the whole animal.
Long before powdered collagen and boxed broths, kitchens relied on slow extraction from collagen rich parts to build body, texture, and structure in food.
The difference now is that we have modern freezers.
We can do the slow work once, portion it, and keep it on hand. We get the same convenience as modern powders, but made from scratch, from real food.
And once you start keeping it in your freezer, you will reach for it constantly.